
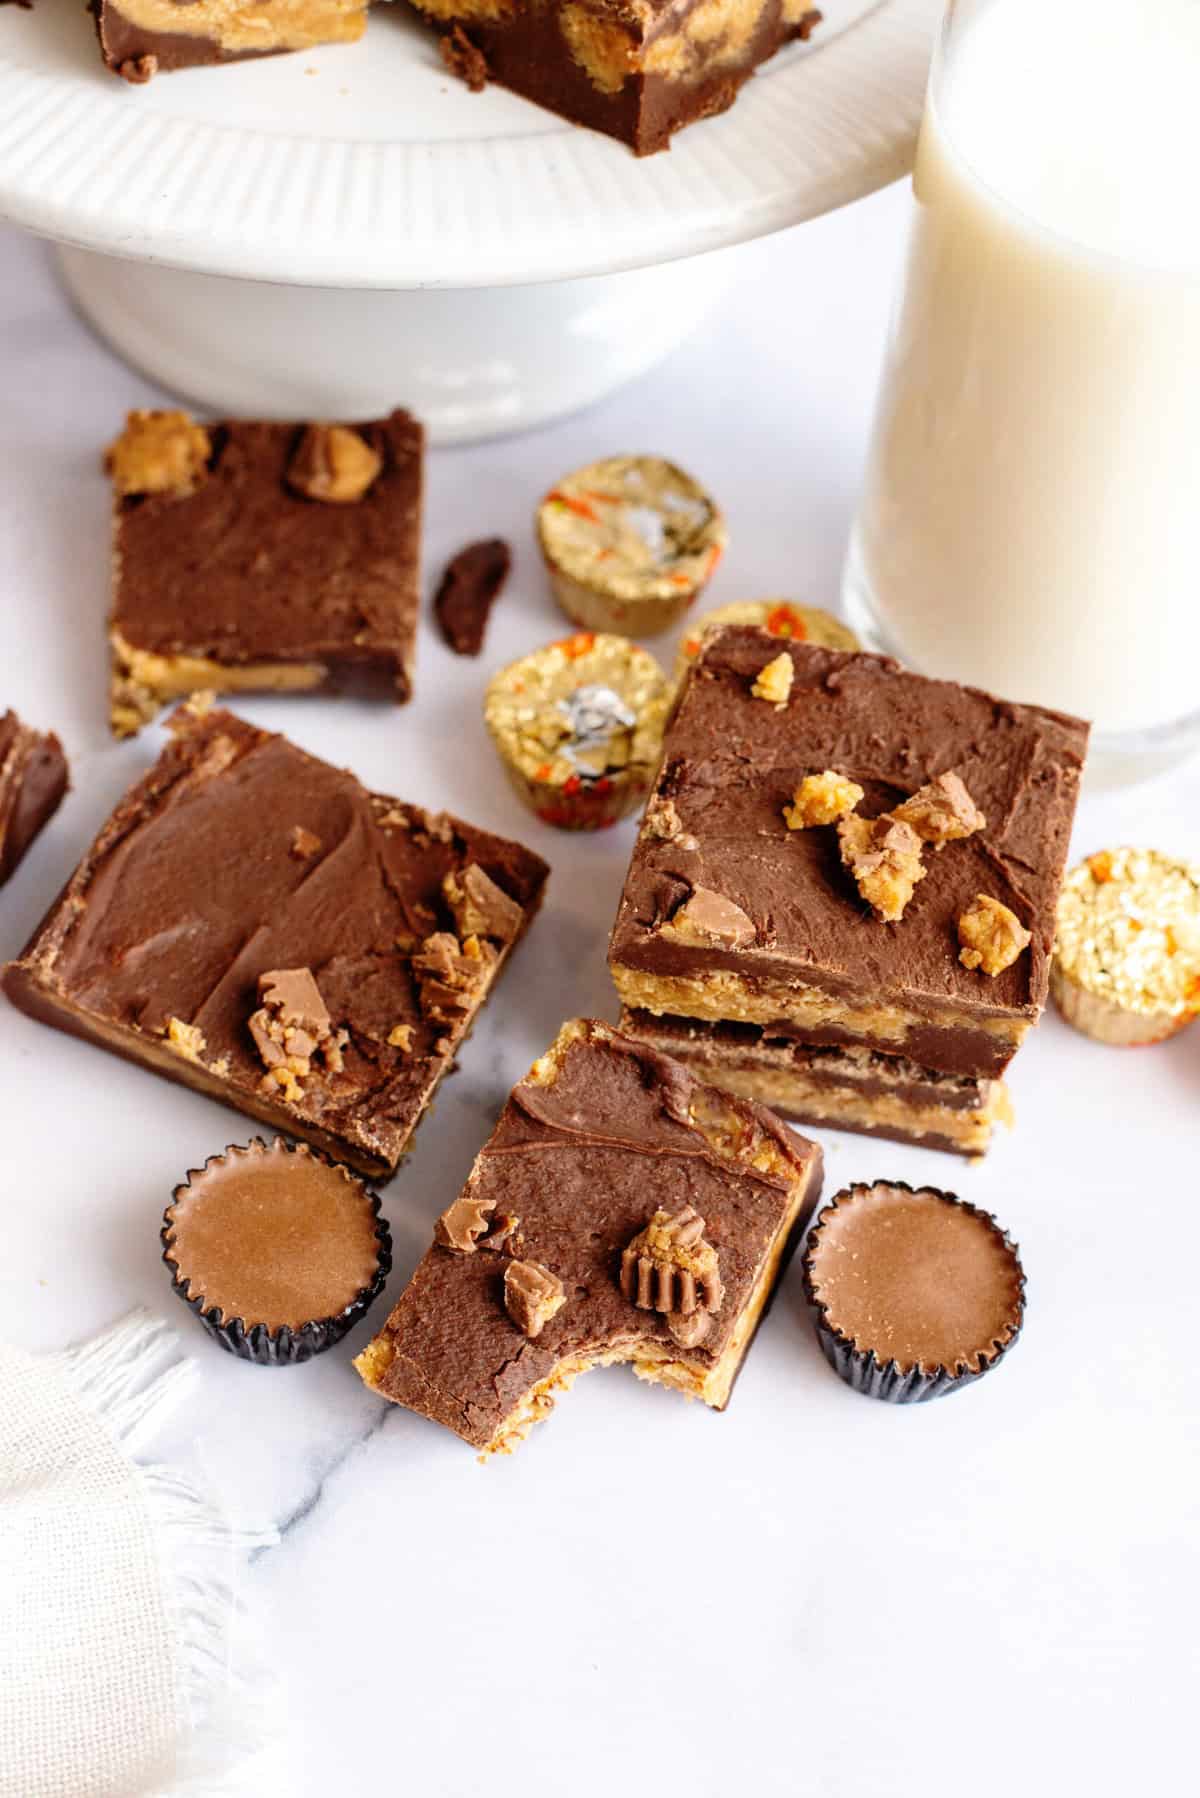
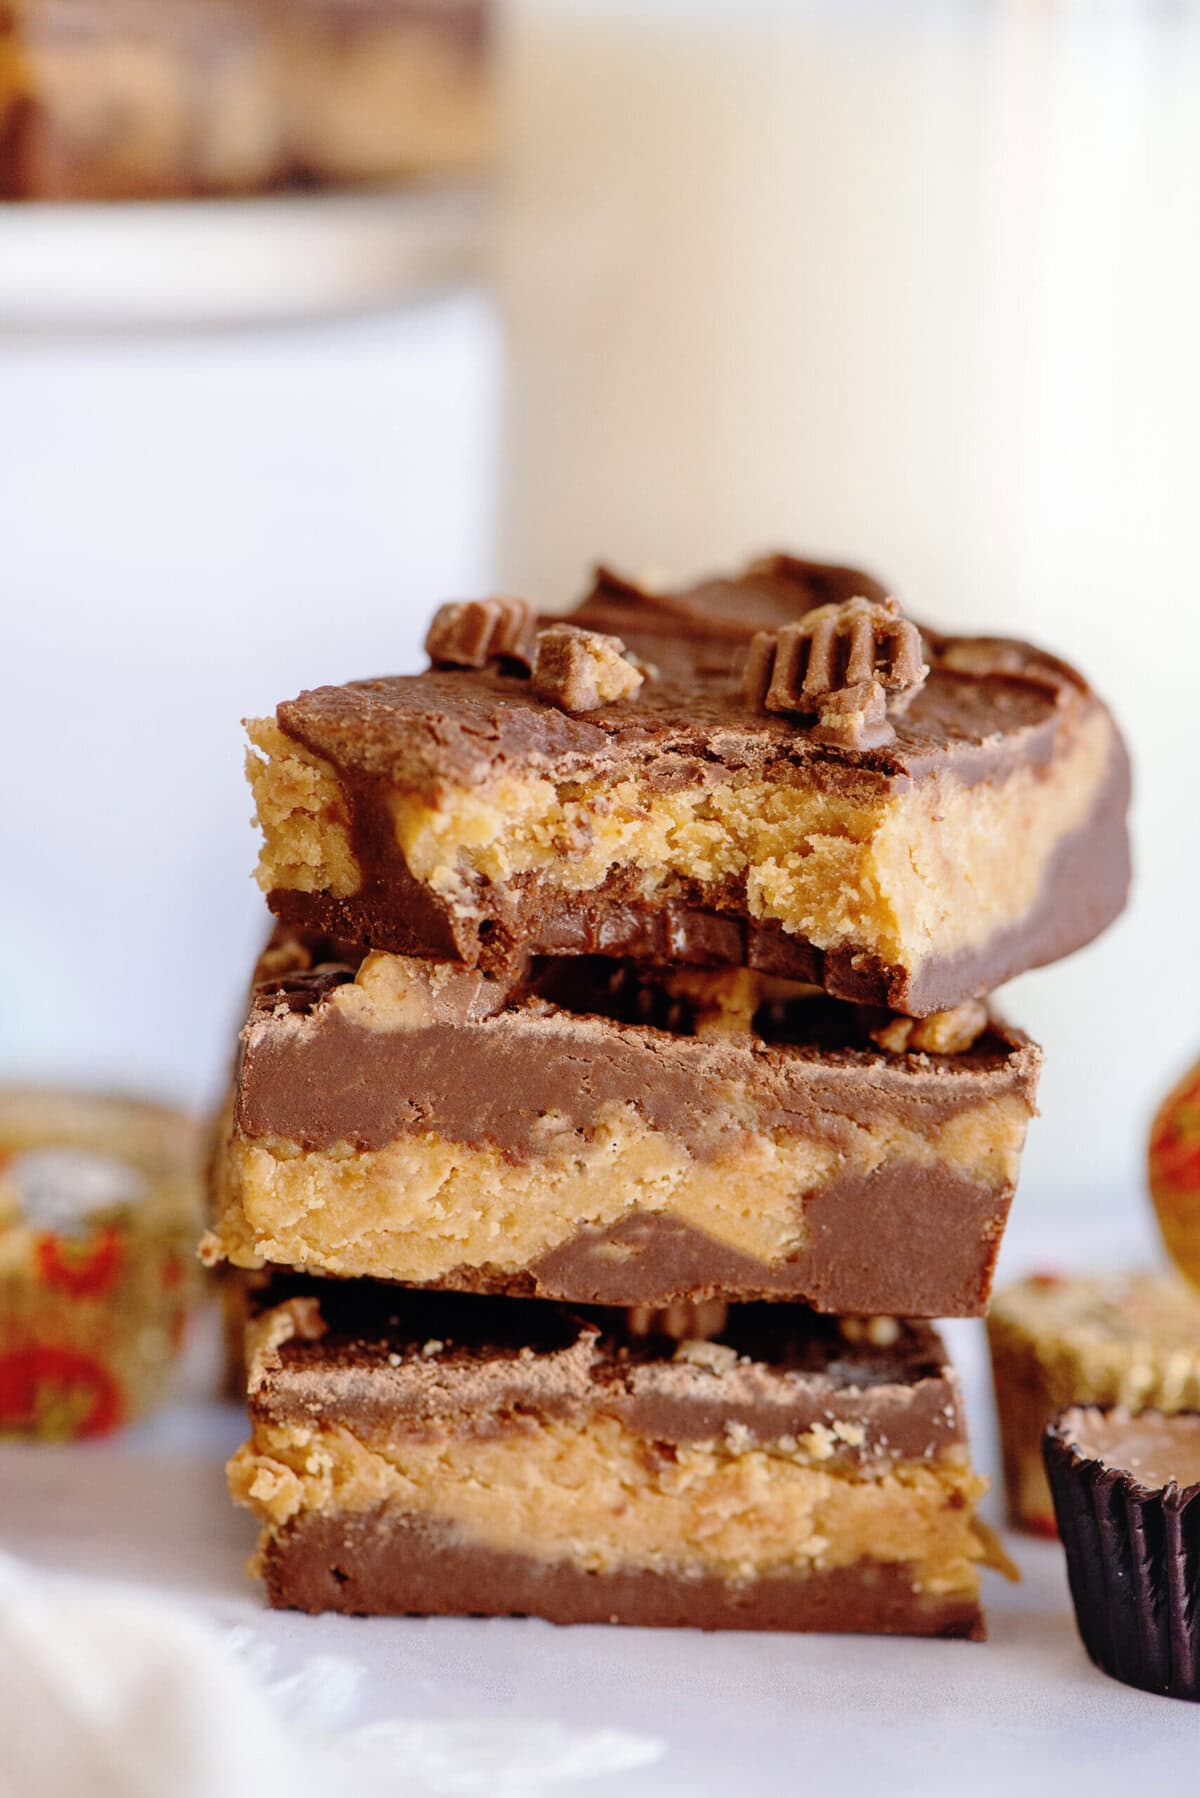
Velvety-Smooth Chocolate Peanut Butter Fudge
This Chocolate Peanut Butter Fudge layers silky semi-sweet chocolate with a creamy peanut butter topping for the ultimate no-bake treat.
Why This Fudge Is a Keeper
Every holiday season, I try at least one new candy recipe, but I always circle back to a classic chocolate-and-peanut-butter combination. Chocolate peanut butter fudge, in particular, is incredibly rich, creamy, perfectly layered, and almost suspiciously easy for how impressive it looks on a dessert plate!
This version uses two simple microwaveable layers: a chocolate fudge base and a peanut butter layer that’s soft, smooth, and just salty enough to balance the sweetness. A couple of microwave-safe bowls, some parchment paper, and a silicone spatula are all you need to whip up a batch of this homemade fudge with a dreamy, melt-in-your-mouth texture.
If you’re making fudge for the very first time, this is a great recipe to start with. And if you’re looking for similar recipes, try your hand at this creamy peanut butter fudge!
Ingredients You’ll Need
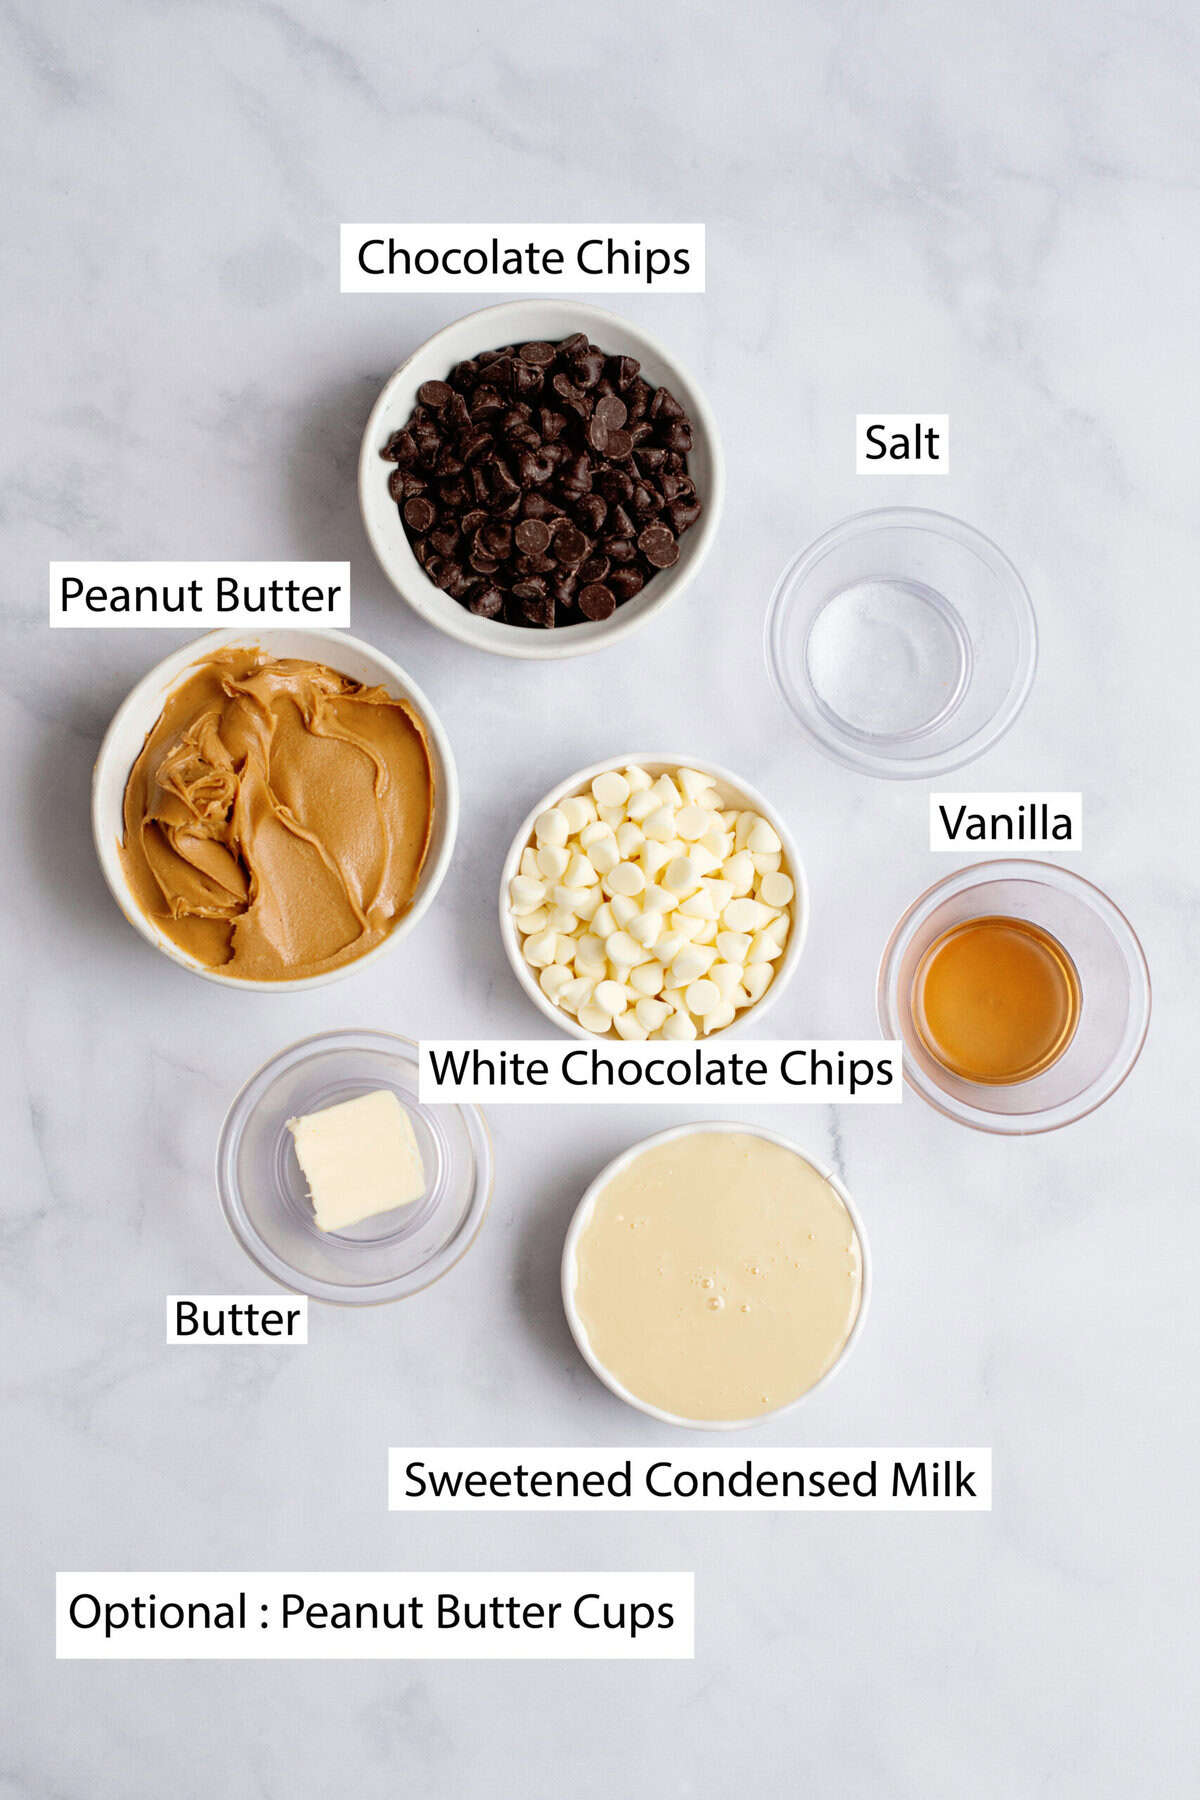
- Semi-sweet chocolate chips
- Sweetened condensed milk
- Butter
- Vanilla extract
- Creamy peanut butter
- White chocolate chips
- Salt
- Chopped peanut butter cups (optional; I used 4 minis)
Helpful Tips for Best Results
- Use creamy peanut butter, not natural. Natural peanut butter separates and won’t give you the creamy texture you want in homemade peanut butter fudge.
- Don’t overheat the chocolate. It should melt smoothly; if it seizes, it becomes grainy.
- Let each layer stay warm while you work. If either mixture cools too fast, give it a few seconds in the microwave to loosen up again.
How to Make Chocolate Peanut Butter Fudge
1. Prepare Your Pan
Line an 8×8-inch baking pan with parchment paper, letting the edges hang over the sides. This makes it so much easier to lift out the finished fudge. You can also use aluminium foil in a pinch, but parchment gives the neatest edges.

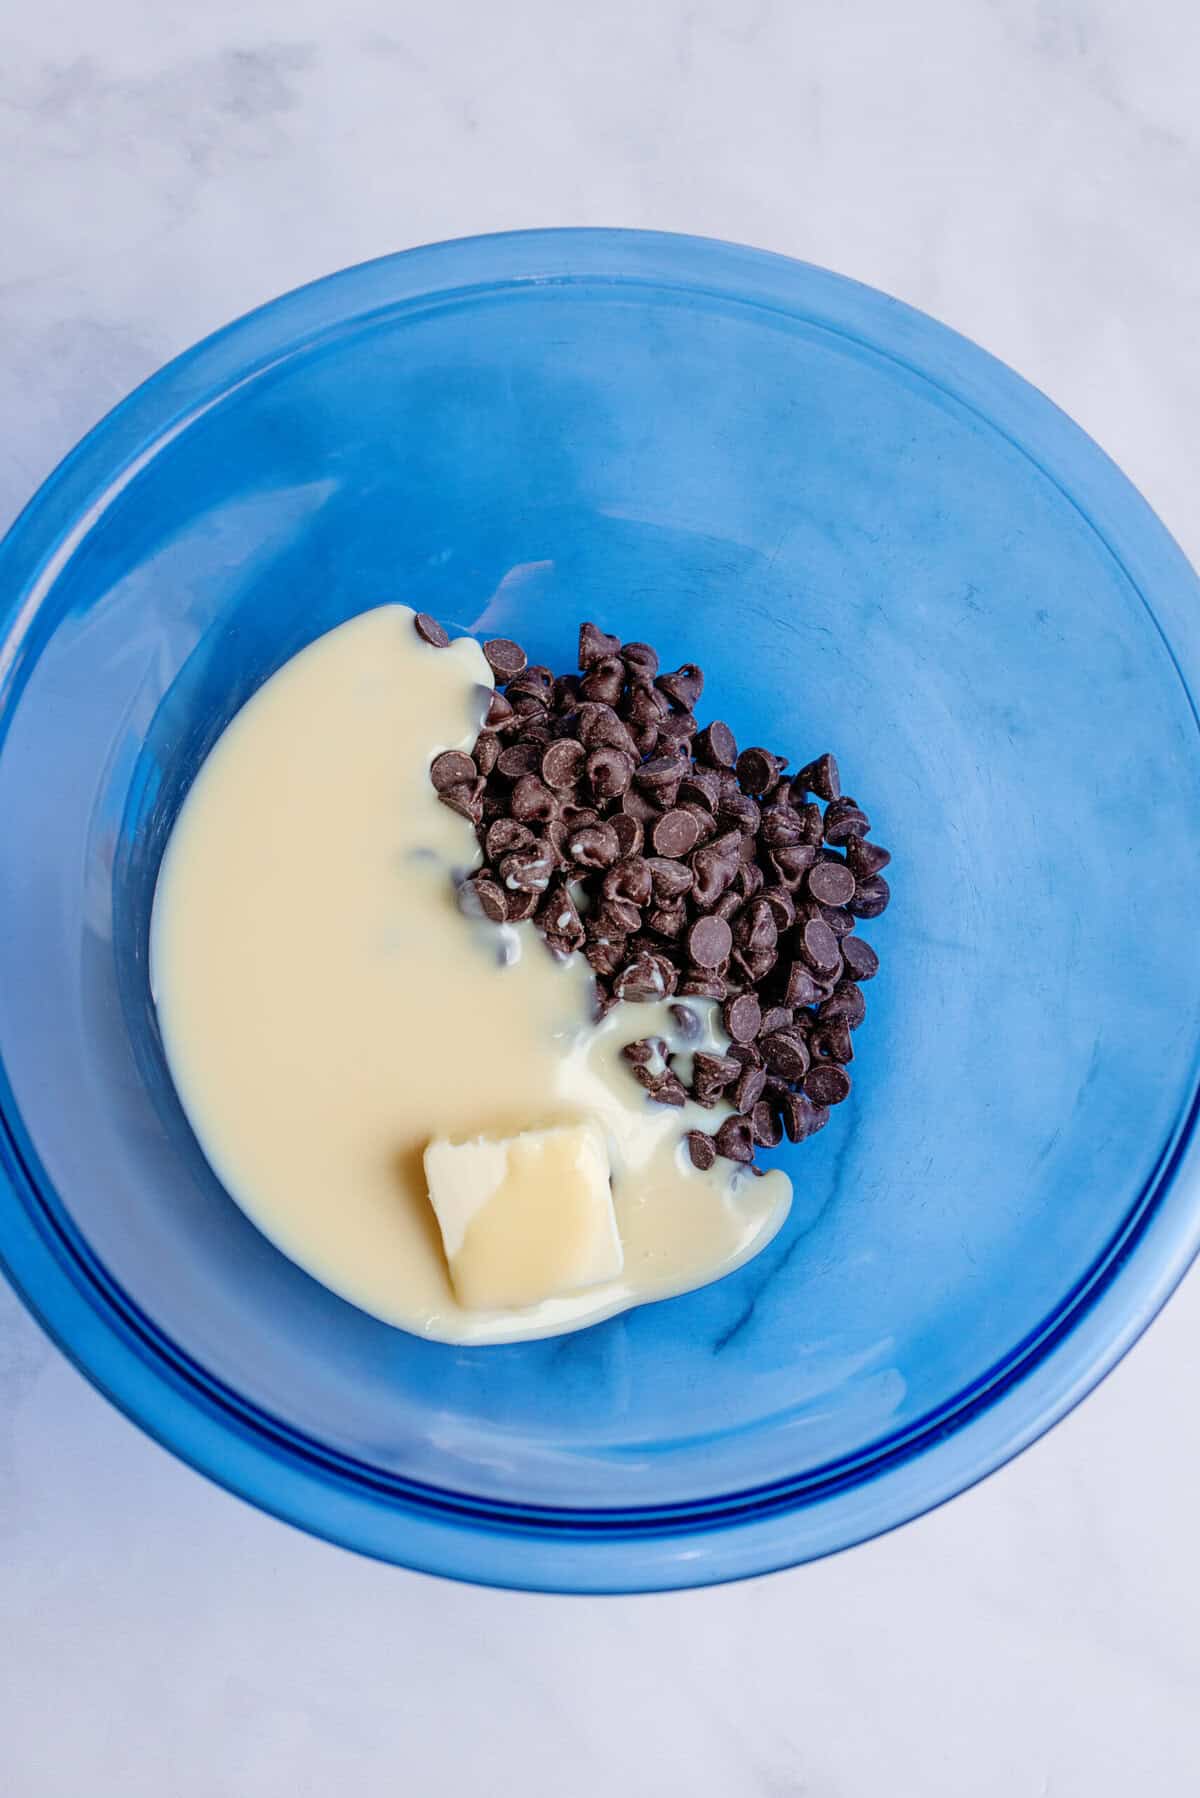
2. Melt the Chocolate Layer
In a microwave-safe bowl, combine the semi-sweet chocolate chips, sweetened condensed milk, and butter. Heat in 20-second bursts, stirring after each round, until smooth and glossy. Stir in the vanilla and set aside.
Tip: If you’re used to traditional fudge, it might feel strange not cooking this over medium heat, but the microwave works beautifully for recipes using chocolate and sweetened condensed milk.
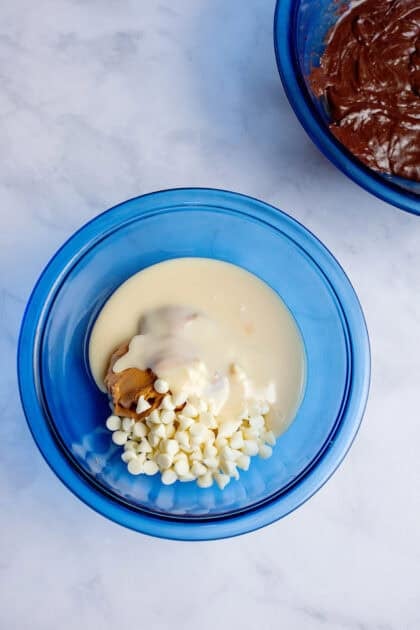
3. Make the Peanut Butter Layer
In a second microwave-safe bowl, mix the creamy peanut butter, white chocolate chips, and sweetened condensed milk. Microwave in short intervals until everything melts together into a thick, creamy texture. Finish with a splash of vanilla extract and a pinch of salt for balance.
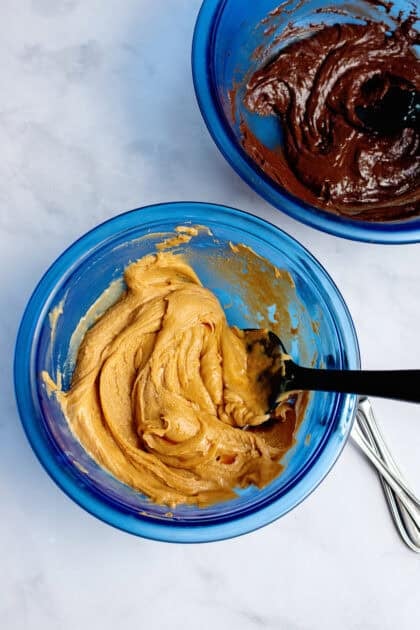
The mixture should be smooth and spreadable; if it stiffens as it cools, a quick 10–15-second warm-up helps.
4. Layer the Fudge
Spread about half of the chocolate mixture into your prepared pan. It doesn’t have to be perfect; it’ll settle as it chills.

Next, spoon the peanut butter mixture over the top. Dolloping it around the pan helps you spread it without disturbing the chocolate layer too much. Use your spatula to gently smooth it out.
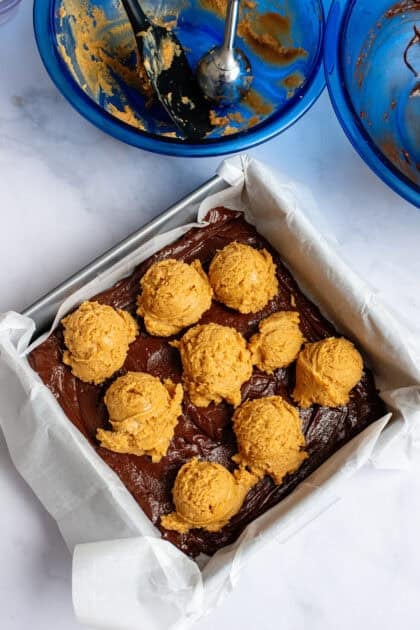
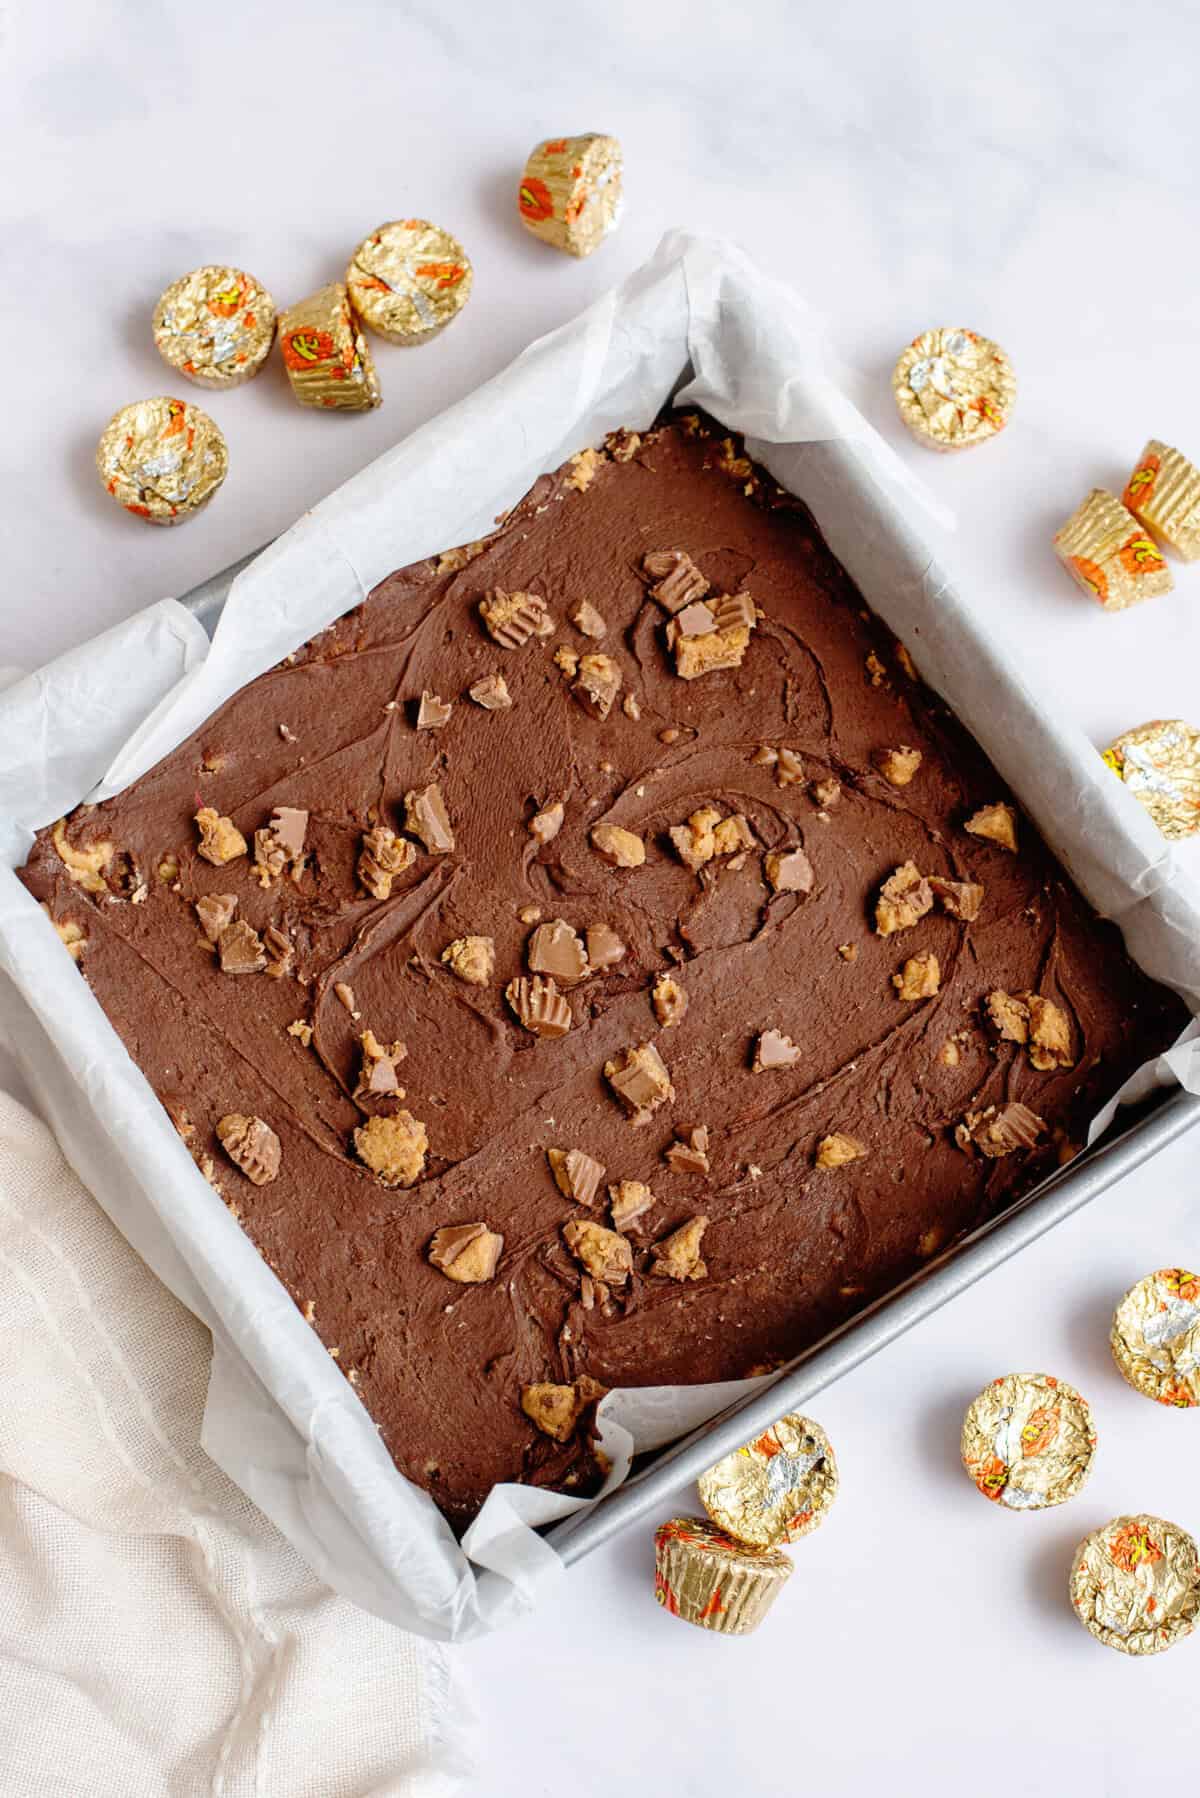
Top everything with the remaining chocolate mixture and spread it across the surface. If you’re adding chopped peanut butter cups, scatter them across the top.
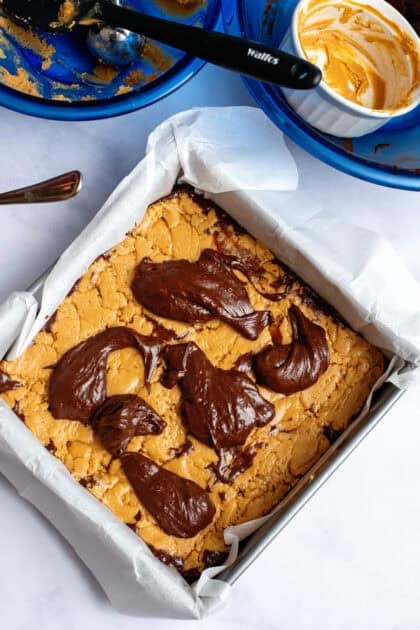
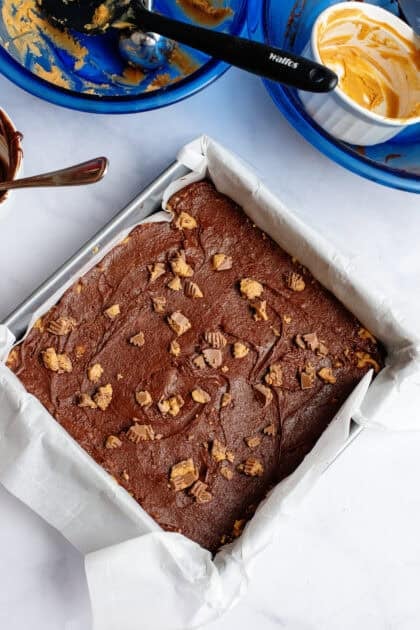
Give the pan a small tap on the counter to help the layers settle into those neat, candy-shop stripes.
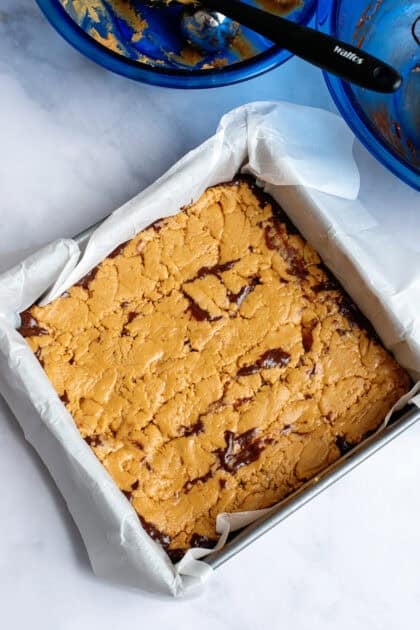
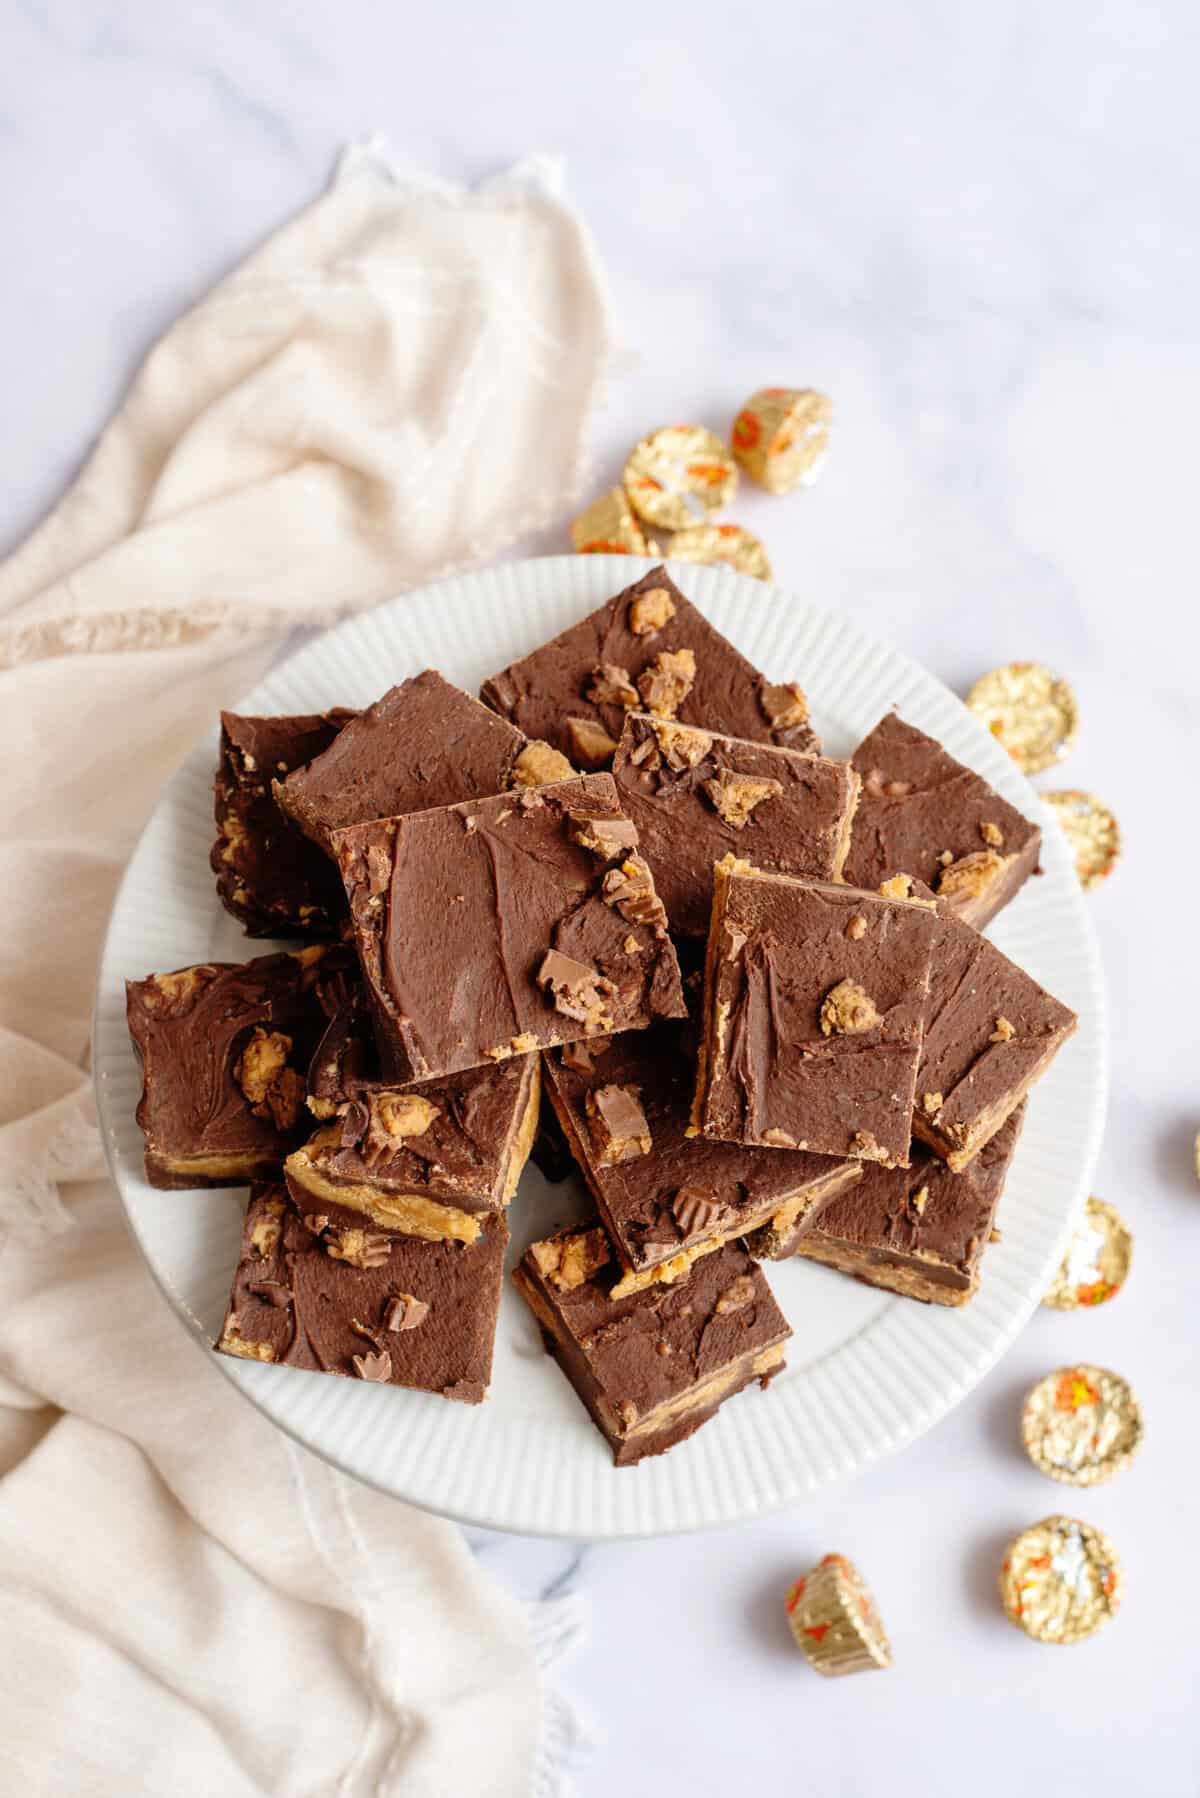
5. Chill and Slice
Refrigerate for at least 2 hours, or until firm. Fudge cuts best when it’s totally chilled, so resist the urge to slice early!
Using the parchment overhang, lift the slab out and transfer it to a cutting board. A sharp knife works best! Clean it with a warm paper towel between cuts for smooth edges.
Storage Tips
One of the biggest perks of this chocolate peanut butter fudge is that it keeps so well, making it a perfect make-ahead holiday treat.
- Refrigerator: Store in an airtight container for up to 2 weeks.
- Freezer: Freeze tightly wrapped fudge for up to 2 months. Let it thaw in the fridge overnight before serving.
- Room Temperature: If it’s cool in your kitchen, it will hold for a couple of days, but the fridge keeps the layers firm and clean.
Frequently Asked Questions
It’s best to stick with regular creamy peanut butter. Natural peanut butter separates easily and won’t give you the smooth, cohesive peanut butter layer this recipe needs.
It likely just needs more chill time. Make sure the pan chills for a full 2 hours, and check that you used sweetened condensed milk (not evaporated milk).
Definitely! Chopped peanut butter cups, mini marshmallows, or even crushed pretzels all work well. Sprinkle them on before chilling. Other mix-in fudge recipes you might like include Oreo fudge and a festive Peppermint fudge.
Ingredients
Chocolate Layer
- 1 ½ cups semi-sweet chocolate chips
- ⅔ cup sweetened condensed milk
- 1 tablespoon butter
- ½ teaspoon vanilla extract
Peanut Butter Layer
- 1 cup creamy peanut butter
- ½ cup white chocolate chips
- ½ cup sweetened condensed milk
- ½ teaspoon vanilla extract
- Pinch of salt
- Chopped peanut butter cups optional; I used 4 minis
Instructions
- Line an 8×8-inch baking pan with parchment paper, leaving some overhang for easy removal.
- In a microwave-safe bowl, combine the chocolate chips, sweetened condensed milk, and butter. Microwave in 20-second intervals, stirring between each round, until smooth. Stir in the vanilla extract and set aside.
- In a separate microwave-safe bowl, combine the peanut butter, white chocolate chips, and sweetened condensed milk. Microwave in the same way, stirring until smooth. Mix in the vanilla extract and a pinch of salt.
- Spread about half of the chocolate mixture into the prepared pan. Spoon the peanut butter mixture over the chocolate in dollops, then gently spread it across the top. Add the remaining chocolate mixture and spread it evenly over the surface. Top with chopped peanut butter cups, if using.
- Gently tap the pan on the counter to smooth the top. Refrigerate for at least 2 hours, or until firm.
- Lift the fudge out using the parchment paper and cut into squares. Store in an airtight container in the refrigerator for up to 2 weeks.