Christmas Mice with Candy Cane Tails
As an Amazon Associate I earn from qualifying purchases.
Felt and glue are two of the best things to have on hand during Christmas time with your kids. I can’t even begin to count how many different ornaments and crafts we made up as kids to hang on our tree or give to friends using mostly those two simple supplies. It’s so important to let kids make gifts for friends because it really teaches them that the best gifts, the ones they should get excited about, come from the heart
These little mice are a great place to start with your kids. I know its difficult to find red and green felt this time of year so don’t worry about those colors, just think outside of the box. Why not make them in your favorite colors or school colors even? Think of your sports fan and how much they would enjoy a gift from your child in their favorite team colors!
Either way you go, you’ll have fun and your kid will be proud at the results. I’m including a template you can print off to trace onto your felt to make this a breeze. There ya go, excuses are gone and its time to get crafting with your younguns!
This is a fun little craft for kids and adults alike.
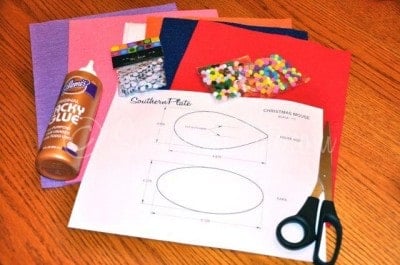
You’ll need: felt, little pom poms, googly eyes, scissors, glue, and the little template I’m using.
I am using Tacky glue but a glue gun and even good old school glue would work.
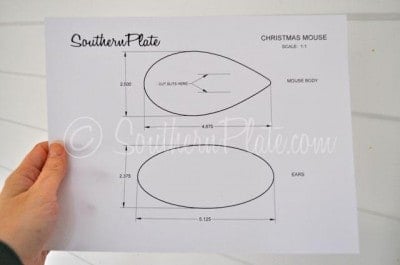
You really should print off the template if only to see what happens when you draw two shapes on a piece of paper, hand them to a mechanical engineer, and say “Can you make me a template of this in a pdf file so I can upload it to the website?”
~blinks~
Methinks he gets a bit technical!
(You can also click on that photo up there to print it and it will pop right up on your screen)
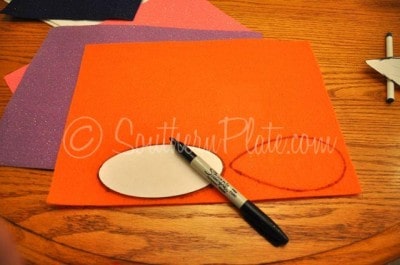
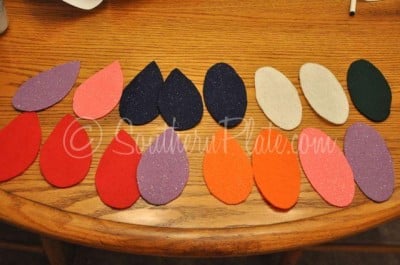
Cut out the mouse body and ear templates and trace them onto your felt. I like to use two different colors for ears and body but there isn’t a rule that says you have to!
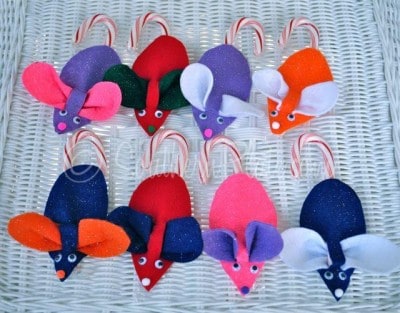
Here is my little army of mice just waiting to be made.
All of my photos are a little off tint here because I did this tutorial indoors at night and because I haven’t a clue how to work photoshop or any other fancy schmancy program. And I’m cool with that…
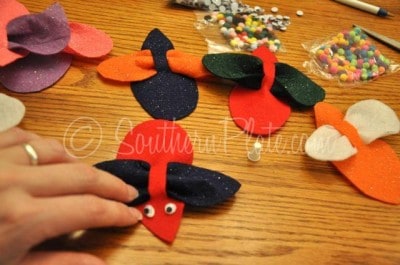
Then cut two little slits for the ears to go through.
I have these marked on the template to give you an idea of where to put them and about how big they need to be.
Then you just slip the ears through the holes of the mouse.
Doing this creates a little pocket on the back that the candy cane slides through.
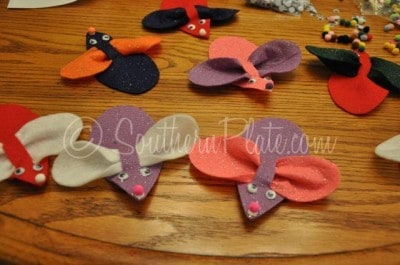
Then glue on little googly eyes and a pom pom nose to each one.
Katy Rose has been having fun gluing three eyes and two noses to some of hers. Let your kids have fun and create three eyed mice if they want!
It’s quicker if you just set up an assembly line, dotting little bits of glue for eyes and noses as you go along and then placing them.
Here are the little mice babies as they dry
Then turn all the little guys over and insert a little candy cane in the pocket the ears made.
They make cute little set! Don’t forget to make some in your school colors!
You can hang them on the tree or use them as little favors.
These are great little gifts for your kids to make for their teachers and friends.
Print the template for making the mice by clicking here.
~~~~~~~~~~~~~~~~~~~~~~~~~~~~~~~~~~~~~~~~~~~~~~~~~~
It isn’t the size of the gift that matters,
but the size of the heart that gives it.
~Quoted in The Angels’ Little Instruction Book by Eileen Elias Freeman









I’m making several batches of Snowman Soup, to hand out to the little ones at church. I’m also going to bake bread, sweet rolls, and cookies this year. Hope to make some Holly Jollies too!
Thanks for the great giveaway:-)
thank you, Ricky!
I made angels out of handkerchiefs and something round like a styrofoam ball. I remember drawing closed eyes with eyelashes on them and putting real blush on their cheeks. Wish I could remember the rest of how it worked.
I love your website! I’m a decorative painter and I found some nice multi-purpose jars at Dollar General measuring 4-1/2″ wide x about 8″ tall and some about 4″ tall. They have nice metal screw-on lids on which I am doing some decorative painting. I’m making “Cracker Candy” to place inside.
CRACKER CANDY: Preheat oven 400 degrees. Cover a 10″ x 15″ jelly pan or cookie sheet with heavy duty foil and spray with Pam. Place a layer of saltine crackers as close together as possible covering cookie sheet. Bring to a boil 1 cup butter and 1 cup sugar. Boil 1-1/2 to 2 minutes, stirring constantly. Immediately pour over crackers. Bake 7 minutes in oven. Remove from oven and immediately scatter 11 oz. peanut butter chips and 11 oz. chocolate chips on crackers. As chips begin to melt, spread until smooth. Top with 1 cup chopped pecans and press lightly into melted chips. Chill. Break into pieces.
I have made many of my gifts over the years. I love to crochet blankets for people and they always get used, which is the point of a gift for me. I also love to make jewelry, my husband and I made necklaces for all the people who participated in our wedding.
My son made me a bowl in pottery in grade school and this hand made pot is one of my favorite things.
Homemade gifts from the kitchen are rare for me to give…I specialize more in making quilts and giving them away. I always love receiving homemade bread and jam from my friend.
I used to make a different homemade “treat” each year for our friends and family. One year it was homemade liquers (amaretto, kahlua) and everyone LOVED them!!! Somehow, I got too busy and now just manage to make a few cookies and/or candies if I am lucky!!
I make homemade goodies (breads, candies, etc.) for all my kids’ teachers.