
Homemade Peanut Butter Cups
This homemade peanut butter cups recipe is super easy and delivers sweet peanut butter dough cups with a hard chocolate topping.

A Quick Look At The Recipe
- Recipe Name: Homemade Peanut Butter Cups
- Serves: 24 cups
- Main Ingredients: butter or margarine, packed light or dark brown sugar, vanilla extract, peanut butter, confectioner's sugar, semi-sweet chocolate chips
- Why You'll Love It: These homemade peanut butter cups taste exactly like the store-bought version. This super easy recipe delivers sweet peanut butter dough cups with a hard chocolate topping.
I happened upon this homemade peanut butter cup recipe by accident (or desperation) this summer when my son was going to a pool party and needed to bring a snack to share. My first thought was brownies, then cake, then cookies, and then I went on down the list until I came up with something that would be really good but not make a lot of mess in the kitchen. So I took a standard peanut butter bar recipe and flipped it into peanut butter cups.
I was not prepared for the reaction. Every speck was snatched up and I received text messages and even emails telling me how wonderful the homemade peanut butter cups were. I’ll be darned if it didn’t put a spring in my step! So I decided to bring them to you today in case you might need a little spring in your step, too. Because no matter what, I think you’re pretty wonderful!
So, what do you need to make my easy homemade peanut butter cups? Confectioner’s sugar, creamy peanut butter, brown sugar, vanilla, butter, and chocolate chips. First, we create our peanut butter cup by melting the butter, peanut butter, and brown sugar together. Then we mix in the powdered sugar and vanilla to make a dough. We place this into muffin papers to create our “cups” and then, of course, we need to add melted chocolate on top.
Once they’re set, it’s time to dig into your homemade Reese’s peanut butter cups. I tell ya, you’ll never buy them from the store again!
If you are a chocolate peanut butter lover like me make sure you try these other delicious recipes Peanut Butter Candy, Chocolate Peanut Butter Balls (No Baking Necessary), No Bake Peanut Butter Bars, Frosted Chocolate Peanut Butter Treats, and Peanut Butter Cheesecake Cookie Bars.

Recipe Ingredients
- Confectioner’s sugar
- Creamy peanut butter
- Brown sugar (dark or light)
- Vanilla extract
- Butter (or margarine)
- Semi-sweet chocolate chips
Helpful Kitchen Tools
How to Make Homemade Peanut Butter Cups

Place butter, peanut butter, and brown sugar in a large microwave-safe bowl,
Microwave this for 1 to 2 minutes until everything melts.
You can do this on the stovetop if you prefer.

Stir it until smooth and creamy, preferably with a little piggy spoon.

Add in your vanilla and stir that well.

Add in powdered sugar and stir that up really well, too.
At first, it will seem like it is going to be too dry but keep stirring and it will come together into a dough.
If you find after stirring it that they are still a little dry, you can melt 1/4 cup more peanut butter and add to it. But this is the exact recipe I use and I’ve never had to add more.
All ya need is a little faith, trust, and pixie dust!

Here is our dough.

Now take off pinches and roll them into balls.
Mine are about 1/1.5-inch balls. You can use a cookie dough scoop for even cups.
You can also make smaller ones and make mini peanut butter cups if you like.

Press the ball into the cupcake liner with your fingers like this.

Repeat until all of the peanut butter mixture is used up.
This will make about 24 full-sized peanut butter cups and a gazillion mini-sized ones. I’m estimating the quantity of the minis 😉.

Make the Chocolate Topping
Now, I don’t put chocolate on the bottom, only on the top. It is easier and you get more of that yummy peanut butter taste that way. A lot of folks will try to put chocolate on the bottom and spread it up the sides to make these look store-bought, but we don’t do that in this recipe.
Anyway… pour about 2 cups of chocolate chips into a microwave-safe bowl and nuke that for about a minute.
Stir. Nuke one minute more (or until it all melts), and stir again.
Note: Make sure no water gets into your chocolate. Not even one little drop because it will cause it to clot something terrible.

Stir it up really well and you’re ready to top your peanut butter cups.

Top the peanut butter filling with a good spoonful of chocolate.

Once you have a few topped, go ahead and spread it around.
I start by banging my muffin tin on the table a few times.

Then I use the back of my spoon to spread it the rest of the way.
If you make a circular motion with your spoon it makes the tops pretty.
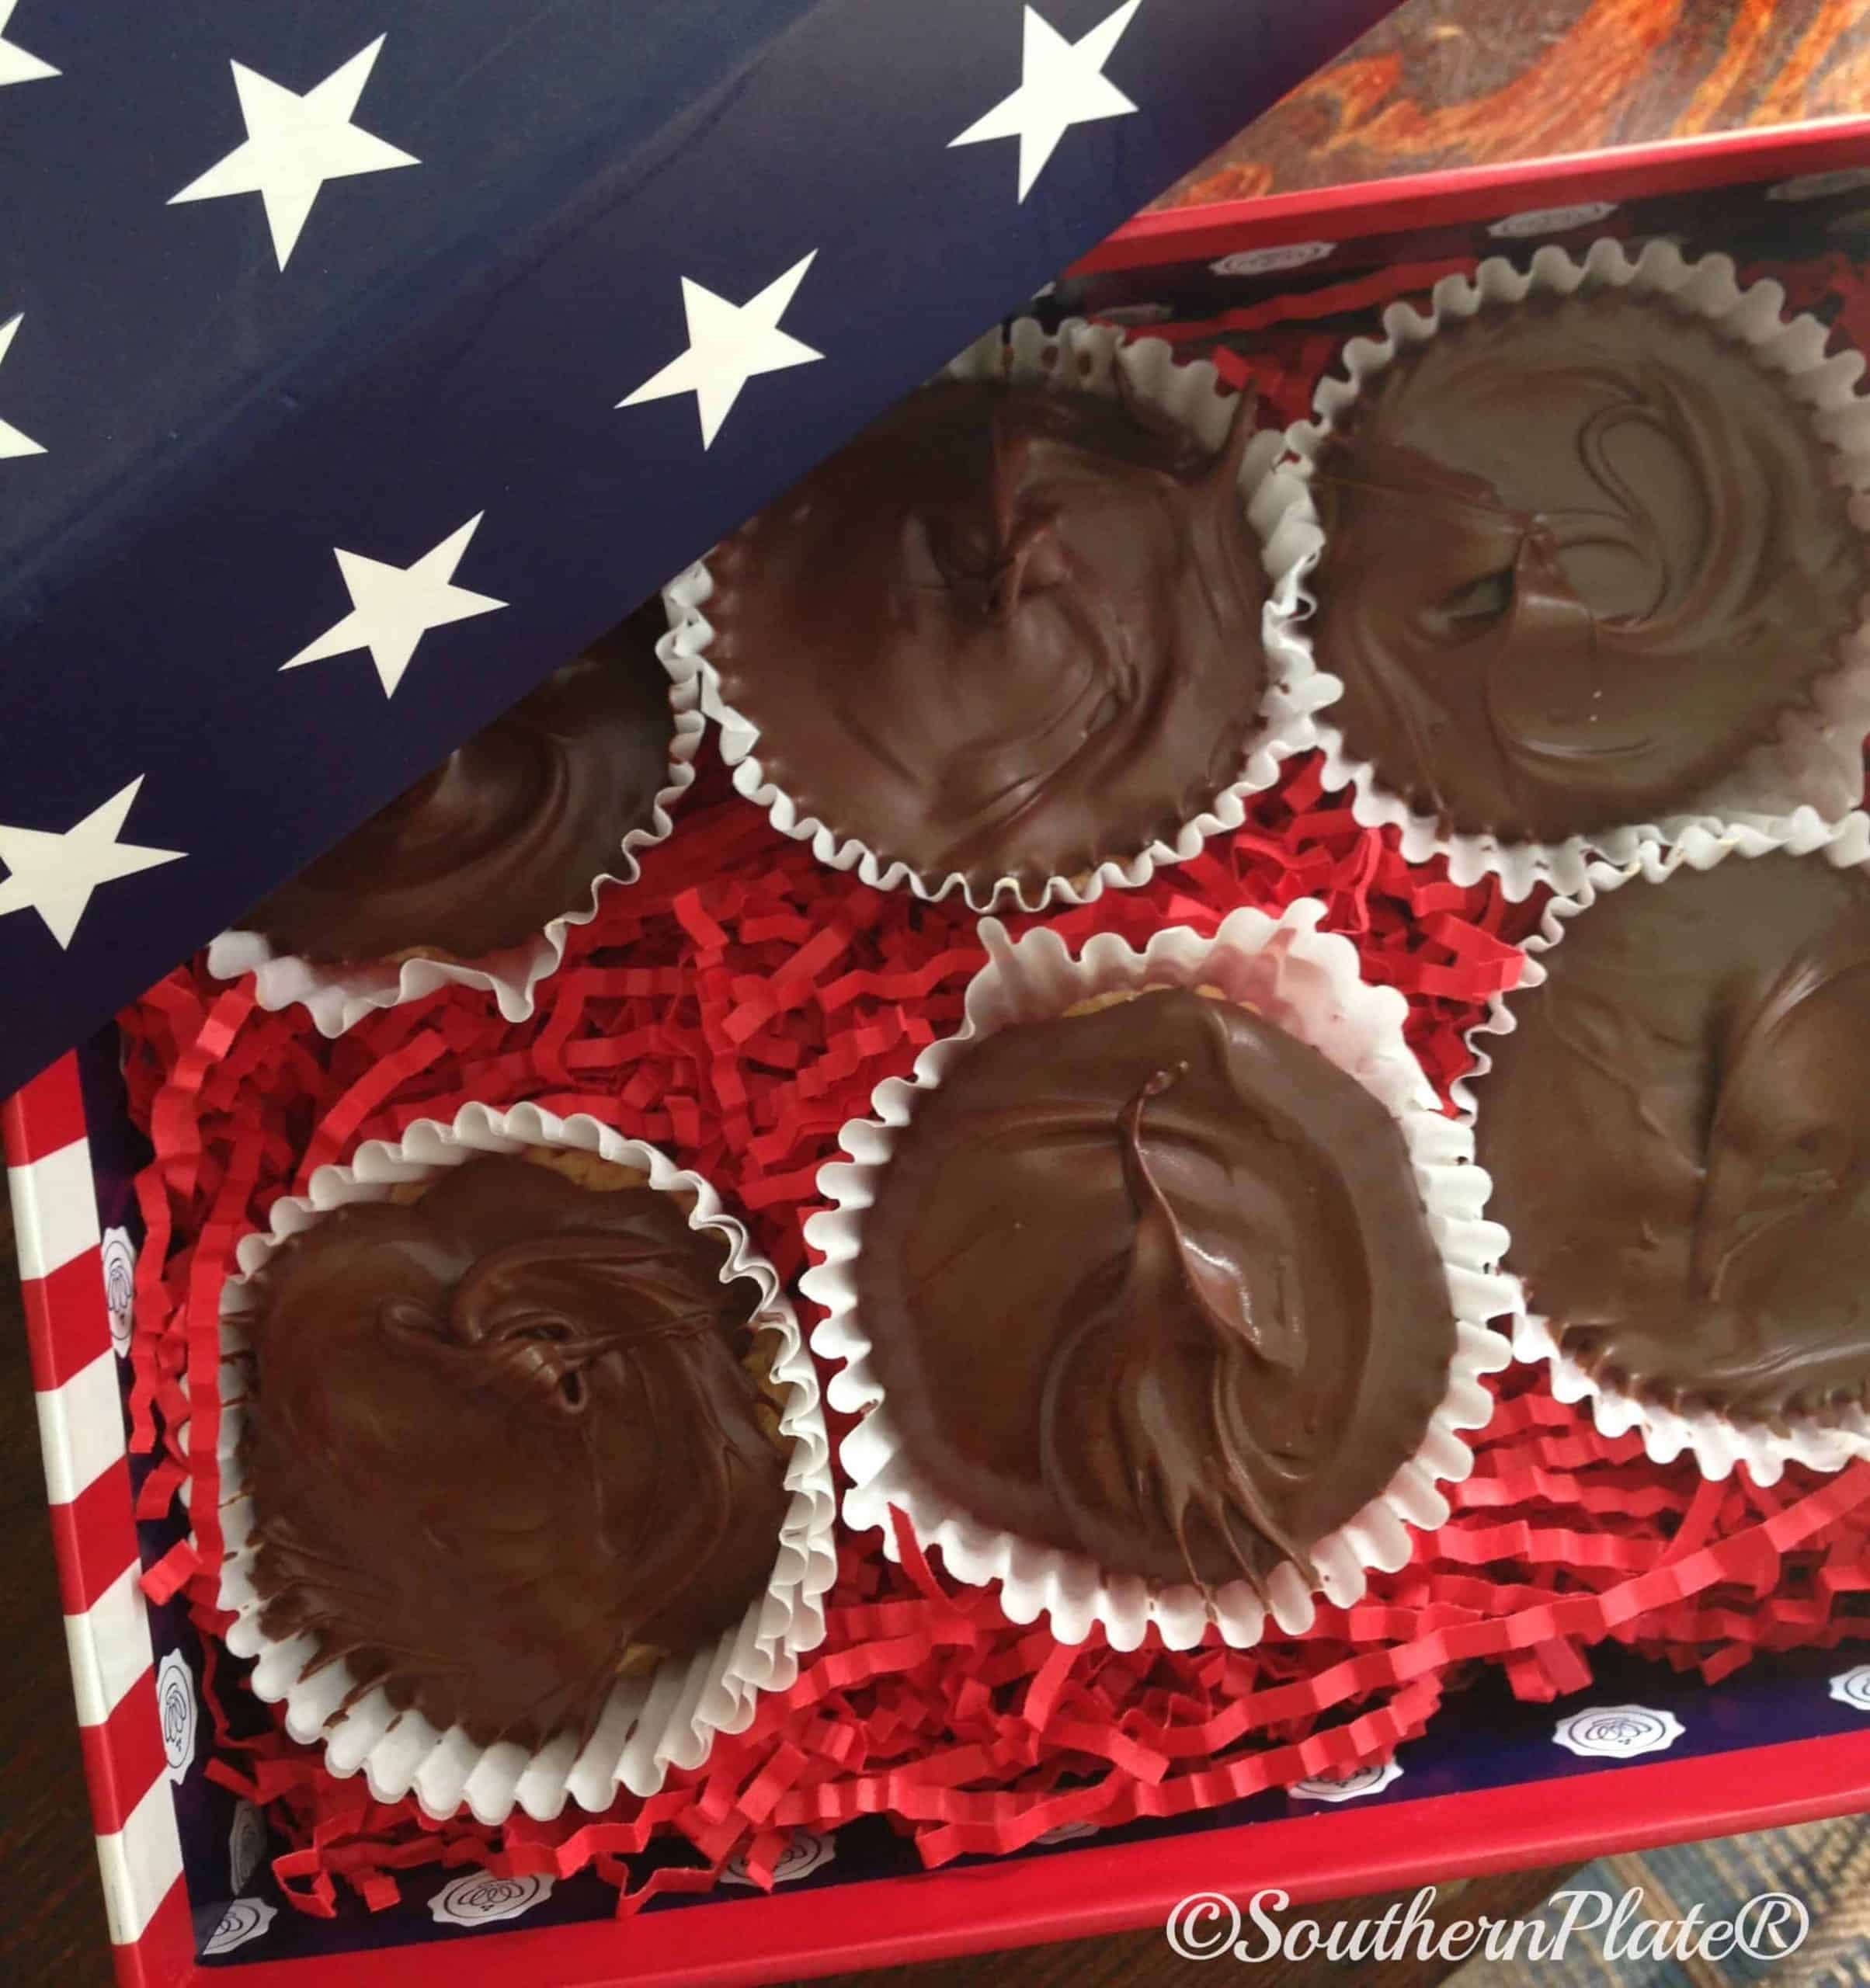
Place these in the refrigerator when complete, until the chocolate hardens.
This should only take about an hour.

Then you can pop each peanut butter cup out of its cupcake liner for that Reese’s look or serve them as is.
Enjoy your peanut butter cups!
This photo is from my friend Conni at A Good Life Farm.
Storage
- Store them in an airtight container at room temperature or in the fridge and try and eat them within a week. Ya know this has never been a problem in my household!
- You can also store chocolate peanut butter cups in the freezer for up to 3 months. Thaw them in the fridge overnight or at room temperature before serving.
Recipe Notes
- Because we want a smooth texture, I recommend using creamy or smooth peanut butter, not crunchy peanut butter. I also don’t recommend natural peanut butter for this recipe. However, you can substitute for different nut butter, like creamy almond butter or cashew butter, for a different taste.
- If you want to make authentic peanut butter cups completely covered in chocolate, check out this recipe for helpful directions.
- I’m using semi-sweet chocolate chips, but you can use whatever you prefer. This might be dark chocolate chips, milk chocolate chips, or even chocolate chunks. You can even use chocolate almond bark.
- If your peanut butter isn’t salted, I recommend adding a pinch of sea salt or kosher salt to the peanut butter mixture. Alternatively, sprinkle some on top of the melted chocolate.
Check out these other peanut butter treats:
Chocolate Peanut Butter Balls (No Baking Necessary)
Frosted Chocolate Peanut Butter Treats
Peanut Butter Cheesecake Cookie Bars
Ingredients
- 1/2 cup butter or margarine
- 1/2 cup packed light or dark brown sugar
- 1 teaspoon vanilla extract
- 2 cups peanut butter
- 2.5 cups confectioner's sugar
- 2 cups semi-sweet chocolate chips
Instructions
- Line two muffin pans with muffin papers (24 total).
- Place peanut butter, butter, and brown sugar in a large microwave-safe bowl. Microwave until butter and peanut butter are melted (one to two minutes). Time will vary by microwave.1/2 cup butter or margarine, 1/2 cup packed light or dark brown sugar, 2 cups peanut butter
- Remove the bowl from the microwave and use a large spoon to stir all of the ingredients together (except chocolate chips) until they form a ball of dough that leaves the side of the bowl.1 teaspoon vanilla extract, 2.5 cups confectioner's sugar
- Pinch off pieces of dough and roll them into 1.5-inch-sized balls. Place one ball into each muffin paper then pat them into a 9x13 baking dish or muffin tin. Press the peanut butter filling flat into the papers with your fingers.
- Pour chocolate chips into another microwave-safe bowl and microwave at 30-second intervals, stirring after each, until completely melted. Spoon over the top of the peanut butter layer and spread evenly.2 cups semi-sweet chocolate chips
- Allow them to cool completely at room temperature until the chocolate hardens again or place them in the refrigerator for faster hardening.
Nutrition
“Never let a bad day make you feel like you have a bad life.”
~Unknown
I have also made these with white chocolate. They freeze okay too. I’ve put chocolate in the bottom of the cup then put the PB ‘chip/wafer’ in the bottom. Talk about a happy crew on the boat !!!
Thanks to Marsha’s idea, I plan to make these and send to a sweet girl who just went off to college (full scholarship!) and whose family won’t be sending her things…it’s a pitiful situation, but some of us have kind of adopted her and try to help. Our ladies’ Bible class put notes and treats in their lockers during their senior year (at our little Christian school) and peanut butter cups were one of the favorites! (just didn’t have any homemade ones) I don’t doubt that these are far superior to store-bought. (I’m with you on that, Christy!)
You are most welcome! Thank YOU for the yummy treats!
These sound delish! However I put chocolate in the little paper cups then the peanut butter filing and more chocolate. Have done them for our allergy support group using Sunbutter and dairy free chocolate as i have alergies to both. Have a wonderful day!
Christy,
I love your recipes and even more than your recipes I love your blog posts! My husband and I are moving to Athens after the first of the year after 26 years in Orlando, Fl and it’s really tugging on my heart to say goodbye to all the friends and church family I have here. But your posts always put a smile on my face and I decided that if the women in the Huntsville/Athens/Decatur area are half as funny and sweet as you are I’ll get along just fine!
Becky Girl,
You come on up here. I know that all of us are just gonna love you, too!
I have a feeling you would get along with most anyone, anywhere! Can’t wait to have you up here in my neck of the woods!!
Have got to make these real soon,thanks for the recipe and lesson in how to make them pretty.
Hope you get to try them soon JB!
This is my most requested “Christy Recipe”!! I use your recipe to make the Peanut Butter bars all the time. My co-workers fight over them and “scraping the pan”. The next time I think I will make them like this.
Oh WOW! That is so funny, my kids fight over scraping the pan as well!!
The kids? I scrape the pan before anyone knows it is ready to be scraped. Joking of course, since my kids are all grown. So now I get to scrape all the pans and lick all the spoons by myself.