
Homemade Caramels
These homemade caramels taste so much better than store-bought and will positively melt in your mouth.
A Quick Look At The Recipe
- Recipe Name: Homemade Caramels
- Serves: 60 pieces
- Main Ingredients: granulated sugar, butter or margarine, vanilla extract, dark corn syrup, 14-ounce can sweetened condensed milk
- Why You'll Love It: Made with sugar, sweetened condensed milk, corn syrup, and butter, these homemade caramels taste so much better than their store-bought alter-egos and will positively melt in your mouth.
When I was a little girl we had a little store in our neighborhood which we all called “the store around the corner”. I don’t even know if it had a name other than that but kids from all over would ride their bicycles there to get treats on the weekends or pick up a loaf of bread for their mothers. Caramels were one penny each and I’d save my pennies and go spend every single one on them, coming home with a prized brown paper sack full of my favorite treat. I rationed them out, eating one a day, and was convinced that the rest of the world cherished them as much as I did.
But you know what is funny? I still ration them out today. But I gotta tell ya, these homemade caramels are far better than any caramel I’ve ever had in my life and definitely worthy of a little special treatment. I hope you get to make them soon. They take a little more time but are still incredibly easy and I know you’ll be impressed with yourself when you’re done!
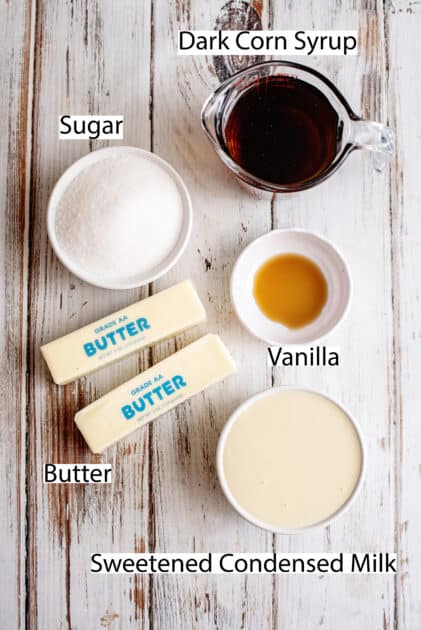
So, what do you need for my easy homemade caramels recipe? White sugar, dark corn syrup, sweetened condensed milk, butter, and vanilla extract. Just like making homemade dulce de leche, condensed milk is the key ingredient for that quintessential caramel flavor. But that melt-in-your-mouth caramel texture is all thanks to how we boil the ingredients. All you need is a little bit of patience and a candy thermometer and your homemade caramels will be ready to eat in no time!
The homemade caramel candy is soft, chewy, and melt-in-your-mouth delicious. Keep scrolling for FAQs and some more bite-sized homemade candy recipes… there are just a few on Southern Plate!
Recipe Ingredients
- Granulated sugar
- Dark corn syrup
- Sweetened condensed milk
- Butter or margarine
- Vanilla extract
How to Make Homemade Caramels

To start with, take an 8×8 square pan and line it with aluminum foil.
I prefer the heavy-duty stuff for this but if you only have regular foil just go for it.
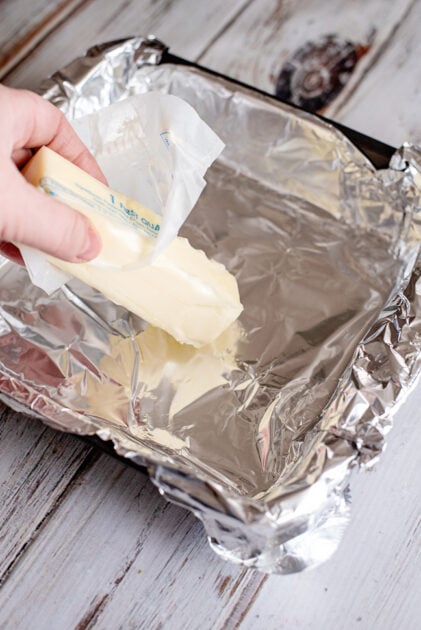
Now butter that. I just take a stick of butter or margarine and rub it over the foil for this part.
Margarine works a little better than butter for this in my opinion.
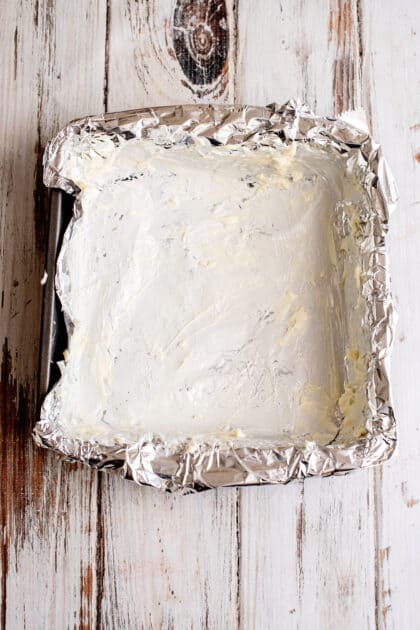
It should look as buttery as this!
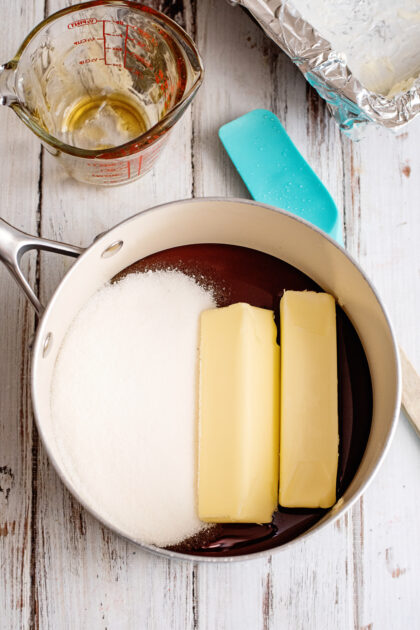
To begin with, place corn syrup, sugar, and butter (or margarine) in a medium saucepot.
You’re going to put that on medium heat and bring it to a boil, stirring constantly.
It’s boiling time!
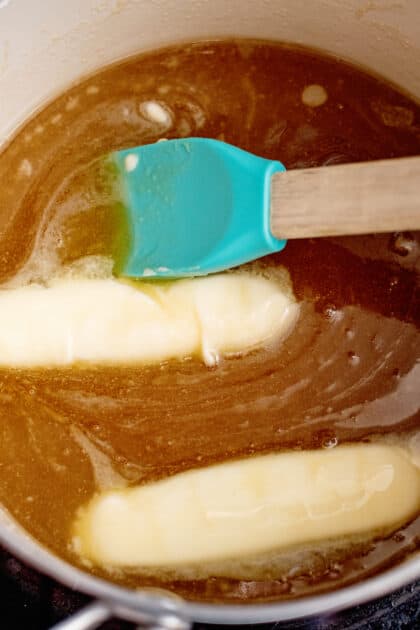
Here is our butter starting to melt.
You really really have to stir constantly here so just settle in and get comfy.
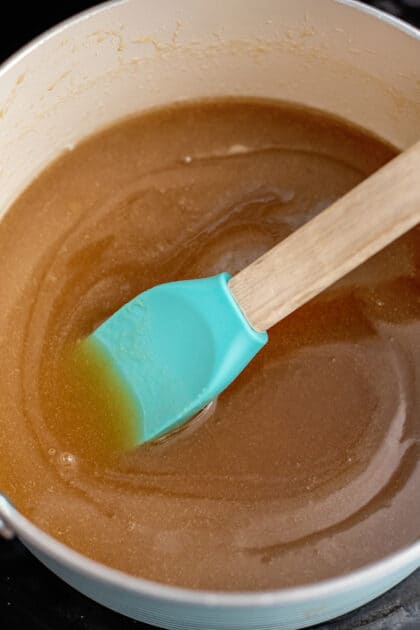
Now our butter is melted and it’s still heating up…
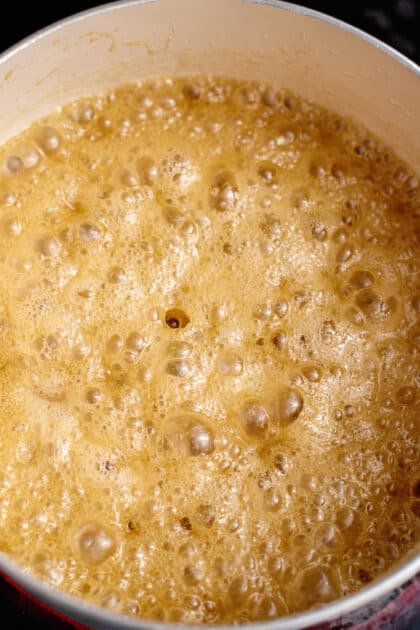
Finally boiling!
Once it reaches a full boil, stop stirring and let it boil for four minutes.
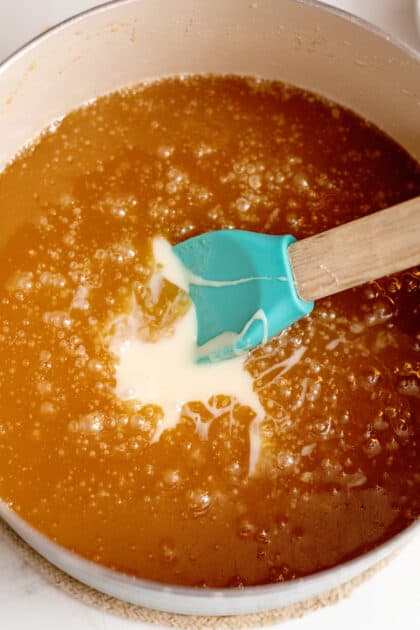
After four minutes is up, remove from heat and stir in your sweetened condensed milk.

Return the pot to the stove eye and place it on medium heat.
Here we go with the stir constantly thing again. This time it’s serious ~grins~
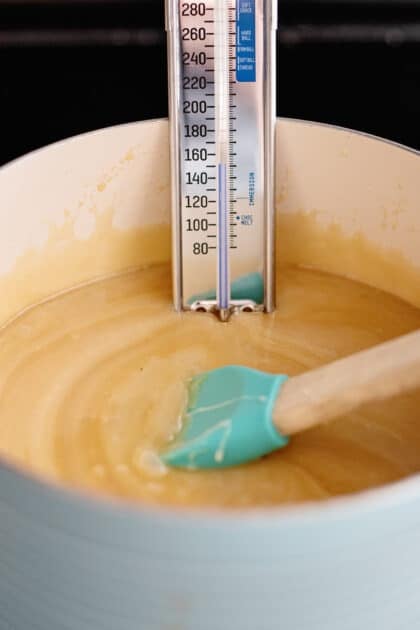
Put your candy thermometer in the pot.
Now don’t you be intimidated by a candy thermometer, it really is no big deal. Just remember, you are bigger than it. It is more scared of you than you are of it.
It has a little clip that clips it right onto the side of the pot and you just have to make sure the bulb end of it is just beneath the surface of your liquid, but not touching the bottom.
We need to cook this to soft ball stage and that is easy with a candy thermometer because it says right on it “soft ball stage”.
I’ll show you that towards the end so hang with me.
This will take about 10 minutes or so. You just stir and watch your thermometer.
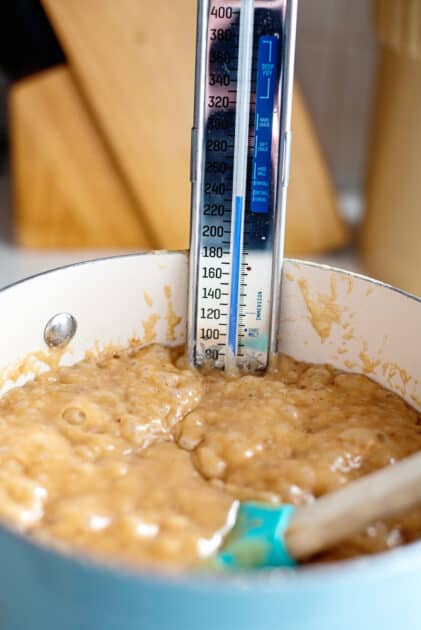
This is at soft ball stage.
See where the blue line ends? That is the line that says “soft ball” on the thermometer so we know we’re ready.
Remove from heat.
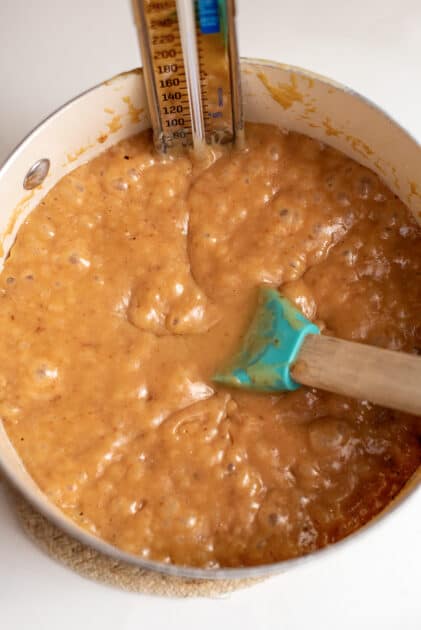
Look at how gorgeous our caramel looks! Oh my goodness, it smells so good!
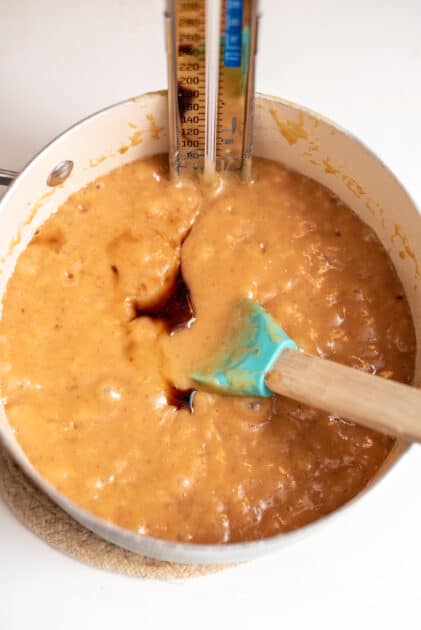
Pour in your vanilla and give that a good stir.
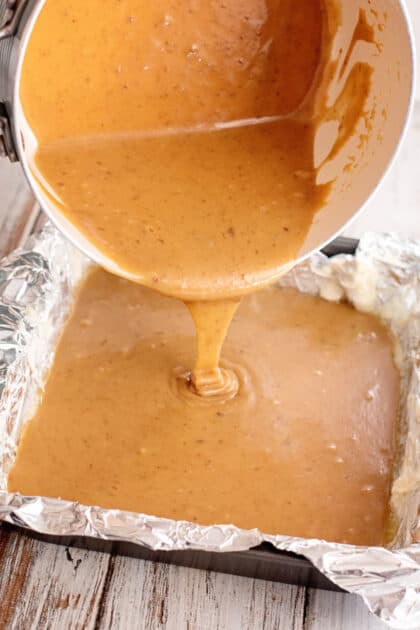
Now pour into your buttered prepared pan.
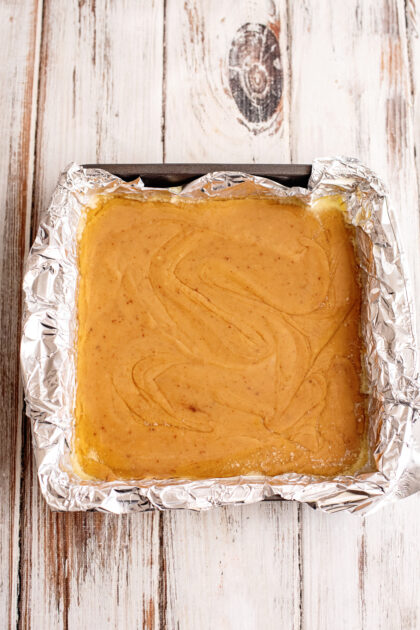
This needs to sit a while until the caramel mixture cools some.
I don’t let mine cool all the way, though. I start working with it while it is still warm to make it easier.
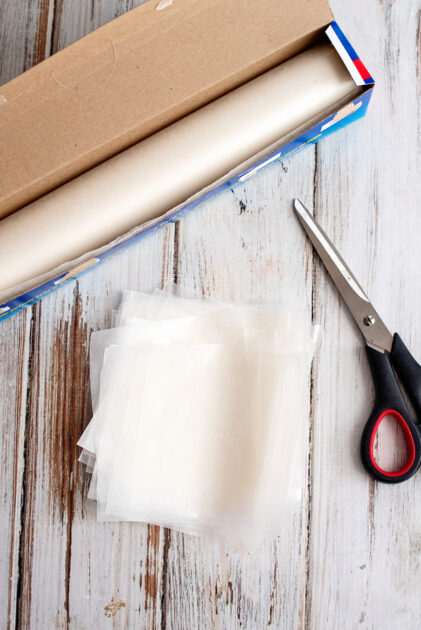
Wrapping your homemade caramels
While we’re waiting on that to cool, cut some sheets of waxed paper.
I tear off a few sheets about 18 inches long or so, then cut each of those sheets into three strips.
Cut each strip into squares (or rectangles, depending on which way the wind blows, I’m not particular).
There, now we got us a little pile.
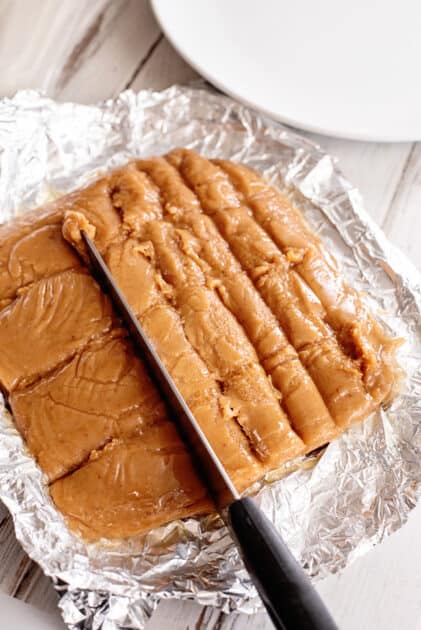
Get yourself a big old honking knife and start a-cutting.
We are really just kind of scoring it because it won’t stay cut.
At this point, it is the consistency of taffy so we’re scoring it and then we’ll pull it apart to get ready to wrap.
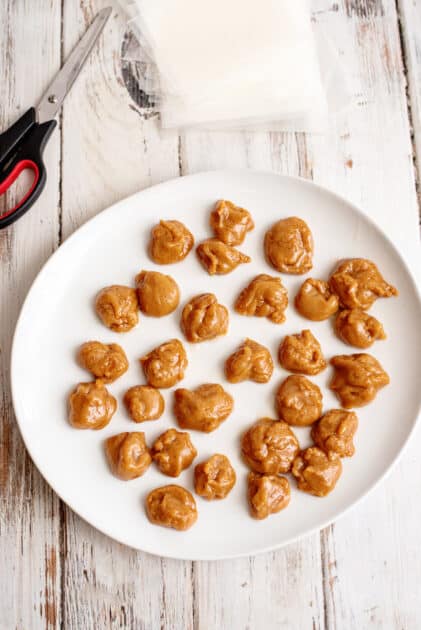
You wanna make sure your hands are clean for this.
As we pull it apart it will stretch a bit and I just plop it down like little balls on a plate.
These will shape up really well as we wrap them.
For now though, just pull them all into little balls like this and then allow them to cool completely.
A cookie sheet or large platter or two will be needed.
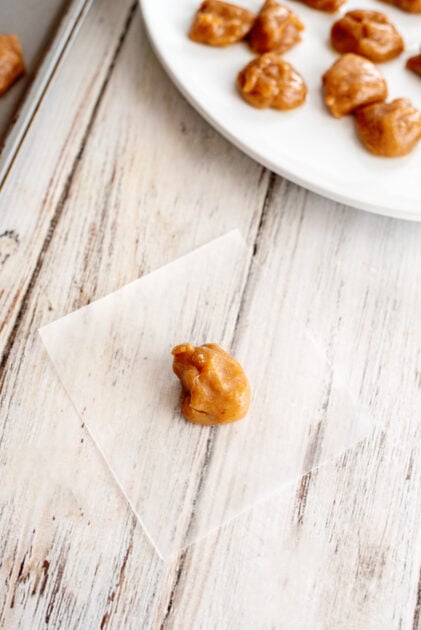
Once completely cooled, place each one in the center of a piece of waxed paper.

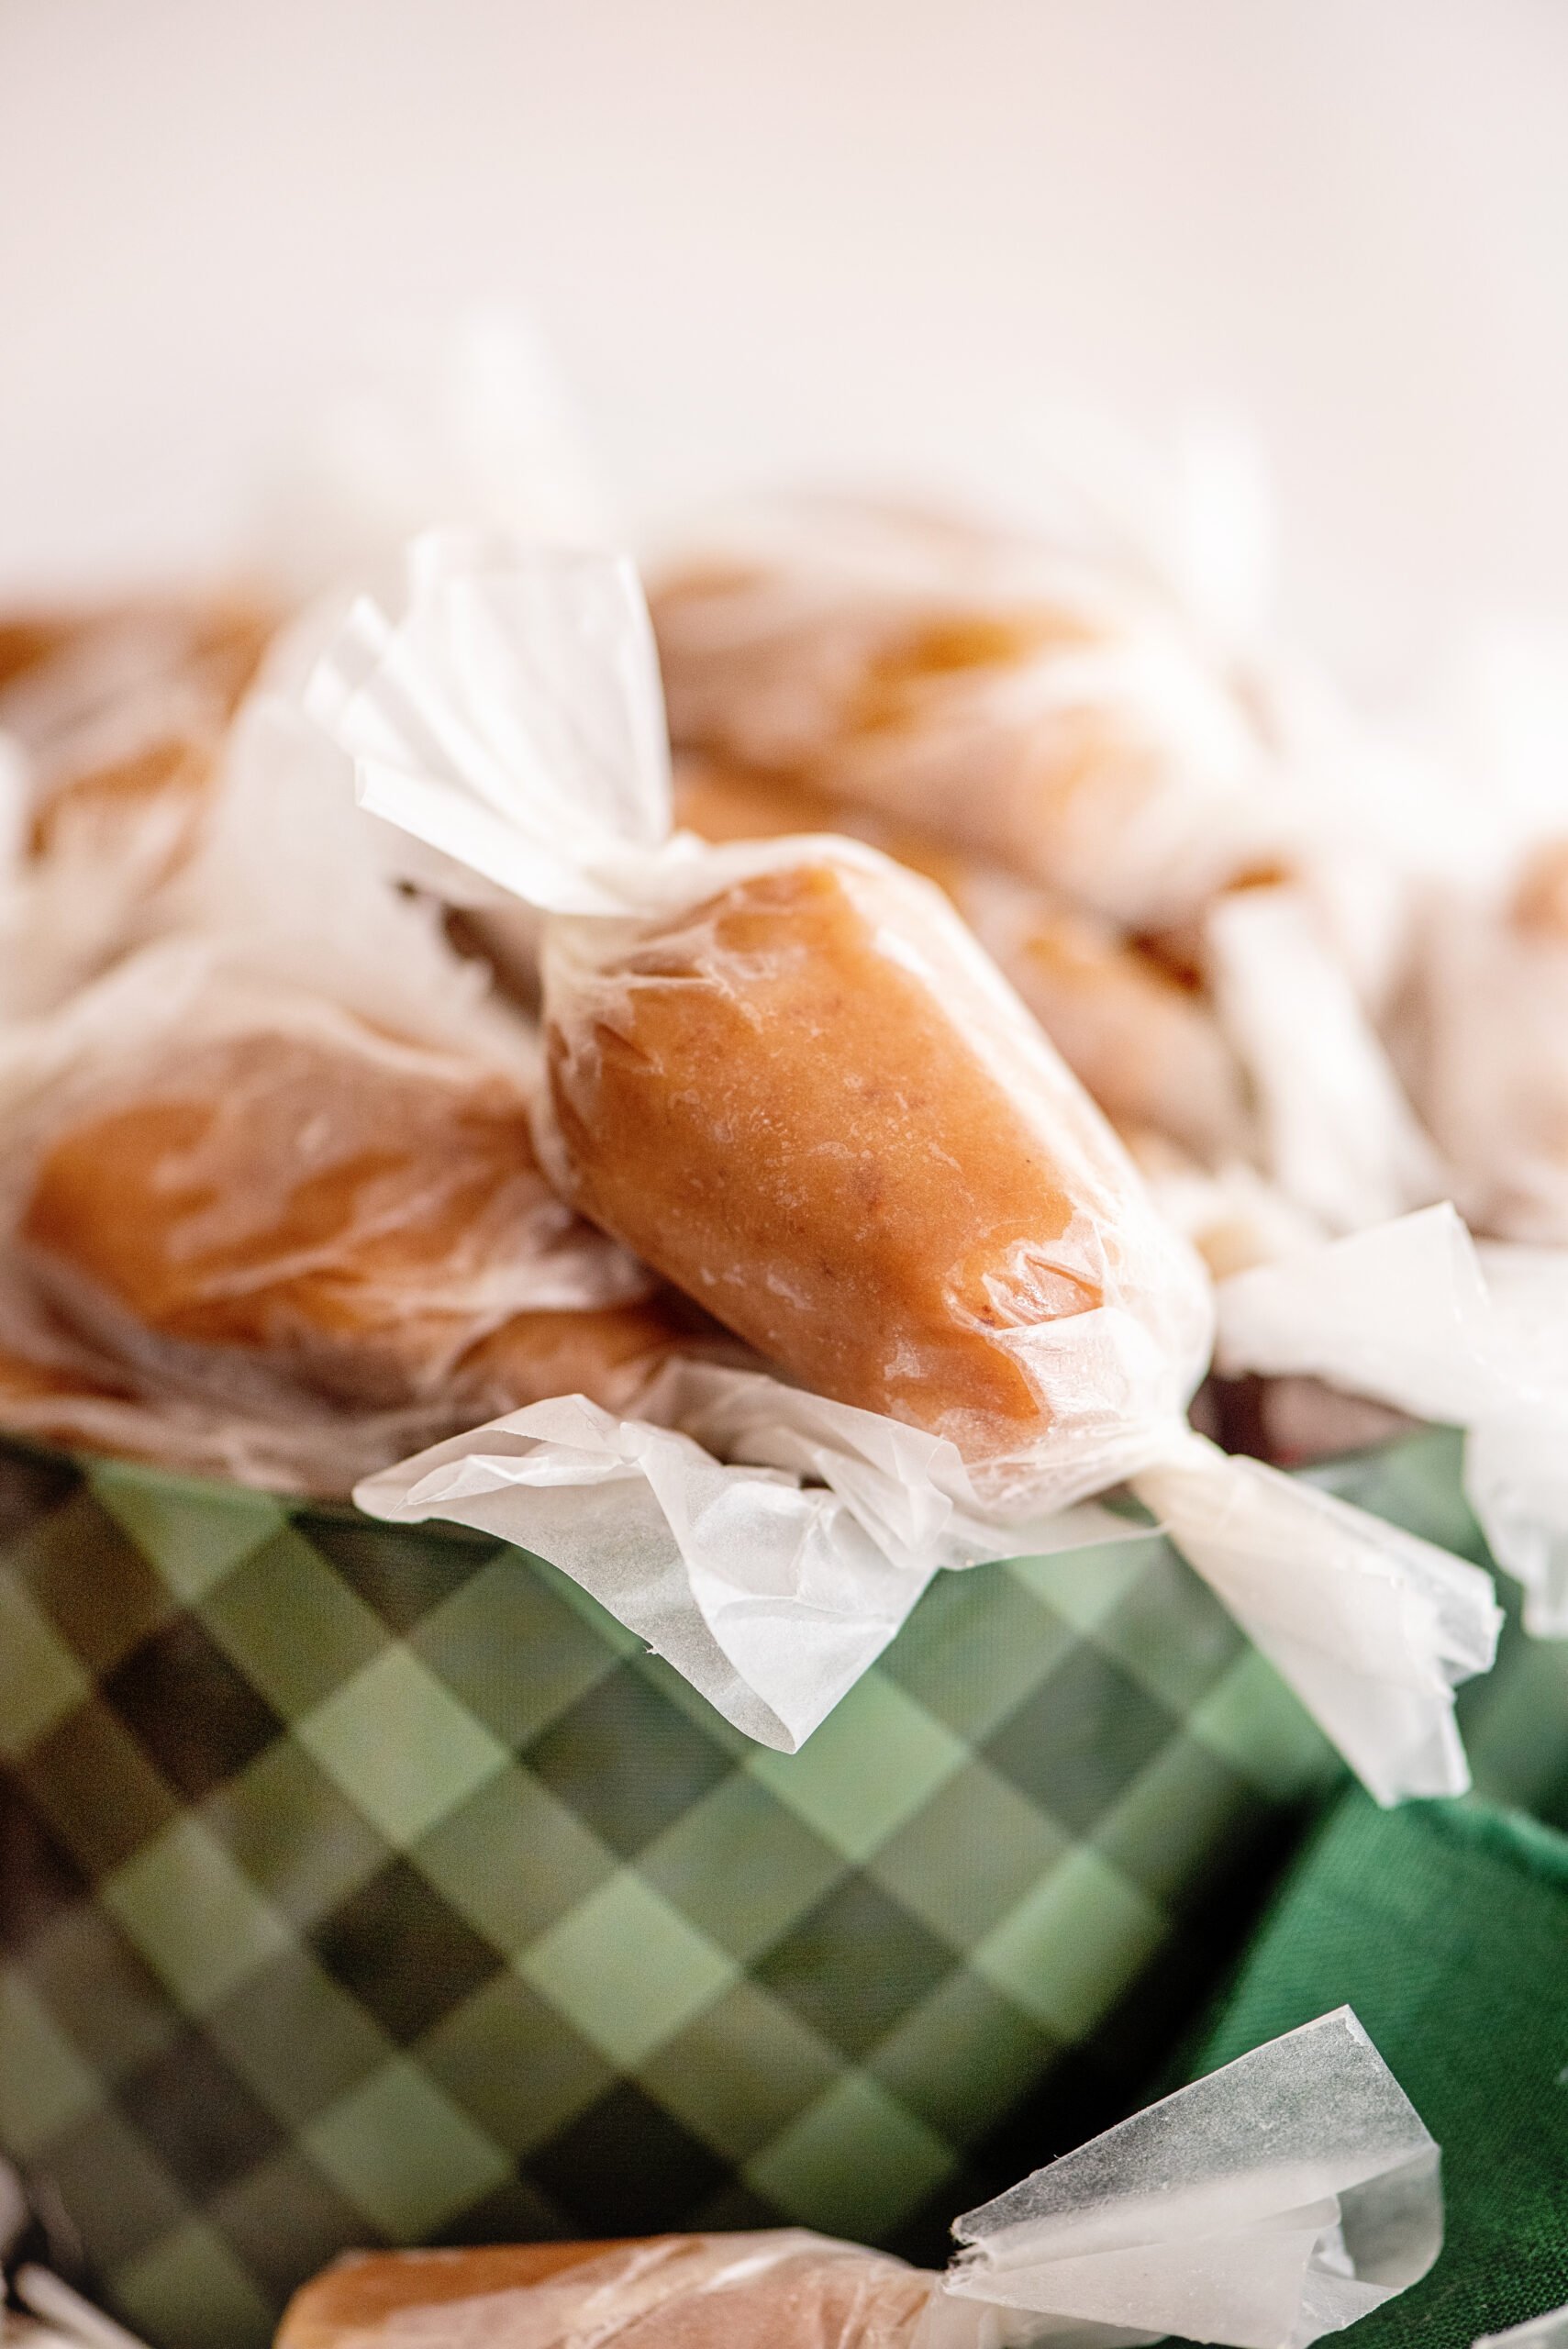
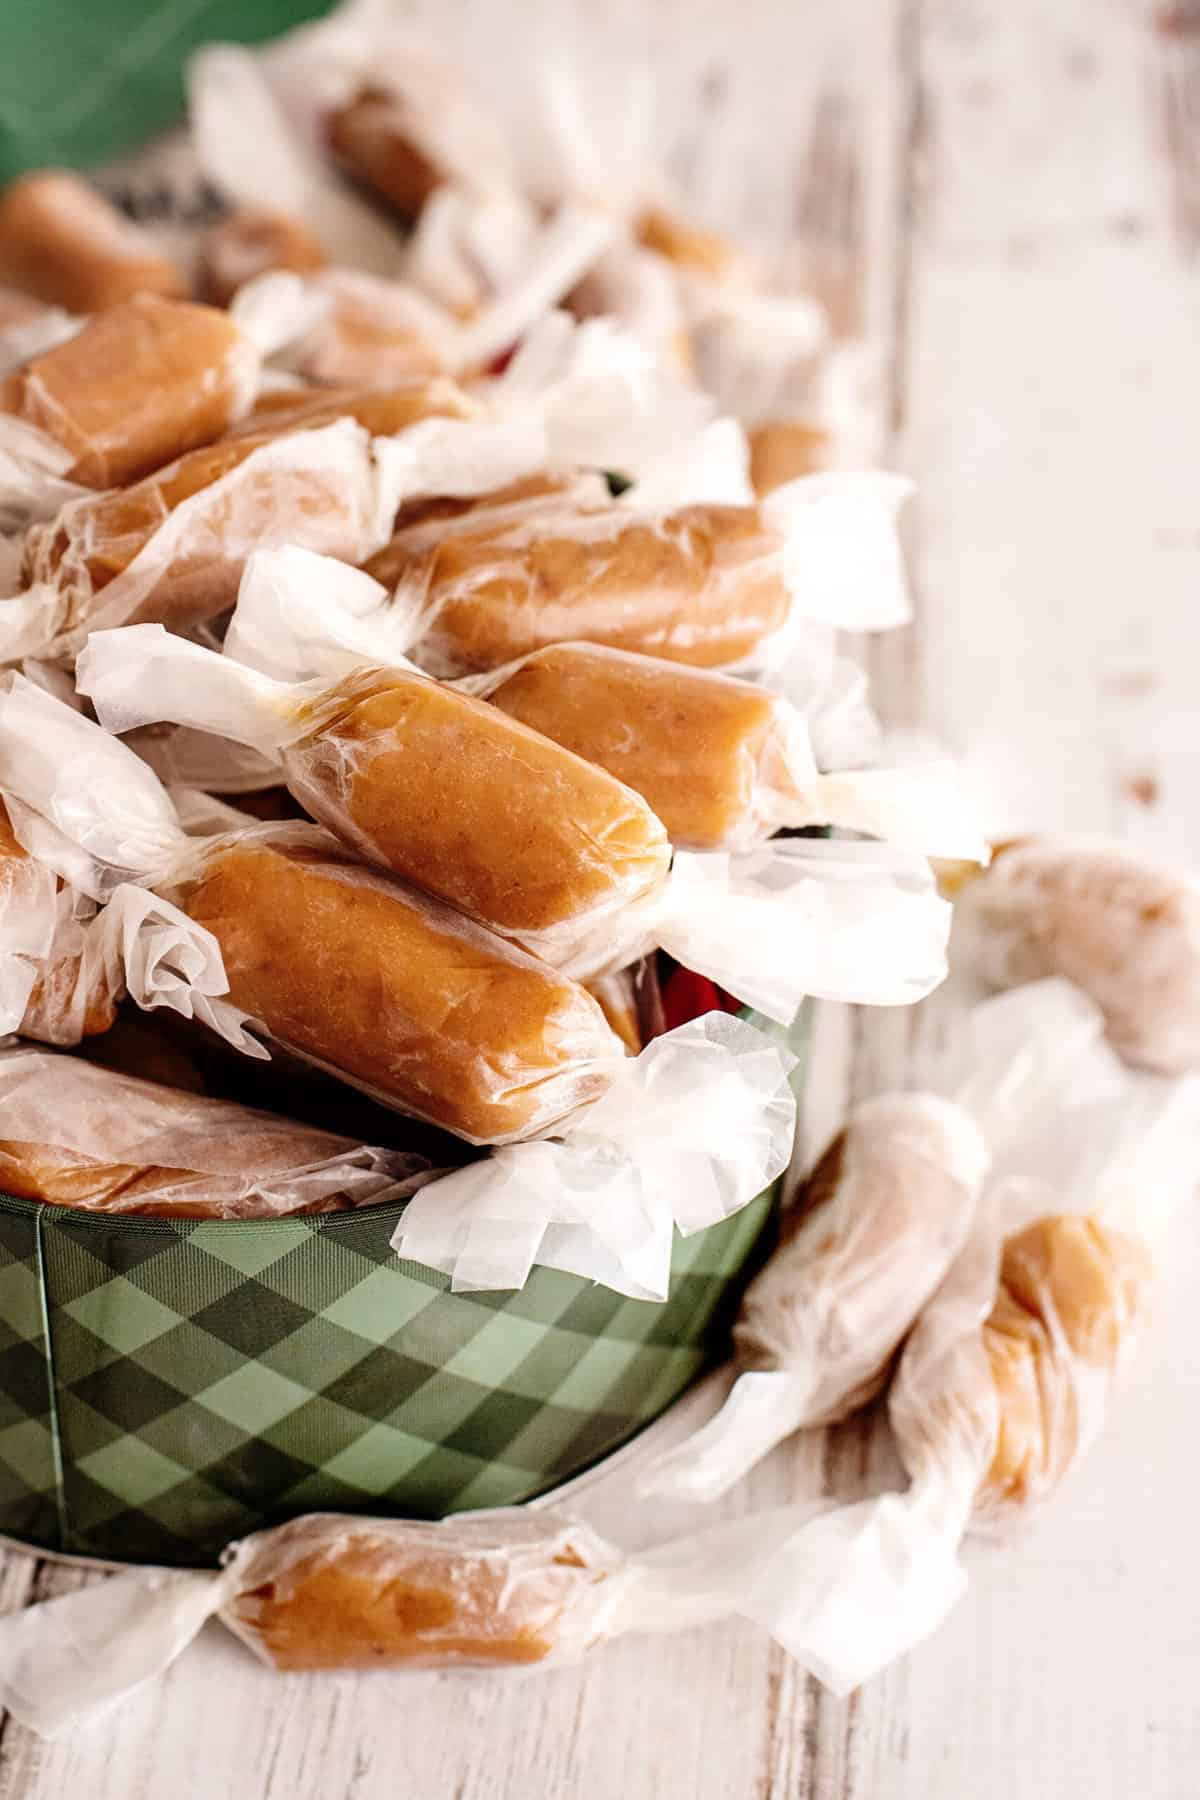
Roll it up and twist the ends like a homemade Tootsie Roll.
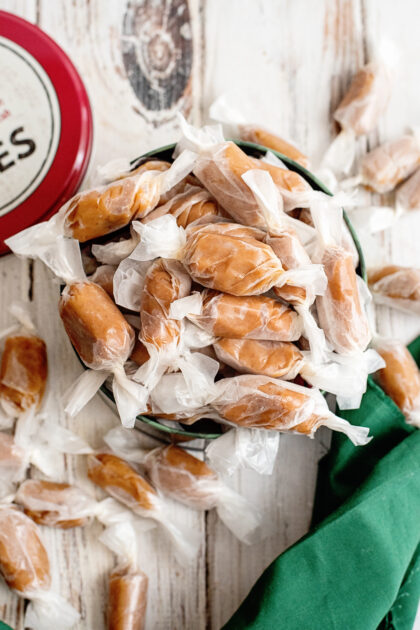
Continue until you are done and you’ll have about 60 pieces of homemade caramel candy heaven!
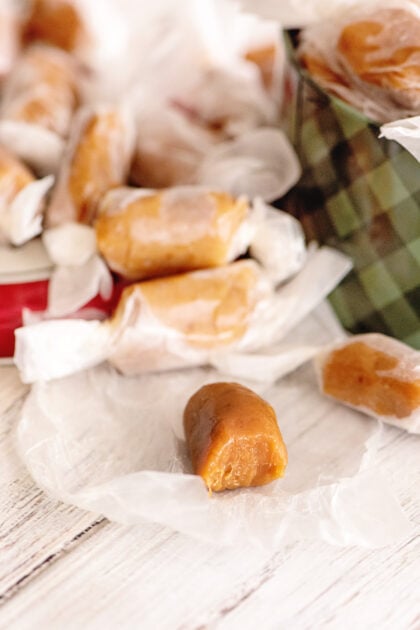
But, you know, don’t forget to taste test a few before gifting them!
Storage
- When stored in an airtight container at room temperature, wrapped caramels will stay fresh for about 2 weeks. You can store them in the refrigerator, but I’d personally let them come to room temperature before enjoying them.
Recipe Notes
- Some folks have had problems with caramels sticking to the wax paper wrappers. We’ve played with this recipe and discovered that letting the caramels cool completely before wrapping seems to solve this problem.
- If you’ve never used a candy thermometer, you can buy them on the kitchen gadget aisle for two or three dollars. After you are done using it, just let it cool and then hand wash it and put it up for another day. They are really low maintenance and the key to many homemade candies, including homemade fudge!
- Feel free to use dark or light corn syrup. It’s also known as Karo syrup.
- Some homemade caramel recipes use evaporated milk or heavy cream, but I highly recommend sticking with the sweetened condensed milk.
- To enhance the caramel flavor, substitute white sugar for brown sugar.
Recipe FAQs
Why did my homemade caramels turn out hard?
If the temperature gets too hot, the caramels will turn hard once cooled. That’s why it’s so important to use a candy thermometer and immediately remove the pot from the heat once it reaches the soft ball stage.
Why are my homemade caramels too soft?
In turn, if your temperature is too low, your caramel candies will be too soft.
How do you make chocolate-covered caramels?
If you want to make homemade Tootsie Rolls, once the caramels cool completely, you’ll want to dip them in melted chocolate. Let them sit and harden before wrapping them as instructed.
How do you make homemade salted caramel candy?
For salted caramel candies, you’ll want to sprinkle the cooled caramels with flaked or coarse kosher sea salt.
Can you make homemade caramels without corn syrup?
While I haven’t personally tried it, in other recipes you can typically substitute corn syrup with honey or pure maple syrup.
What is the ice water test?
To test if your homemade caramel’s ready to be removed from the heat, you can perform the ice water test. Add a decent drop to a glass of ice water and then roll it into a soft, smooth ball. If it’s pliable and holds its shape, you’re good to go.
You need these other homemade candies in your life:
Potato Candy Recipe Made The Ole Fashioned Way
Recipe For Easy Chocolate Fudge
Ingredients
- 1 cup granulated sugar
- 1 cup butter or margarine
- 1 teaspoon vanilla extract
- 1 cup dark corn syrup
- 1 14-ounce can sweetened condensed milk
Instructions
- Line an 8-inch square pan with heavy aluminum foil. Butter foil and set aside.
- In a large saucepot, place sugar, corn syrup, and butter. Bring to a boil over medium heat, stirring constantly. Boil slowly for four minutes without stirring and then remove from heat.1 cup granulated sugar, 1 cup dark corn syrup, 1 cup butter or margarine
- Stir in the sweetened condensed milk. Return to medium heat and place the candy thermometer in the pot. Cook, stirring constantly until the thermometer reads soft ball stage (238 degrees). Remove from heat and stir in vanilla.1 teaspoon vanilla extract, 1 14-ounce can sweetened condensed milk
- Pour into the prepared pan. Allow the caramel to cool until able to handle. Cut into one-inch squares and place each square (which will look like a blob at this point) onto a cookie sheet or platter to cool completely.
- Once cooled, place each in the center of a wax paper square, roll up, and twist the ends.
“Happiness is a choice that requires effort at times.”
~ Aeschylus. Submitted by I Play Outside The Box.
Subscribe to Southern Plate and never miss a single recipe!
OH WOW!!! I have attempted making caramels before. TO NO AVAIL! This recipe is GREAT!!!! I would just give one tip: Do not stop stiring! Thank you SOOOOO MUCH! These are outrageously delish!
I am so glad you like them Kim!!
I tried to make these a second time a couple of weeks ago and they would not set up well…The first time i made them they turned out amazing but i don’t know what happened the second time…
Kayla, my first batch I cooked ONE minute longer (five minutes) and they have the darker caramel look similar to those in the store. The second batch (yes, two in one day! LOL) I went right by the recipe and although very soft, not chewy at all really (not like I imagine a caramel to be). Both batches are very tasty. However, I lean toward the one cooked an extra minute. From reading your post I think my second batch turned out much like yours. I was able to cut them though….just VERY soft! I hope this helps!!!! That extra minute does amazing things….just DO NOT stop stiring!
The reason everyone’s caramels are sticking to the waxed paper is because these caramels won’t set up properly! They are way too sticky to be wrapped. I followed the directions exactly and am sorry to say that I have tried many recipes that taste (and set up) much, much better. These were “grainy” — not at all smooth and creamy like others I’ve made and, of course, sticky and gummy. I tried these because they looked so good and the directions were nicely detailed and easy to follow, but as for taste and texture, I will stick to my old tried and true recipes!
Did any one’s turn out chewy? These are delicious, but they could have been firmer. They melt in the mouth a little too quickly. Maybe I didn’t do it quite right.
I tried parchment paper, and that worked ok for not sticking, but I ended up using the release aluminum wrap for most of them.
Love parchment paper for lots of things, from baking chicken pieces to baking cookies. Found in groceries along with the other food wraps.
Sending my husband to buy a candy thermometer after work and will attempt to make them tonight…..I am a cake and cookie baker and have never attempted candy so wish me luck…I love Caramel!
I buy Mexican vanilla in quantity on the internet. MUCH better and richer than any you can buy on the grocery shelf…and you can’t even compare it to imitation!!!! Great price too….you use less than recipe calls for ’cause it’s so pure.
Where do you buy Mexican vanilla on the internet?
Christy, I left you a comment a couple of weeks ago about using Release foil to wrap the caramels in. I’ve made them twice with the foil and there’s NO sticking at all! Thanks so much for the delicious recipe!!!
Yay!!! I am so glad to hear that it works. I am going to try it next time, thanks so much for letting us know!