
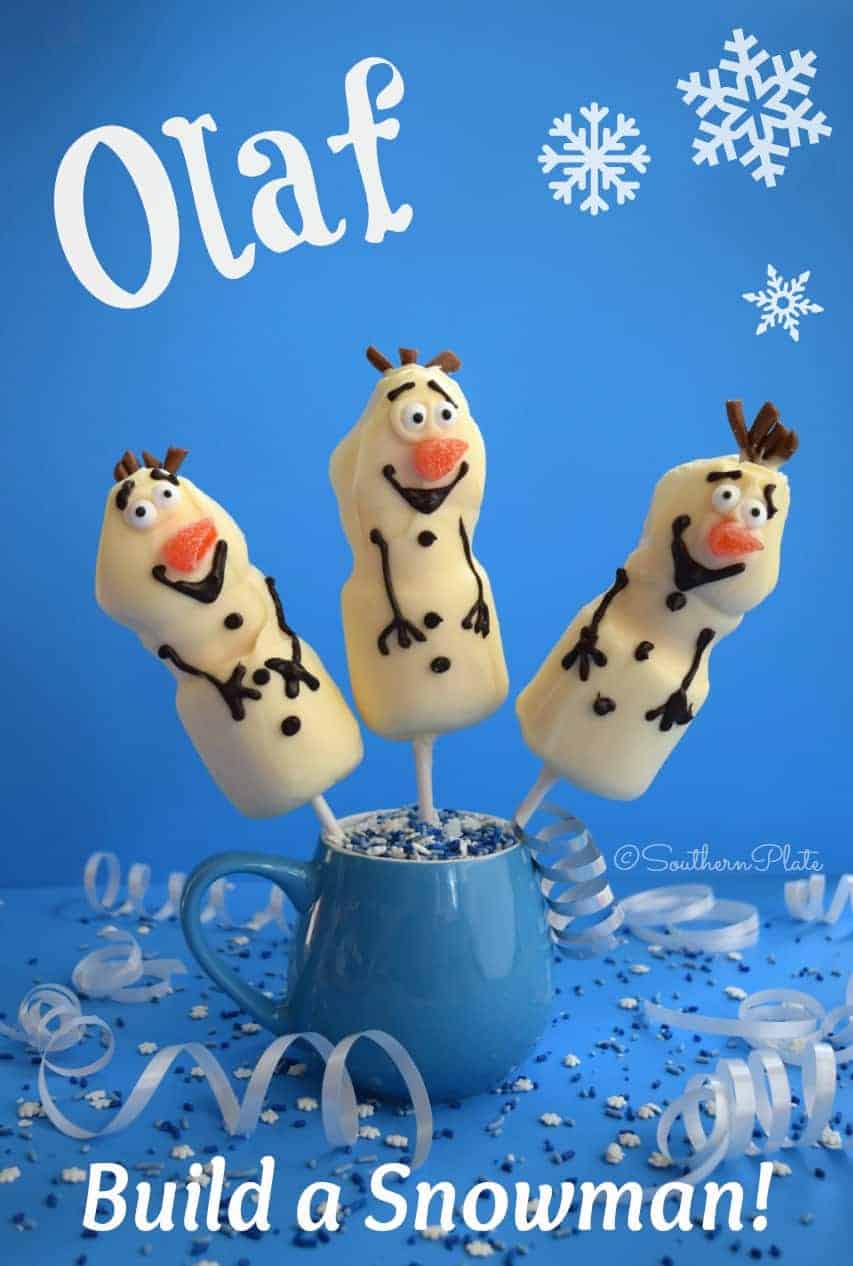
Olaf Marshmallow Sticks – Build A Snowman!
Build A Snowman with these cute, fun and easy Olaf Marshmallow Sticks!

A Quick Look At The Recipe
- Recipe Name: Olaf Marshmallow Sticks – Build A Snowman!
- Serves: 4
- Main Ingredients: Giant Marshmallows, Marshmallows, Almond Bark White Candy Coating, solid vegetable shortening, Orange Slice Candy, Tootsie Rolls, Chocolate Chips, Long Lollipop Sticks
- Why You'll Love It: Build A Snowman with these cute, fun and easy Olaf Marshmallow Sticks! They only take minutes to make and provide loads of fun!
I’m gonna preface this by saying it’s not like I’m a Frozen fan or anything crazy like that. I mean, everyone has the soundtrack memorized, including the songs that didn’t make it into the film, right? That can’t be just me. And I haven’t seen them but I’m sure all of the other moms and daughters have matching Anna outfits too, don’t you think? It’s not like we could go see the sing-a-long version in theaters in the same old outfits we’d worn the other four times we went to see it.
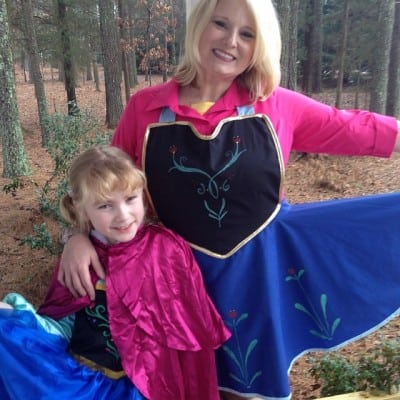 So having established that I’m not really a frozen fan (more like a fanatic) I thought it would be fun if we, the good natured and good hearted people of Southern Plate stepped up and responded to Anna’s persistent plea “Do you wanna build a snowman?” with “Yes. Yes, Anna, we do.”
These don’t take nearly as long to make as you’d think. I made a dozen of them for this post in about twenty minutes, and then went back later and spent a few more minutes adding the arms, mouths, and buttons with some melted chocolate chips. Katy has requested that I make twenty more for a party she is going to this weekend so I plan on getting busy again later today and turning those out. The details like hair, nose, and eyes are as simple as sticking them on while the coating is wet. But don’t take my word for it, come along with me in this post as we build a snowman :).
P.S. I don’t know if you’ve ever tried marshmallows that have been dipped in chocolate coating but oh my goodness are they good. We have this little shop called the Chocolate Crocodile and whenever I go by I just have to go in and buy a stick of dipped marshmallows. I had never tried them until a few years ago and they have become one of my favorite little treats!

You’ll need: GiantMarshmallows (These are bigger than big marshmallows, thus the name 🙂 ), Large Marshmallows, Orange Slice candy, Almond Bark, a little solid Vegetable Shortening to thin the coating, Tootsie Rolls, Candy Eyes (found in cake decorating section, Wilton makes them), AND Chocolate Chips or chocolate bark along with long lollipop sticks or wooden skewers like you find in the craft department*
You’re also going to need long lollipop sticks. Wilton makes them and you can find them in the craft department. I was originally going to try these on pretzel rods and I’m glad I didn’t. The marshmallows would tear a good bit getting them on there. If you decide to go the pretzel rod route, try cutting out a hole in your marshmallow ahead of time and I wish you luck :). Katy was glad I changed my mind because I had already bought the pretzel rods and they have now been relegated to snack food.
*The bold things are pictured but are still needed. In the age of “selfies” it is refreshing to find that not everything wants to have it’s photo taken.
Now listen, when I say Giant Marshmallows, I’m really really really not talking about the regular large marshmallows. This is kind of a new size to me so I’m gonna assume it might be a new size to some of y’all, too. I get these at Wally World on the very bottom shelf, underneath all of the other marshmallows. There are like, a thousand different marshmallows right now. Flavors, shapes, all sorts of craziness going on in Marshmallow land and apparently one of the benefits of this is that giants finally have some of these to put in his hot chocolate.

For each Olaf you’ll need two of these giant roasting marshmallows and one regular large marshmallow.
Note: We aren’t using any mini marshmallows at all. If you want to make baby Olafs you can replace the giant marshmallows with large and the large with mini. I haven’t made baby Olafs yet. Apparently, my Olafs are teenagers. I speak to them and they just stare blankly ahead, as if immune to the sound of my voice…
Speaking of which, how did I get old enough to be the parent of a teenager? I swear I was a teenager myself yesterday. Life goes by so fast. We have got to remember to take time to savor every drop we can.

Now we need to start by making Olaf’s head. You’ll notice that his head is kinda pointy and gaucky looking. So I take one of those giant marshmallows and cut the top into a big old triangle, then I do a little slant on each of the bottom sides to add just a bit of head shape to it.
Note: You can’t screw this up so don’t be sitting here analyzing what I did in this picture. Stop squinting. It doesn’t have to be perfect or exactly like mine. No two Olafs are the same anyway so don’t let any part of this project be something you get all fretful about.

Now line up the marshmallows on your stick. Giant one, large one, trimmed giant one for Olaf’s head.

I start with a tootsie roll. Place that on a plate and microwave it for 5-10 seconds, just until it is nice and warm.
The photo above shows the steps to making Olaf’s hair.
- Press tootsie roll flat.
- Cut tootsie roll on a diagonal longways.
- Cut three cuts into one end to form hair. To add a little Olaf Awkardness, I then make one of the middle side hairs shorter than the others (see photo).
It goes without saying that all scraps of marshmallows and tootsie rolls are free game to eat. You gotta make sure they’re up to quality control standards, you know.
Hey, if you wanted to, you could also make eyes, buttons, a mouth, and even Olaf’s arms out of tootsie rolls. Just use your play-doh skills from childhood.

To make the Olaf noses, just take an orange slice candy and cut in between the ridges. Instant noses!
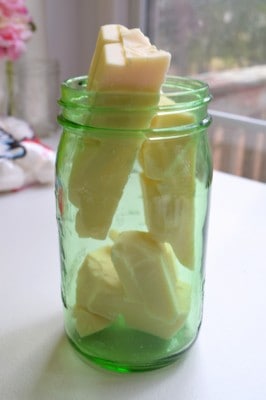
Once you have all of your Olaf bodies assembled, melt your almond bark. You can do this in a bowl, on a double broiler, etc. I just crammed as much as possible into a quart sized wide mouth mason jar, added a tablespoon of solid vegetable shortening, and nuked it in 45 second intervals, stirring after each, until melted and smooth.
Notes you ought read: If you want to keep your Olafs nice and smooth, not gunky, add a tablespoon of solid vegetable shortening to this chocolate while you are melting it and stir it in really well. This thins the chocolate a bit and helps it cover the Olafs, with the excess sliding off smoothly.
Whatever you use to dip your marshmallows, you’ll want to have a LOT of melted almond bark in it. This jar is perfect because it allows me to dip them easily, but I kept a 2 cup measuring cup of additional melted bark beside me and after dipping a few Olafs, I’d replenish the jar. It is amazing how much almond bark gets used to coat one of those little guys!

After your almond bark is all melty and smooth, let it sit a few minutes to cool slightly. You don’t want it so hot that your marshmallows melt when you put it in, although this would be a rare thing and you’d really have to hold your marshmallows in there forever for this to happen, but it helps to have a buffer.
It also helps to have a butter knife nearby just in case you misjudge how much melted coating you need and don’t have enough to submerge your marshmallow stick. Then, you can take that knife and quickly swish coating over it. Trust me from personal experience on this.

While your coating is still wet, stick a toothpick in the top of the marshmallow and push the pointed end of a tootsie roll hair section into it, then stick a piece of an orange wedge onto the front for a nose.

Lay Olafs onto waxed paper or parchment to dry. To keep my tootsie roll hair from leaning during this point, I put another orange wedge beneath each one. I’m not sure this was necessary but it made me feel better so I went with it.

To attach the eyes, I just put a dollop of melted coating on Olaf’s face with a butter knife and then pressed two eyes into it.
Let Olaf dry and harden completely. Then melt some chocolate chips in a bowl in the microwave just like we melted our almond bark. Put those into a FREEZER bag and cover one corner with tape. Just plain old tape like you have on your desk (if you have a desk, and if you can find the tape). After that corner is reinforced with tape, stick a toothpick into the very point of it. Use this to pipe on Olaf’s mouth, buttons, and stick arms as pictured.
Now y’all, I have no artistic ability whatsoever when it comes to drawing. I can’t even draw recognizable stick people. Last time I tried, my stick person looked like a brush pile. But I can draw on Olaf’s features so I know you can, too. Believe me, you got this.

Ingredients
- 12 Giant Marshmallows
- 6 Large Marshmallows
- 1 Package Almond Bark White Candy Coating 1 will make approximately 6 Olafs
- 1 tablespoon solid vegetable shortening
- 1 package Orange Slice Candy
- 3 Tootsie Rolls
- 1/2 cup Chocolate Chips
- 6 Long Lollipop Sticks
- 12 candy eyes or use chocolate chips like you do for arms and buttons, no extra chocolate needed
Instructions
- Cut 6 Giant Marshmallows into kind of a pentagon shape, see photos to understand. Warm tootsie rolls slightly for 5-10 seconds in the microwave. Press flat. Cut according to post directions for Olaf's hair. Cut one or two orange slices along the crease lines to make carrot shape noses.
- Load up each lollipop stick with one giant marshmallow, one large marshmallow, and the trimmed marshmallow for the head.
- Place almond bark and 1 tablespoon shortening in a microwave safe container and melt at 45 second intervals, stirring in between each, until smooth.
- Dip each Marshmallow stick into coating and quickly cover. Hold up and allow excess to drip off. Poke a hole in the top and insert tootsie roll hair. Place on waxed paper or parchment and quickly add piece of orange wedge for the nose. Stick on candy eyes, adding more melted coating as "glue" if need be.
- Let Olaf dry and harden completely. Then melt some chocolate chips in a bowl in the microwave just like we melted our almond bark. Put those into a FREEZER bag (they're stronger) and cover one corner of that bag with tape. After that corner is reinforced with tape, stick a toothpick into the very point of it. Use this to pipe on Olaf's mouth, buttons, and stick arms as pictured.
- Let dry and then package in clear treat bags found in the birthday party section.
Take great care not to let a single drop of water get into the melted chocolate or candy coating as it will cause it to clot and look awful.
Nutrition
“Love is putting someone else’s needs before your own.”
~Olaf
Christy,
You are the first person I’ve heard of (besides me) that goes to “Wally World”
Since my 66 year old young-at-heart brother is a HUGE Olaf fan, I have GOT to surprise him with a few of these !! They are ADORABLE !! Too cute not to try and make. Thanks, Christy !!
I hope you both enjoy them Debbie!!!
Will be making theses with my 2 granddaughters age 3 and 6 they are frozen fans like all the little babies out there…a Thanks!!!
I hope you have a wonderful day spending time with the grands and making these Bonnie!!
I was introduced to Olaf this fall during a road trip with the grandkiddos. I saved a cookie tin from last year and I think I just might be able to ship these to VA fairly intact. I won’t get to see their faces, but I’m pretty sure they will be a hit. Thanks Christy!
Oh how sweet!! I hope they love them!!
So cute. I love that plate with the snowflakes around the edge. What pattern is that? Where could I get one? Thanks Christy for all your great recipes.
Thank you! That is my new Corelle pattern that I just got. They came out with three new holiday patterns this year and I was thrilled! It is called Cheerful Flurry. They sell them on Amazon but they are really overpriced there. If you can find a target within driving distance that has them in stock (you can check online), they have them much much cheaper and you can purchase just the dinner plates, salad plates, and bowls like I did.