
Easy Baby Back Ribs in Oven
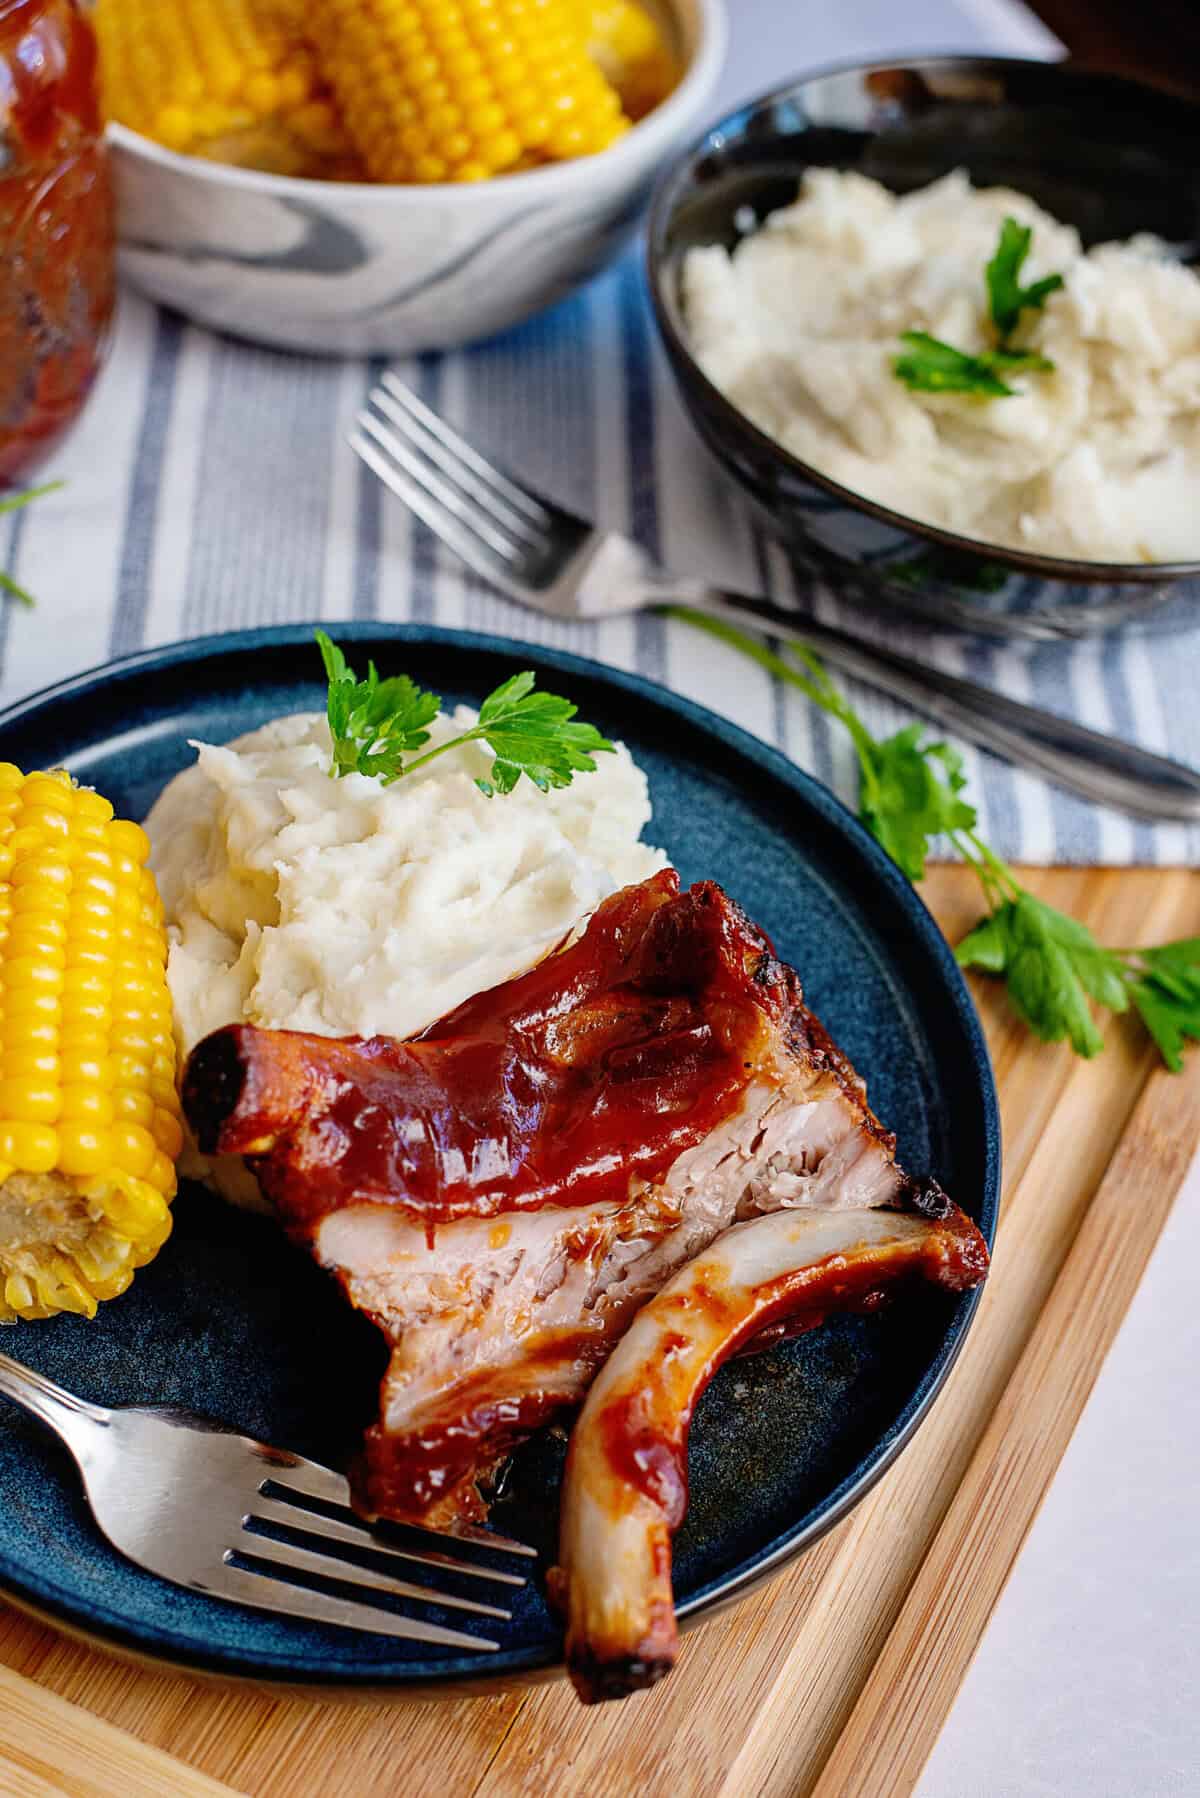
This recipe for Baby Back Ribs in the Oven creates tender, fall-off-the-bone ribs baked in a sweet and tangy barbecue sauce. Forget standing over a grill – this easy-prep meal lets you set it and forget it. Serve with your favorite sides for the perfect Southern supper or summer cookout!
A Quick Look At The Recipe
- Recipe Name: Oven-Baked Baby Back Ribs
- Serves: 4
- Main Ingredients: rack pork back ribs, BBQ sauce
- Why You'll Love It: These tender fall-off-the-bone baby back ribs are baked in the oven in a delicious barbecue sauce. Add your favorite sides for the perfect Southern supper.
No Grill, No Smoker, No Problem
My dad was the rib master growing up. He’d spend hours outside, tending to the smoker or hovering over the grill, basting and coaxing every bit of smoky, sticky perfection out of those racks. And let me tell you, they were worth every minute.
But these days, I’m on my own, and my dad’s an hour away. When a rib craving strikes, I’m not about to stand over a hot grill for hours. Instead, I take a shortcut that delivers just as much juicy, fall-apart goodness with a whole lot less effort.
There are a million ways to cook ribs, and plenty of folks who’ll swear their way is the only way. I’ve made everything from BBQ ribs in the oven with veggies to Crock Pot beef ribs, so you could say I’m a firm believer that your kitchen = your rules!
Reader Rating
“Love this recipe! My husband asks for them all the time! I had never removed the ‘silver skin‘ before, but WOW does that make a difference. So easy to prep and throw in the oven and so tender and delicious!” – Judith
Ingredients
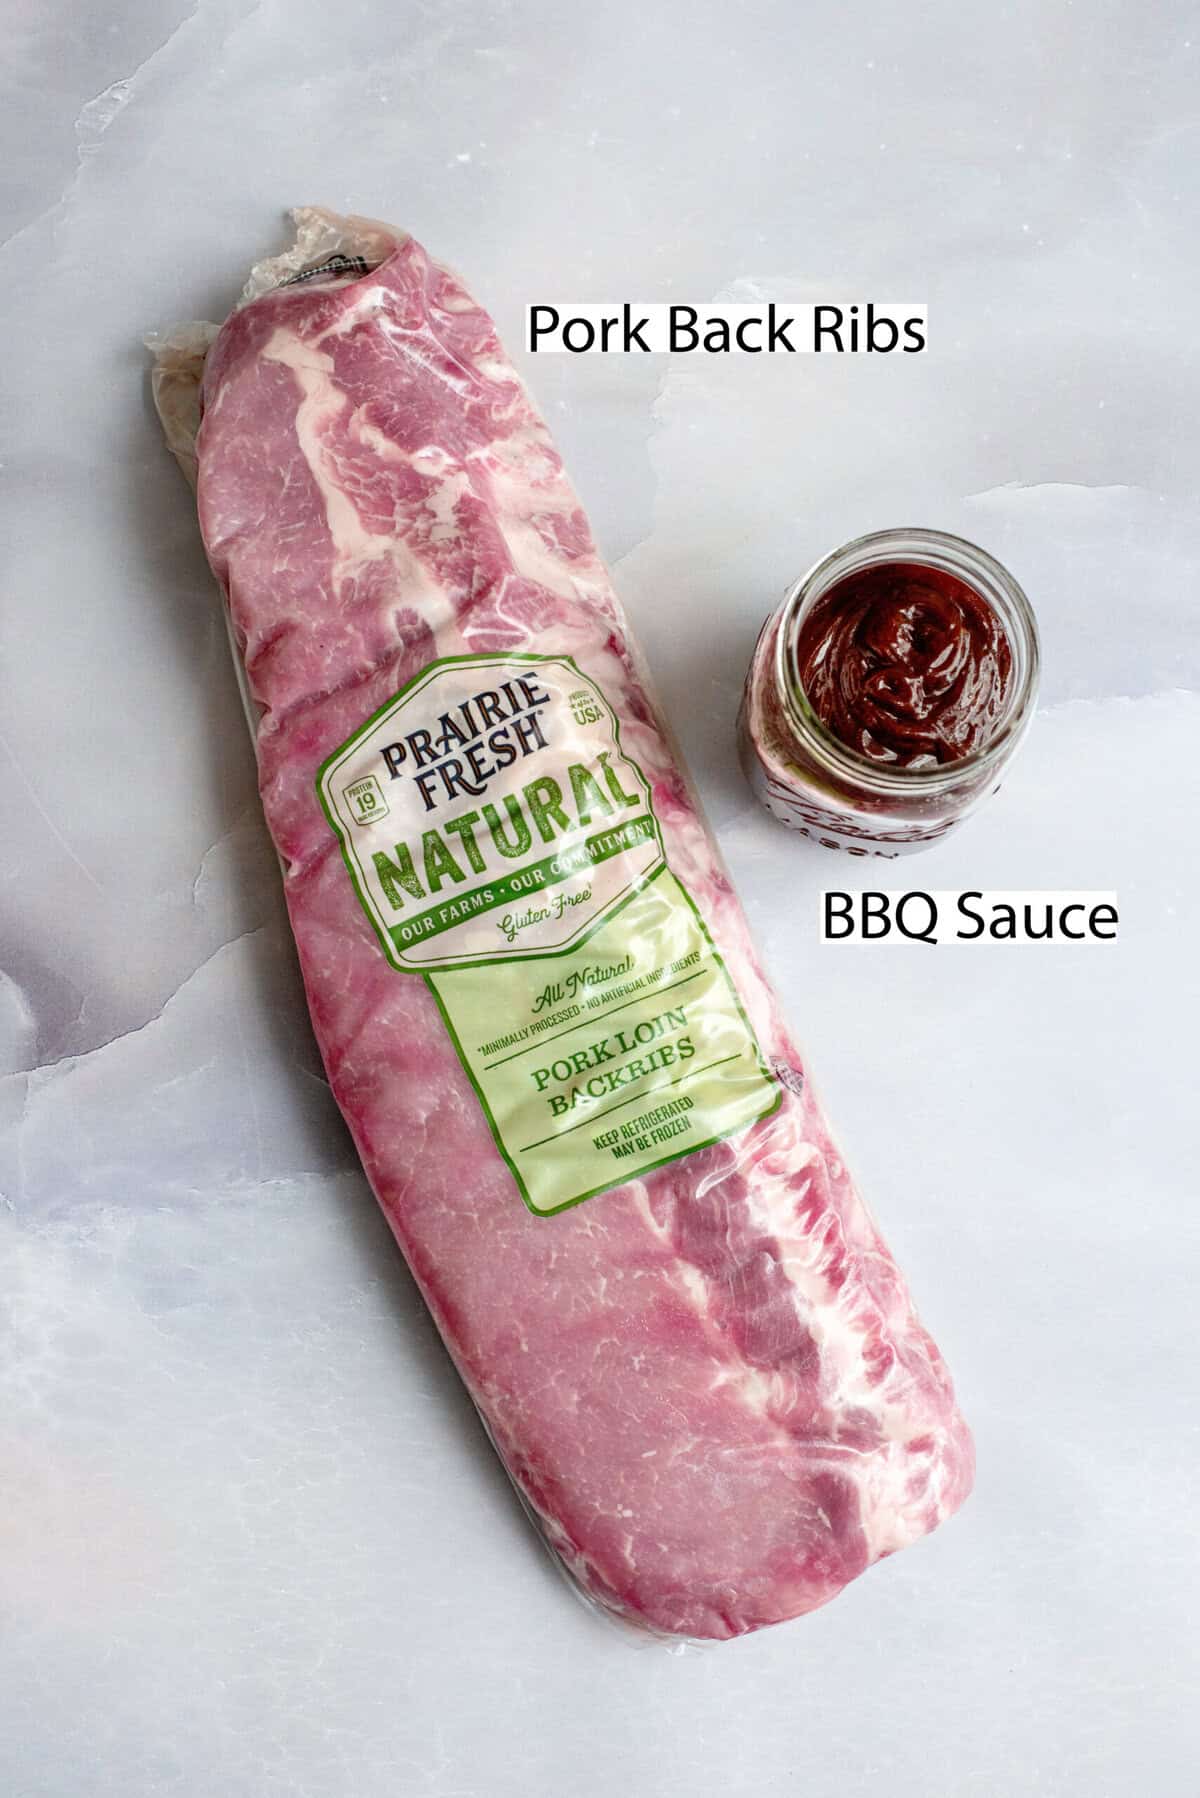
- A rack of baby back ribs (or spare ribs)
- Your favorite barbecue sauce (I love this easy homemade BBQ sauce)
- A simple seasoning blend
The Secret Steps to Perfect Ribs
- Remove the Membrane. This is my secret to ultra-tender ribs. I flip the ribs over and use a knife to loosen that thin membrane on the back. Then, I grab it with a paper towel and pull. It should come right off in one piece.
- Season Generously. I believe a good dry rub makes all the difference. You can use your favorite store-bought BBQ rub, or I sometimes make a simple one with salt, pepper, garlic powder, smoked paprika, and brown sugar for that perfect sweet and smoky balance!
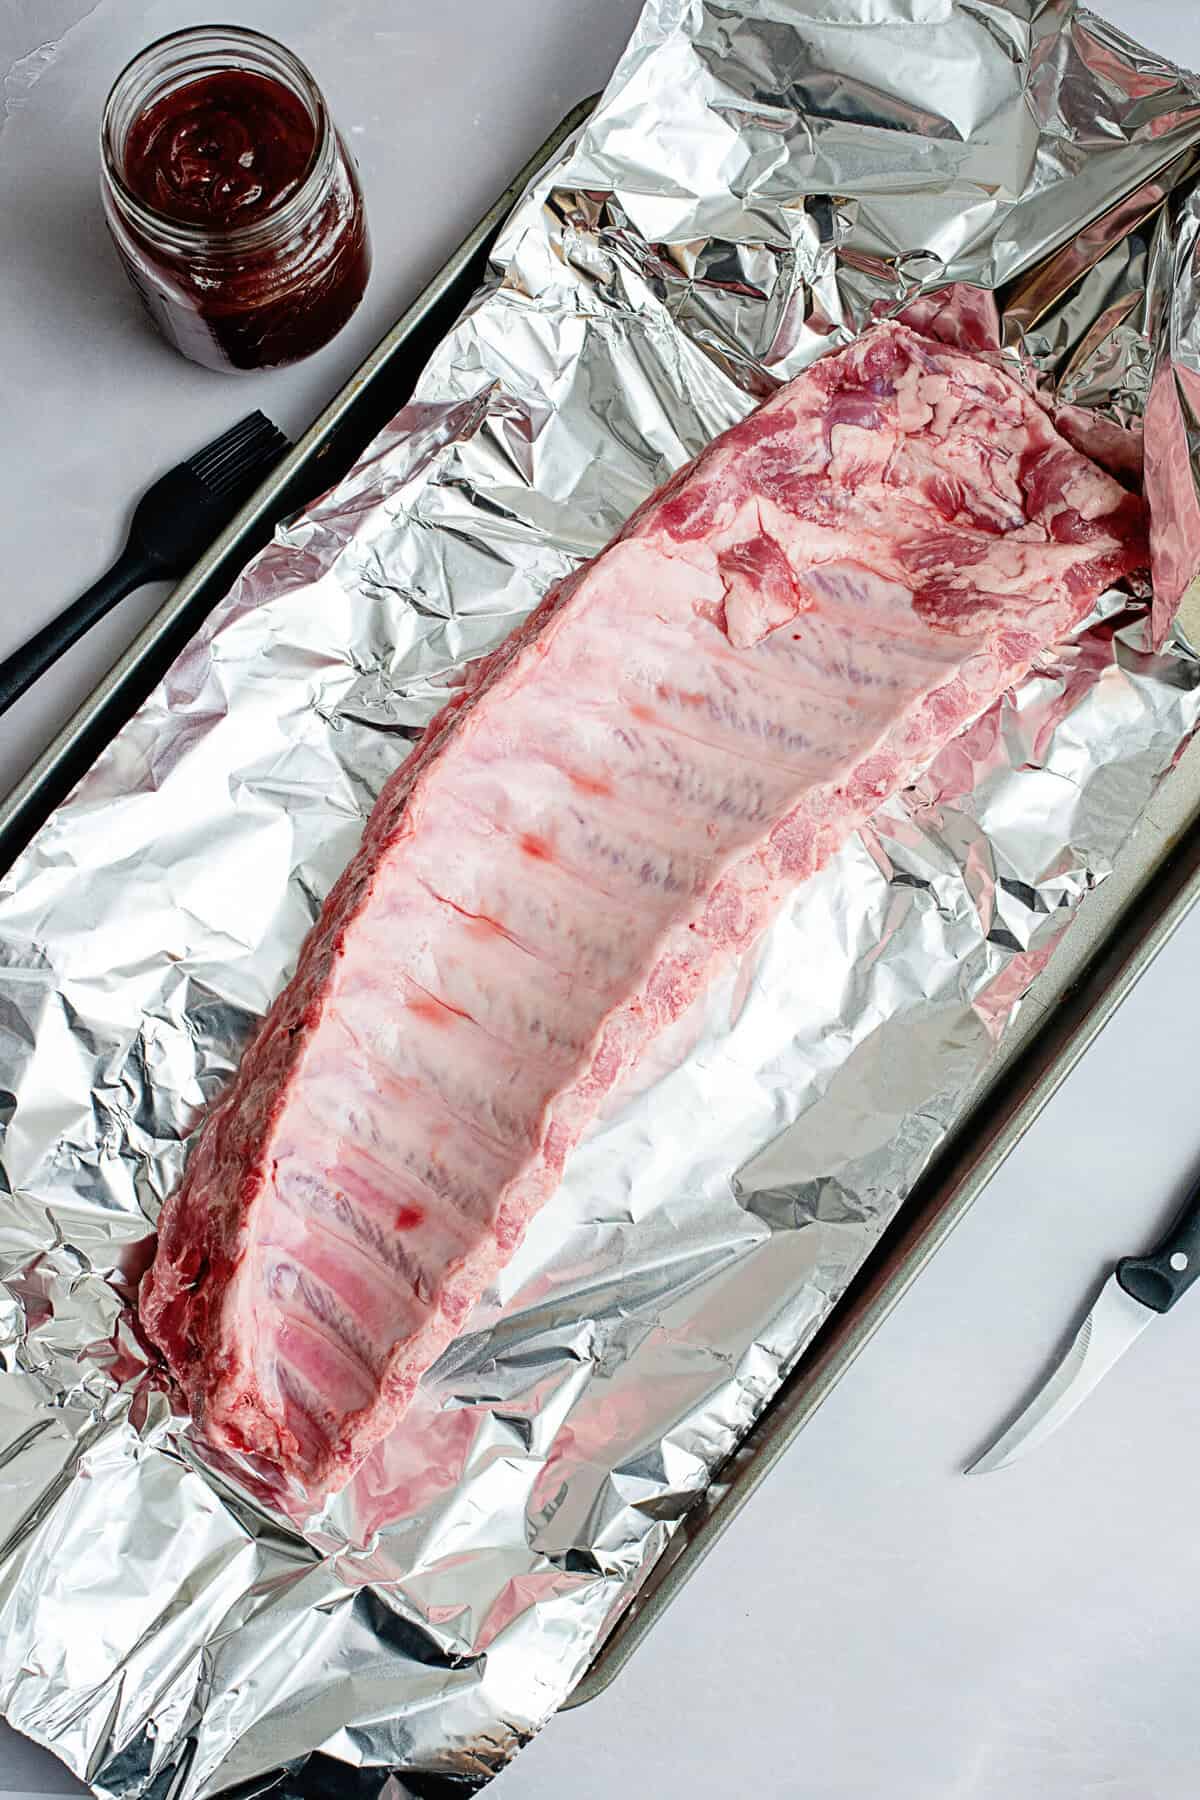
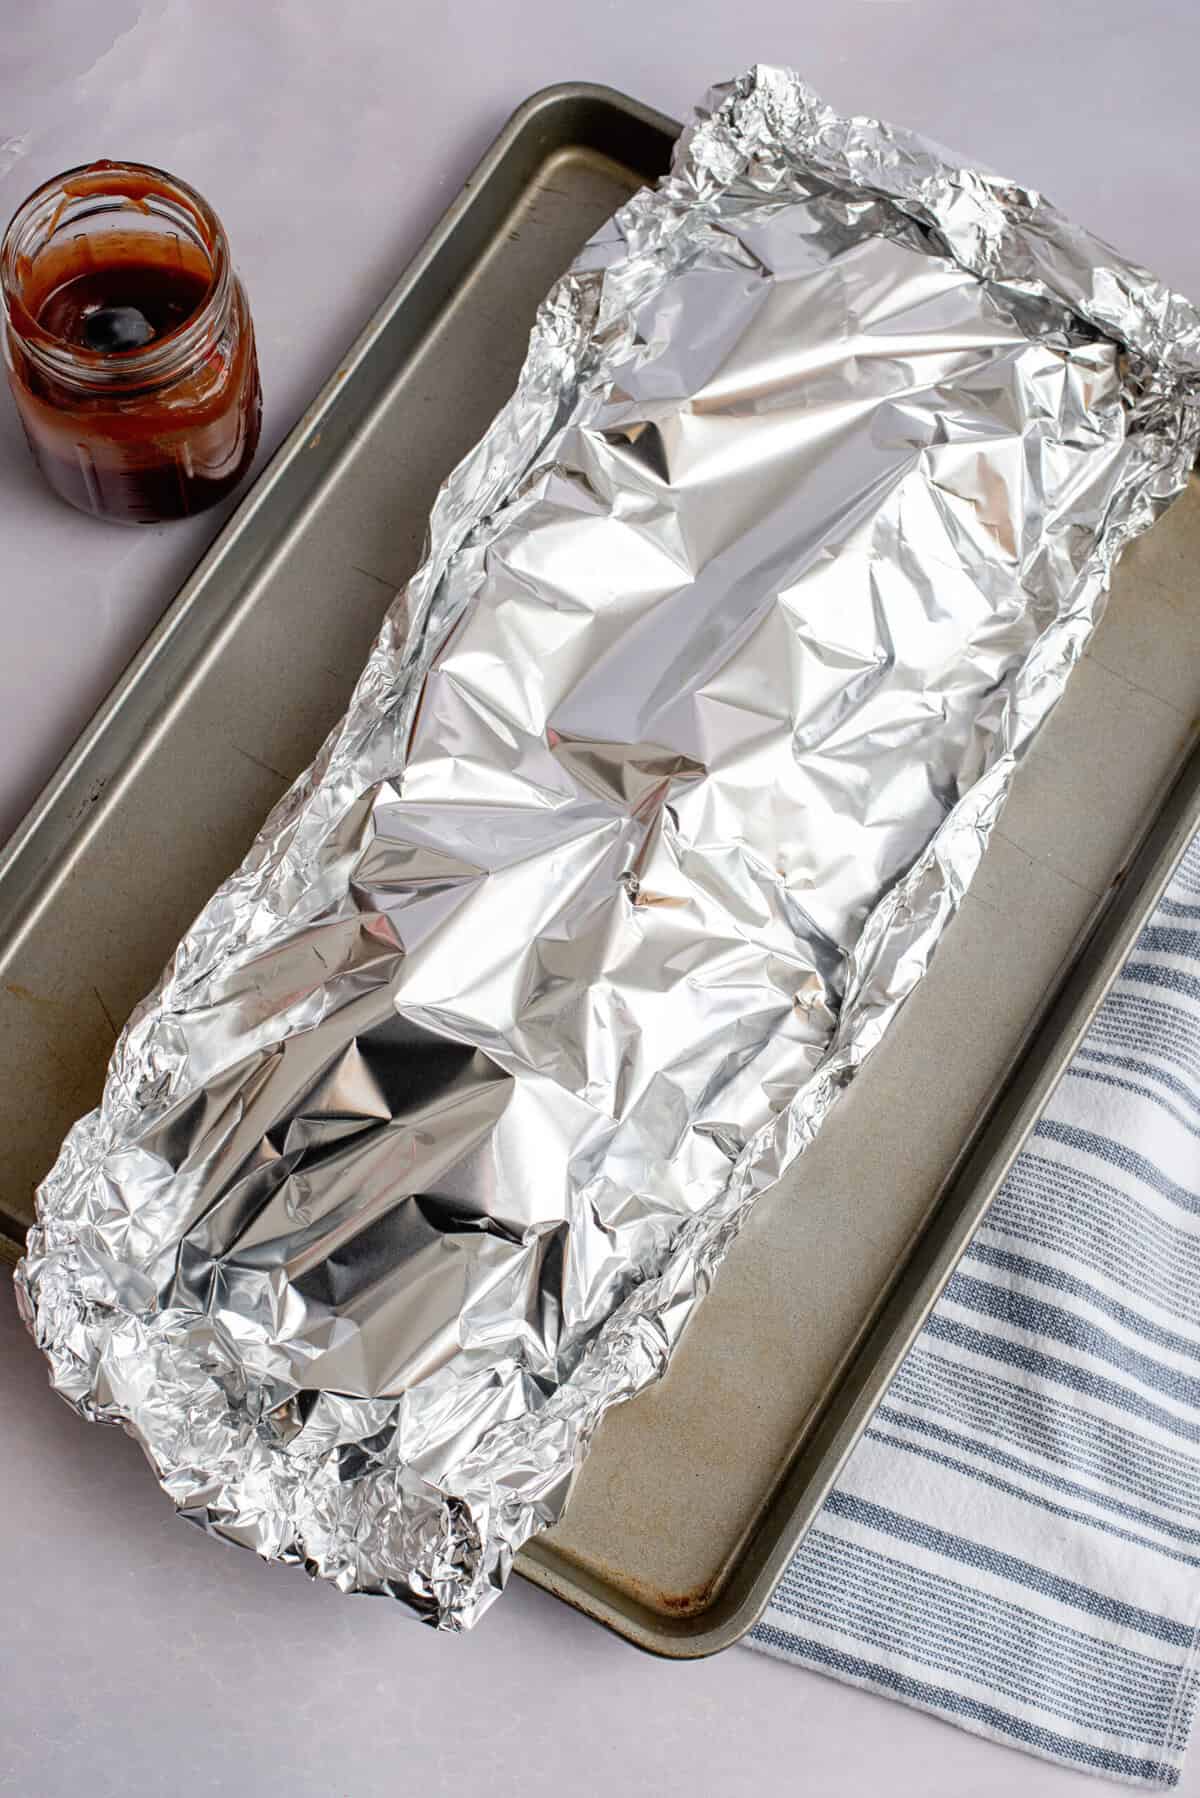
- Wrap and Bake Low & Slow. I place my ribs on a foil-lined baking sheet, cover them tightly with more foil, and bake them at 275°F for 2.5 to 3 hours. This slow-cooking method is what I use to lock in moisture and make the ribs super tender.
- Sauce and Broil for a Sticky Finish. Once the ribs are done baking, I brush them with a generous layer of BBQ sauce. Then I’ll broil them for a few minutes until the sauce gets caramelized and sticky. Sometimes, I’ll even throw them on a hot grill for 5 minutes if I want a little extra char.
How to Make the Best Baby Back Ribs in the Oven
1. Remove the Membrane
First, preheat your oven to 300°F. Then lay a long sheet of foil on a baking sheet and place your rack of ribs right in the center.
Take your knife and make a small slice into the membrane (that’s the thin, white layer covering the bone side of the ribs). Once you’ve loosened it a bit, you should be able to grab it with your hands and pull it right off.

Pro Tip: If there’s a little membrane leftover, don’t worry about it. As long as you remove the main layer, you’re good to go. If it doesn’t come off in one clean piece, just use a paper towel to grip and pull off any remaining bits. A butter knife can help loosen stubborn areas.
2. Wrap in Foil
Generously rub on your seasoning blend. Then brush with BBQ sauce on both sides. Then wrap it all up really well (don’t be skimpy on the tin foil here!). Double-check to make sure no air can get in.

3. Bake
Pop your ribs into the oven and let them bake for 2 hours.
When done, carefully take them out and open the foil. Give the top a good slather of the remaining BBQ sauce.
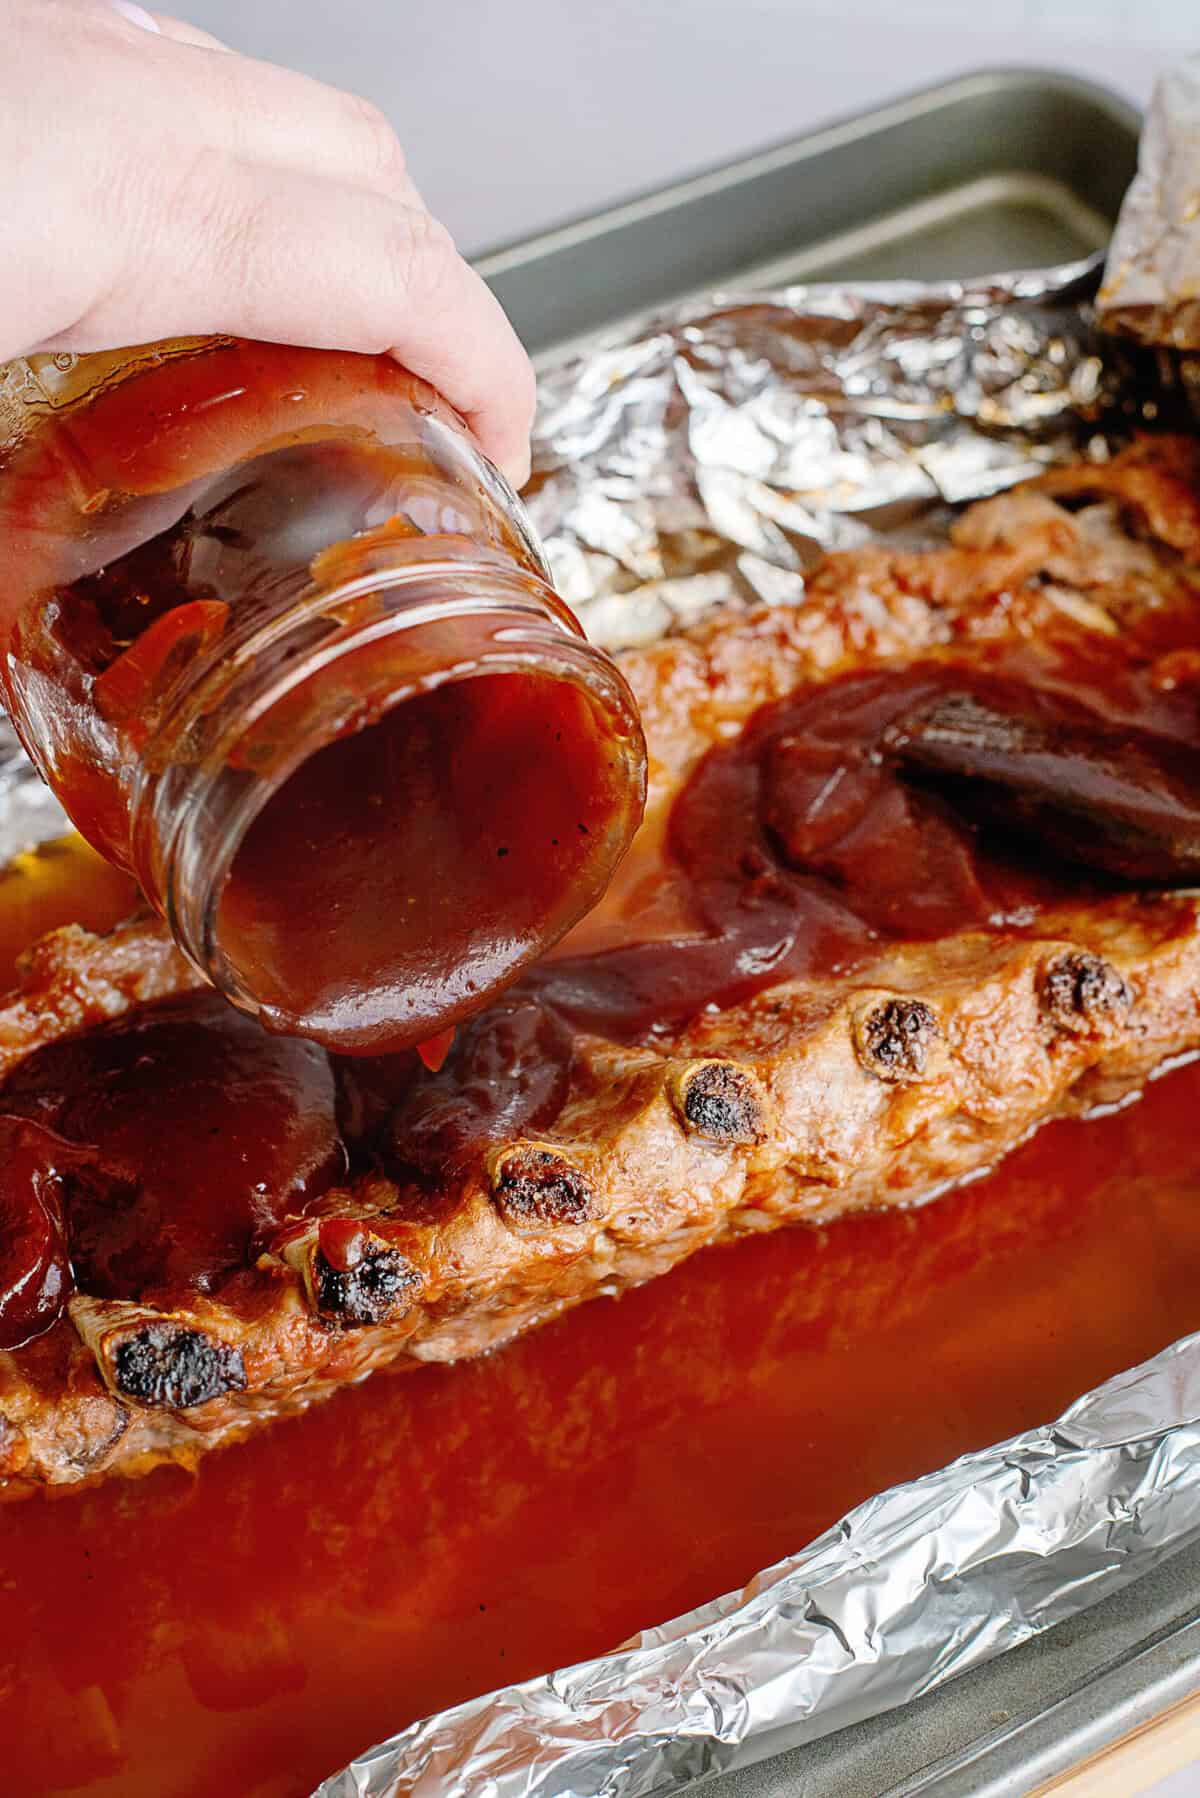

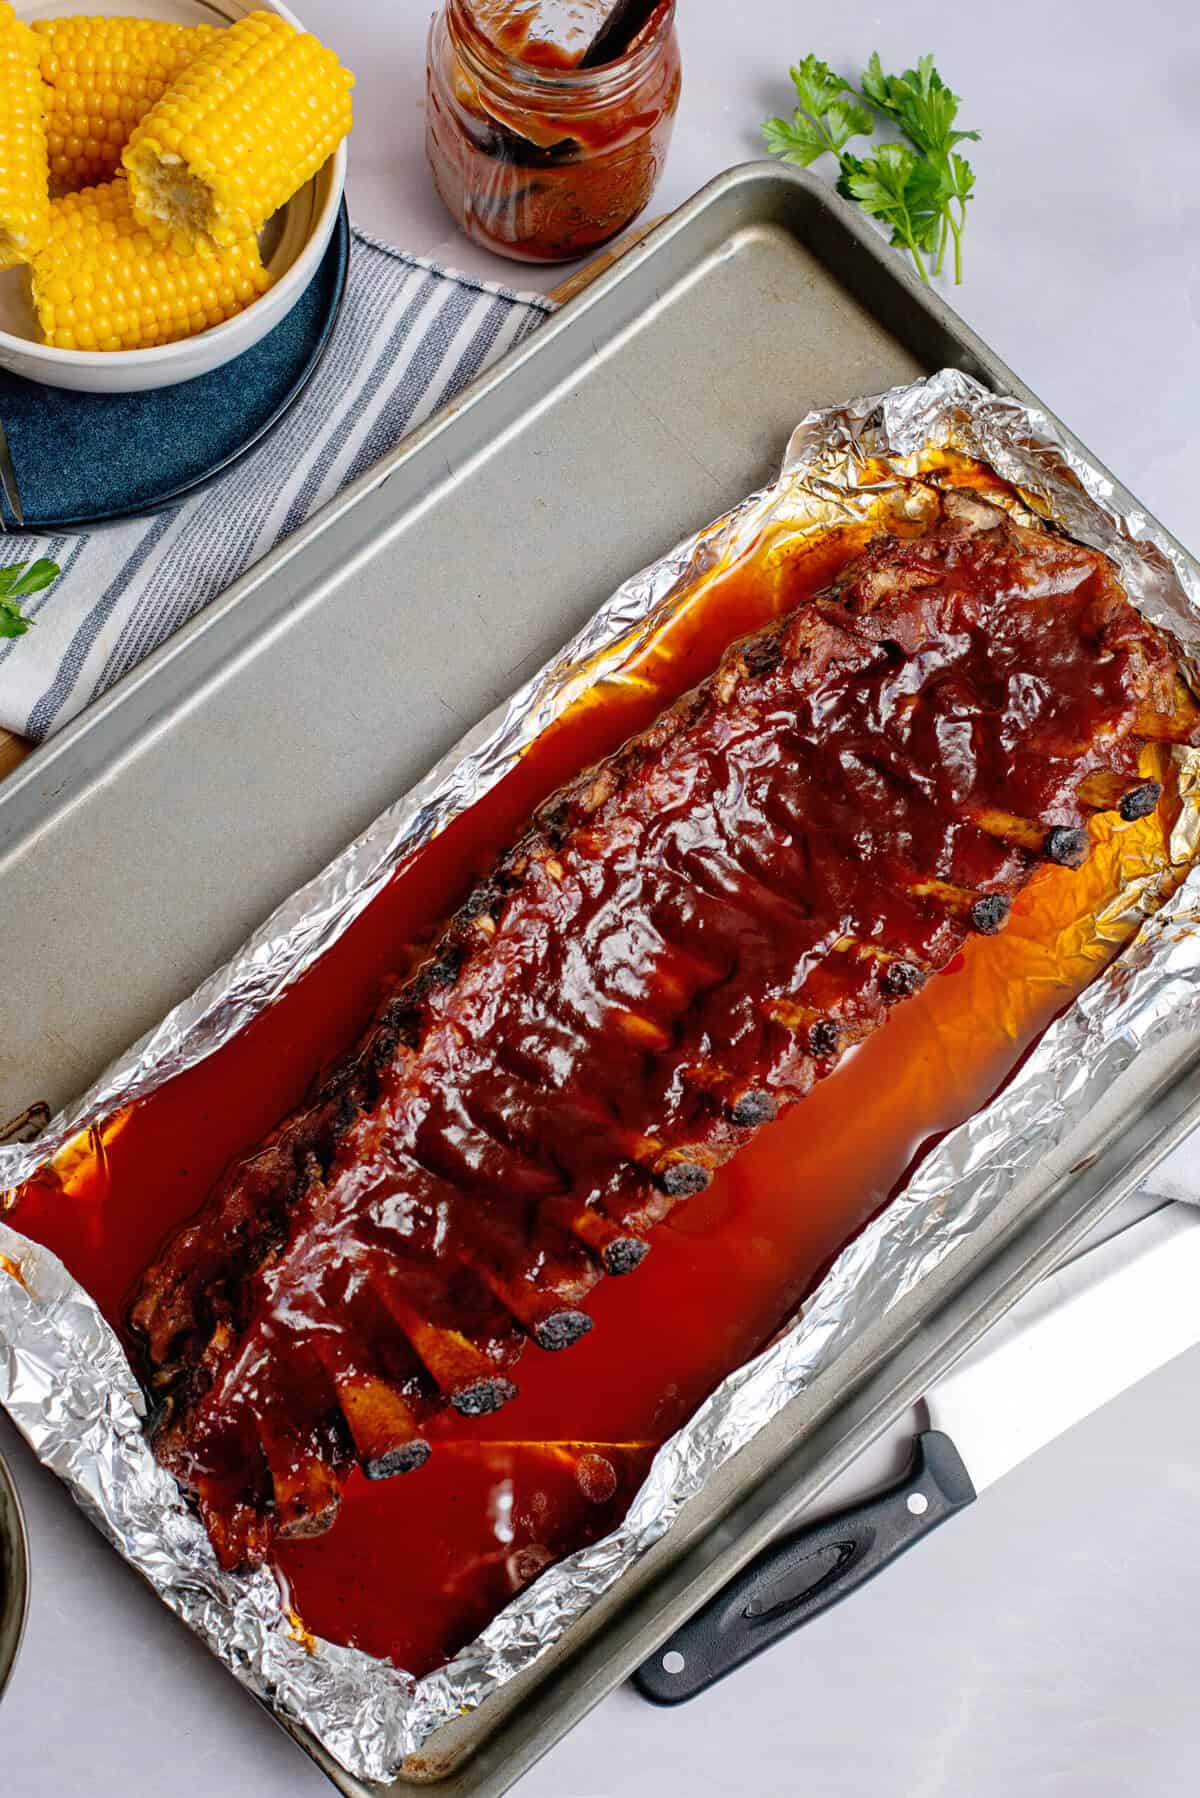
Then put them back in the oven, leaving the foil open this time, for another hour or until that sauce gets wonderfully thick and bubbly.
Now all that’s left to do is let them rest for a few minutes and serve!
Oh goodness, this smells so good. Gotta love some sticky pork ribs!
Storage & Reheating
Store leftover ribs in an airtight container in the fridge for up to 3 days. To reheat, place them in at 300°F oven or air fryer until warm, then reheat through. Adding a little extra BBQ sauce helps keep them moist.
For longer storage, freeze ribs for up to 3 months. Wrap them tightly in foil and place them in a freezer-safe bag or container. When ready to eat, thaw overnight in the fridge, then reheat as above.

Baby Back Ribs in the Oven FAQs
When it comes to side dishes for these easy oven-baked ribs, you can always count on the classics. I love to pair them with a creamy, baked Velveeta mac and cheese. Some simple but delicious craving beans are always a hit, too. And for a little somethin’ extra comforting, a side of Crock Pot creamed corn and a skillet of deep south buttermilk cornbread will round out the meal just perfectly!
Look for ribs with “back” in the name. Baby back ribs or pork loin back ribs are the best options. These come from the upper part of the ribcage and have more meat and less bone, making them ideal for tender, juicy oven-baked ribs.
Spare ribs, on the other hand, come from the lower ribcage and have more bone than meat. While they can still be delicious, they take longer to cook and may not turn out as tender using this method.
When it comes to ribs, I always say low and slow is the way to go. I find that baking them at 300°F for about 2 to 3 hours makes the meat tender and juicy. If I have some extra time on my hands, I’ll even bake them at 275°F for 3 to 3.5 hours. It gives them an amazing melt-in-your-mouth texture.
If you loved these ribs as much as my family does, I’d be so grateful for a star rating and a comment telling me all about it!

Ingredients
- 1 rack pork back ribs
- 1 jar BBQ sauce
- Seasoning blend I like to use a mix of salt, pepper, garlic powder, smoked paprika, and brown sugar
Instructions
- Preheat the oven to 300℉ and line a baking sheet with aluminum foil. Place the rack of ribs on the center of the foil.1 rack pork back ribs
- Using a knife, slice into the membrane on the back of the ribs (the white part) and use your hand to pull it off.1 rack pork back ribs
- Generously rub on your seasoning blend. Then brush the ribs with BBQ sauce on both sides. Wrap well in foil to seal.1 rack pork back ribs, 1 jar BBQ sauce, Seasoning blend
- Bake for 2 hours.
- Remove from oven and open the foil. Baste top with remaining BBQ sauce and place back in the oven, with the foil still open, for another hour, or until the sauce is nice and thick.1 jar BBQ sauce
Notes
- Remove the Membrane. This is my secret to ultra-tender ribs. I flip the ribs over and use a knife to loosen that thin membrane on the back. Then, I grab it with a paper towel and pull. It should come right off in one piece.
- Season Generously. I believe a good dry rub makes all the difference. You can use your favorite store-bought BBQ rub, or I sometimes make a simple one with salt, pepper, garlic powder, smoked paprika, and brown sugar for that perfect sweet and smoky balance!
- Wrap and Bake Low & Slow. I place my ribs on a foil-lined baking sheet, cover them tightly with more foil, and bake them at 275°F for 2.5 to 3 hours. This slow-cooking method is what I use to lock in moisture and make the ribs super tender.
- Sauce and Broil for a Sticky Finish. Once the ribs are done baking, I brush them with a generous layer of BBQ sauce. Then I’ll broil them for a few minutes until the sauce gets caramelized and sticky. Sometimes, I’ll even throw them on a hot grill for 5 minutes if I want a little extra char.
Danny is so right when he recommends using a paper towel to grasp the silver skin with. I would add start at the narrow or small end of the rib and peel toward the large/big end. For some reason the skin remains intact and is easier to peel in this direction.
That’s the same receipt that I use and have never had a failure. Here in Kansas City it,s OK to get sauce all over your fingers but we only wipe our mouths not our fingers, we lick our fingers.
I’ve been doing it this way for many years — except I throw them on the grill for a couple minutes on each side, just to get those grill marks…..then wrap them and put them in the oven for hours. This is so great when you’re having company for dinner and you don’t want to be in the kitchen cooking while everyone is having fun. Make some potato salad and some baked beans ahead of time and you’re done.
Christy, the easiest way to remove the membrain or “silverskin” from the back of ribs or other meats is to pick at a corner until you have enough to get between your finger and thumb. Now, use an old towel or a paper towel to grab the skin and pull. So much easier than using bare fingers.
Danny is exactly right about using a a towel, paper or other material. One additional tip for all is always begin at the narrow or small end of the rib and work toward the large/big end. The silver skin peels so much easier in that direction.
Thank you for the tip Danny!!!!
I use a butter knife to start the skin on the back. Then pull it right off. Easier to start that way.
Love the article. Will say I changed one step. After two hours, I opened up the foil. Basted heavily and transferred them to the BBQ pit. Cooked for about an hour more on the pit at 300 degrees. Awesome. Think I will start all my meat in the oven first.
I am so glad you liked them Britt!
Here it is April 29, 2014. That’s 3 years and 2 days after you posted this on a day that Alabama was being hit by tornadoes. Yesterday and today your great state has been besieged with tornadoes once again. I hope that you and yours are safe and I will offer up a prayer asking for Gods protection and love to all in Bama while I am preparing these tasty ribs for dinner. Take care
Thank you so much for your prayers Annette!! We are all safe and are so thankful for prayer warriors such as yourself! Hope you enjoyed the ribs!!
I plan on cooking these ribs this weekend. I found, what sounds like a real yummy dry rub. I plan on applying the dry rub, and putting them in the fridge over night. I will then cook the ribs according to your recipe. What are your thoughts on using both a dry rub and sauce? Also, I will be cooking 6 racks; will the cooking time be the same?
I think that sounds like a fabulous idea Patty!! Yes, the cooking time would be about the same, you may want to add a little more time…like maybe 15 minutes.