
Fresh Fried Corn (Shucking, Silking, Cooking, and Freezing)
An easy but nonetheless scrumptious Southern side dish, learn how to make buttery fresh fried corn from start to finish.

A Quick Look At The Recipe
- Recipe Name: Fresh Fried Corn
- Serves: 4
- Main Ingredients: ears of corn, margarine or unsalted butter, salt and pepper, water, bacon grease
- Why You'll Love It: An easy but nonetheless scrumptious Southern side dish, learn how to make buttery fresh fried corn from start to finish.
Lay out a table with every dish imaginable, absolutely everything under the sun, and if there is fresh fried corn on that table, you’ll know where to find me.
There is nothing in this world like the flavor of fresh corn, shucked and cut off the cob and cooked up in a skillet. No matter how hard companies may try (and I do appreciate their efforts), no frozen corn kernels or canned corn can even come close. The taste is night and day, as if it were two different vegetables entirely.
When we were little, shucking corn was a family affair. Mama would put a few buckets on the front porch and we’d each get our own brush and then everyone would set to work. We’d shuck a few bushels (at least) and she’d set to cutting it off the cob and cooking it up for everyone. I remember being able to have all the corn we wanted at dinner but it seems now that I’m grown and have my own family, I can never have such bounty. No matter how much I make, we always want more.
Today I’m going to talk you through how I make my fresh fried corn recipe from start to finish. We’re going to shuck them together and cook them together. It’s a Southern Plate family affair! My Southern fried corn is so simple but so good. All you need is margarine, salt and pepper, and a skillet. I’ve included some serving suggestions below because this side dish goes perfectly with so many Southern dishes.
Alright, grab your corn on a cob and let’s go!

Recipe Ingredients
- Fresh corn
- A stiff brush (a dish brush works fine)
- Margarine or unsalted butter
- Salt
- Black pepper
- Bacon grease
- Water
How to Make Fresh Fried Corn

Shucking the corn
First, peel back the husks on your ear of corn.

Like so.

Remove what silks you can with your hand.

Then take hold of all of the husks at the base and…

Break it off.
If kids are watching, you should make a big GRRR sound when you do this and act like you are straining really hard. It will impress them, honest.

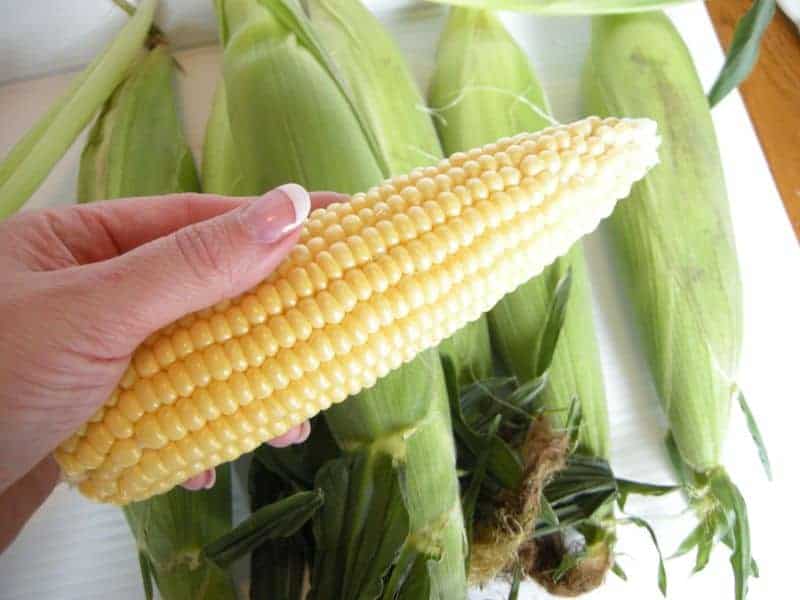
Here is our almost ready ear of corn. There are a few silks left on it that we need to get at though.

Silking the corn
If you take your stiff brush and just brush against the directions of the silks, that should do the trick. You may have to grab a few and pull them off.
If a few end up in your corn, the world won’t end. In fact, you won’t really notice because once you taste this, I doubt you’ll find time to draw breath again until you are done devouring as much as you can possibly fit onto your plate. But maybe that’s just me. 🙂

Here is our corn. It wants to be cooked. It wants us to eat it. And it wants to make us happy.
Good corn.
I am using eight ears and it was enough for four of us to have generous helpings. However, I could have used 16 ears and we would have eaten all of that, too. I know I keep going on and on about that but I’m stressing a point here.
Did I mention how much I love fresh fried corn?

Cut away the corn
Take each ear and stand it up like so. Run your knife blade down the side to cut the kernels off.
HOWEVER, you don’t want to cut them off right at the ear, you want to leave a bit of the kernel bottom on the ear for the scrapings. The scrapings are what is going to give our fried corn its body. So basically, try to cut about 3/4 of the kernel off but leave the rest.
Mama likes to place her ear of corn in the center of an angel food cake pan and then cut the kernels off and scrape it. The center of the pan helps hold the ear and the kernels and scrapings fall right into the pan below. I would do this if I ever actually used an angel food cake pan enough that I didn’t have to go hunt it down when I wanted to shuck corn. Angel food pan = tube pan.

Kernels cut off, ready to scrape!
See how all of the little holes in the cob are filled? In the next picture, you’ll know what I’m talking about better.

Take the blade of your knife and scrape down the corn cob. See how the holes are empty now?
We’ve gotten all of that good pulp out of there.

If you have stuff all over your hands as I do, you’ve done well!

Here is our corn all ready to go!
I know this smells good but you don’t want to eat it now. This is due to reasons that I do not feel the need to document on a food blog. Trust me on this.
Cook
Corn
First.

Cooking the fresh fried corn
Now, in a large skillet, put about two tablespoons of butter or margarine and a tablespoon or so of bacon drippings.

Add your corn and about a 1/2 cup of water.
How much water you end up needing is really dependent on your corn. Some corn will be starchier and need more, some corn will be thin and actually need thickening. For my corn here, I actually ended up needing a cup of water. If your corn ends up looking a little thin, you can stir in a tablespoon of corn starch or flour in with two or three tablespoons of water (mix it up pretty well) and then add that to your corn.

Salt and pepper to taste.
This is always a very personal thing. I am using about 1/2 tsp of pepper but if you prefer more peppery corn, by all means, add more!

I added about 1/2 tsp of salt too. These are good starting points but most people add more.
In general, if you are preparing a meal for guests you should always under-season and then allow them to season their food to their personal taste.

Bring that to a bit of a boil and then lower the temperature of the stove eye to allow it to just simmer.
Stir it often and cook for about 30 minutes.

Yum, YUM, YUM!!
I could just dive into a vat of this, I swear.
Storage
- Store the cooked corn leftovers in an airtight container in the fridge for up to 5 days. Quickly reheat in the microwave or on the stovetop.
- If you want to freeze for later, just cook about halfway through and then cool and place in freezer bags or containers and label. Thaw when ready to use and cook for half an hour just as described above. It will last up to 8 months in the freezer.
Recipe Notes
- Here are some variations on this fresh fried corn recipe:
- Add 1/2 a yellow onion (finely chopped) and 1/2 a bell pepper (finely chopped) to the skillet 2 minutes before you add the corn.
- For heat, add a finely chopped jalapeno or chipotle pepper. Another option is to sprinkle the dish with a dash of cayenne pepper or crushed red pepper flakes.
- For added flavor, sprinkle your corn with some Cajun or Creole seasoning (I love Tony Chachere’s).
- Before serving, sprinkle with freshly chopped parsley, basil, green onion, or chives.
- For extra sweetness, add a spoonful of granulated sugar (adjust according to taste).
- Enhance the bacon flavor and add cooked and crumbled bacon bits to your skillet fried corn.
Recipe FAQs
What do you serve with fresh fried corn?
This is a versatile Southern side dish, so you can serve it with so many main meals:
- Burgers (check out my meatloaf burgers).
- Pulled pork
- Pork chops with velvet cream sauce
- Southern fried chicken
- Grilled chicken tenders
- Crockpot beef ribs
- Southern fried catfish
Can you use frozen corn or canned corn instead?
While this recipe definitely tastes best with fresh corn, you can use frozen corn or canned corn if you’re in a pinch. Just make sure it’s thawed, well-drained, and patted dry before adding it to the skillet. You may also need to adjust seasonings according to taste.
You may also want to check out these corn recipes:
Superfast Corn Succotash Recipe
Ingredients
- 8 fresh ears of corn
- margarine or unsalted butter
- salt and pepper
- water
- bacon grease
Instructions
- Shuck and remove silks from the corn. Cut kernels off the cob with a sharp knife, leaving about 1/4 of the kernel. Scrape cobs clean with the blade of the knife.8 fresh ears of corn
- Place about 3 tablespoons of butter and a tablespoon or so of bacon grease in a skillet. Add corn and corn pulp. Season to taste with salt and pepper. Add 1/2 cup of water (more if needed).margarine or unsalted butter, salt and pepper, water, bacon grease
- Bring to a slight boil, stirring constantly. Reduce heat to simmer and continue cooking and stirring for about 30 minutes.
- If you are wanting to freeze for later, just cook about halfway through and then cool and place in freezer bags or containers and label. Thaw when ready to use and cook for half an hour just as described above.
Nutrition
")
Dang y’all are still in school?? This was our first week out! I guess when I go back the first week of August, y’all will still be enjoying summer. Love your blog as always!
I use to shuck the way you showed, until last year when my husband was watching and he goes why don’t you do that an easier way? Like how? I said. He walks over takes a large butcher knife and takes the corn cuts off the bottom (part you normally break off last) and then slides the corn out….we’ve been together almost 17yrs and now he shows me this???
lol! Well leave it to a man to simplify things for a change, lol. (I say that in good humor, as most of the men in my life do the opposite). I’ve tried that way and it didn’t work as well for me. Maybe you just have a better teacher! I’ll concede that 🙂
I make my own bacon juice, then add pimento for a few minutes until finished. I also leave in a little bacon bits. Soooooo good, thanks for the recipe.
So glad you liked it Bill!!
Never had enough corn to make this, but have had parched corn (dried and then heated in a skillet) (dried on the cob not cut off and dried) and had hominy made from the dried corn (not parched) but momma didn’t make stuff that needed to be canned in a pressure canner, her old one was dicey to use at the best of times, and until we got a freezer when I was 8 she never had the luxury to freeze, and by then she was so ill, the garden went downhill and we never had corn for anything after that, it was very expensive here as its hard to grow good corn way up here in the north. I live in Northeast BC Canada, and we have a short season, so getting the stuff planted and grown large enough can be fun. I have friends who have a market garden, so will give this a try this fall, maybe even put some in the freezer.
I used to cut the corn off with a knife until last summer. I pulled out my mandolin and it was quick and so easy! Just be careful about those fingers!
Who plays the mandolin while you’re fixing corn, lol? I have an upright bass, but I can’t do both!
Great Idea, I shall try some at our next reptile party.
When someone writes an paragraph he/she retains the plan of a
user in his/her brain that how a user can know it. So that’s why this paragraph is outstdanding.
Thanks!