
Lela’s Fried Peach Pies The Ole Fashioned Way
If you’re yearning for an old fashioned fried pie like Granny used to make, you’ve come to the right place.
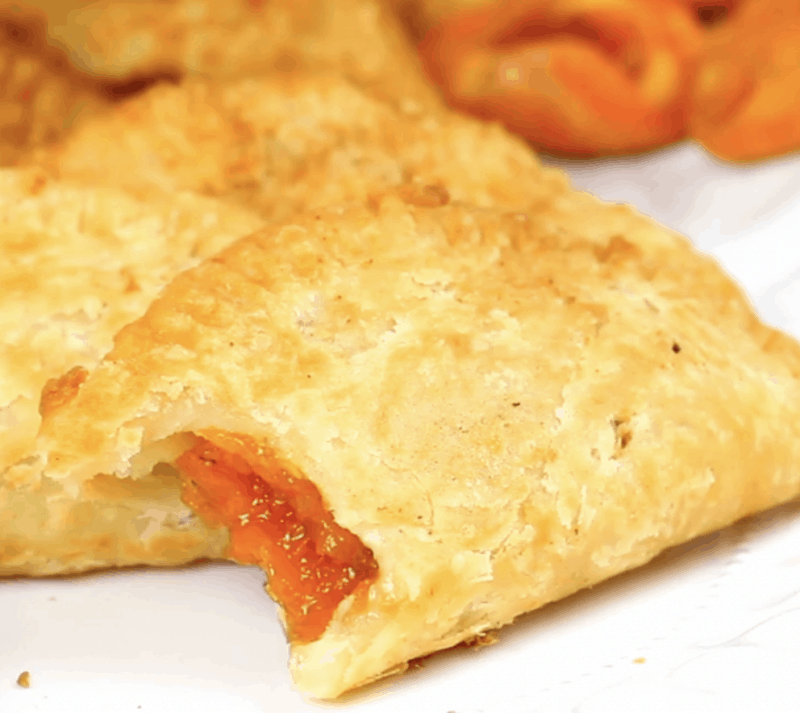
My Great Grandmother’s Fried Peach Pies!
These are my great grandmother’s pies. Lela loved to make fried pies and the only kind we ever remember her making was peach. Mama loved her peach pies and ate them all the time growing up but one day asked her to make her apple instead of her customary flavor. So Lela got all of the ingredients and made a plate full of apple pies just for Mama. She took one bite and realized, unless they were peach, they just weren’t her her granny’s.
Sweet Memories
I remember Lela standing in the kitchen humming as she fried these, placing the crispy treats on a Corelle plate next to the stove as she dipped more into the hot oil in her cast iron skillet. The entire house seemed to smell of peaches, an especially welcome treat in the middle of the winter!
Dried Fruit and Handmade Dough
There are many ways to make fried pies nowadays and many shortcuts, but the traditional southern fried pie requires dried fruit and handmade dough, usually a form of biscuit dough rather than real pie pastry. Today I’m bringing you the traditional method, which is pretty easy.
If you are in the mood for more pie check out some of our other recipes like Apple Pie, Chocolate Fried Pies, Frozen Turtle Pie, and Caramel Banana Pie (a.k.a Easy Banoffee Pie)
Recipe Ingredients You’ll need:
- Cooking oil
- Lemon juice
- Cinnamon
- Butter
- Sugar
- Dried fruit for the filling (I have used Sun Maid but you can even use you own dried fruit if you like)
As usual ingredient amounts and instructions are on the printable recipe card that you will see after the tutorial so keep scrolling.
For the dough
You’ll need these ingredients:
- Flour
- Shortening (I use coconut oil)
- Salt
- Milk
Helpful Kitchen Tools

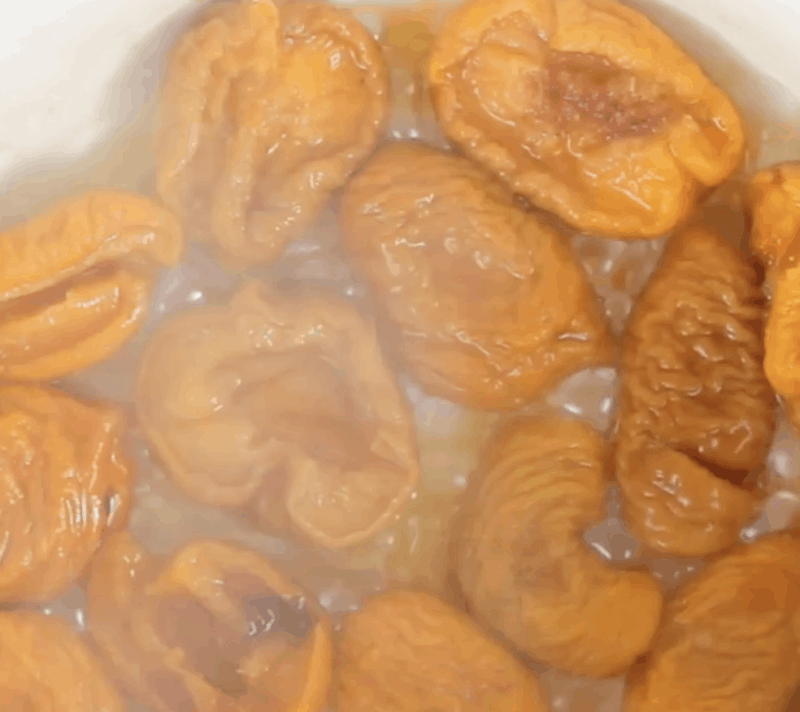
Lets talk dried fruit
Drying fruit was one of the least expensive methods of fruit preservation available to folks back in the day (still is, actually). Apples, peaches, apricots, and other fruits could be dried in the sun and put up, then reconstituted into delicious fried pies, sauces, and baked goods which were a welcome delicacy in the hard winter months.
How Did They Dry Fruit Back in The Day
There were all sorts of improvised ways of drying fruit. Some folks even dried fruit on their shingles! The hot rooftop and stiff breeze provided excellent conditions. They’d lay out the fruit on a piece of cloth or screen and cover with cheesecloth or another screen to keep the flies out. My great grandmother dried her fruit on sheets of tin with the pieces covered in cheesecloth. I asked Mama how they kept the ants off of it and she says she thinks the tin just got too hot for them. Hmm, that makes sense. Later on in her older years, when life was easier, she just took to buying her fruit from the grocer’s in bags such as these Sun Maid bags above.
You can use this recipe with any number of dried fruits. Peaches, apples, and apricots are the most common.
How To Make Fried Pies Step by Step

To begin with, place your dried fruit in a pot and cover with two cups of water.
Bring to a boil.

Bring that to a boil and then reduce heat and simmer until they are tender and soft. This will take about twenty minutes. To test, moosh one with a fork and see if it is able to mash up a bit, like a cooked potato. If so, you’re ready.
Apples will be a bit firmer than peaches but that’s okay.
Recipe Tip:
This bag was only six ounces of dried fruit but resist the urge to buy more because it will really go far!
I made ten pies out of this and ended up with about a cup of fruit leftover.
If you are using apples, you may find that your fruit needs about 1/2 cup more of water. There seem to be a lot more apples in that bag than there are peaches!

Turn off the heat and add butter, sugar, cinnamon and a wee bit of lemon juice.

Use a potato masher or a fork and moosh all of that up together.
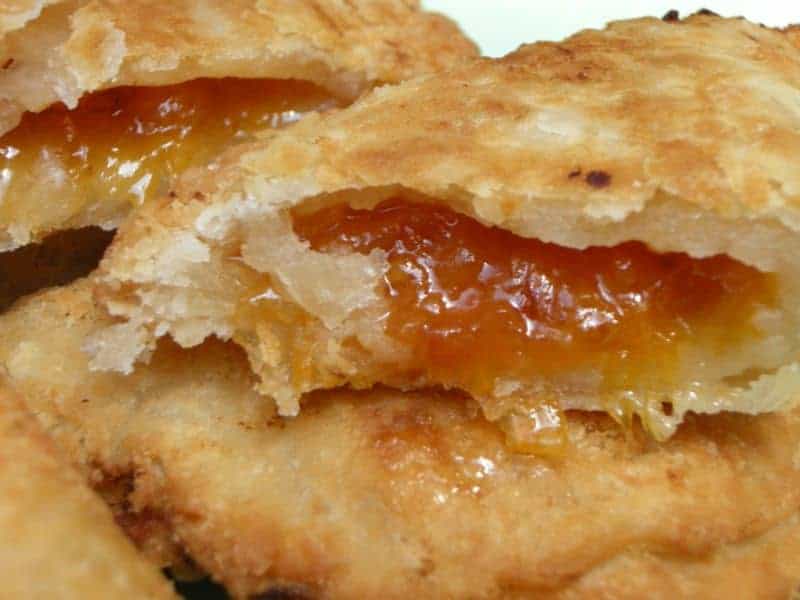
This is the consistency you’re going for. Aren’t pictures great?
This is kind of lumpy and saucy and it smells like my great grandmother is in the kitchen.
Now we make our dough…

You can do this while your fruit cooks or let your fruit set aside a bit after you are done with it and make your dough then.
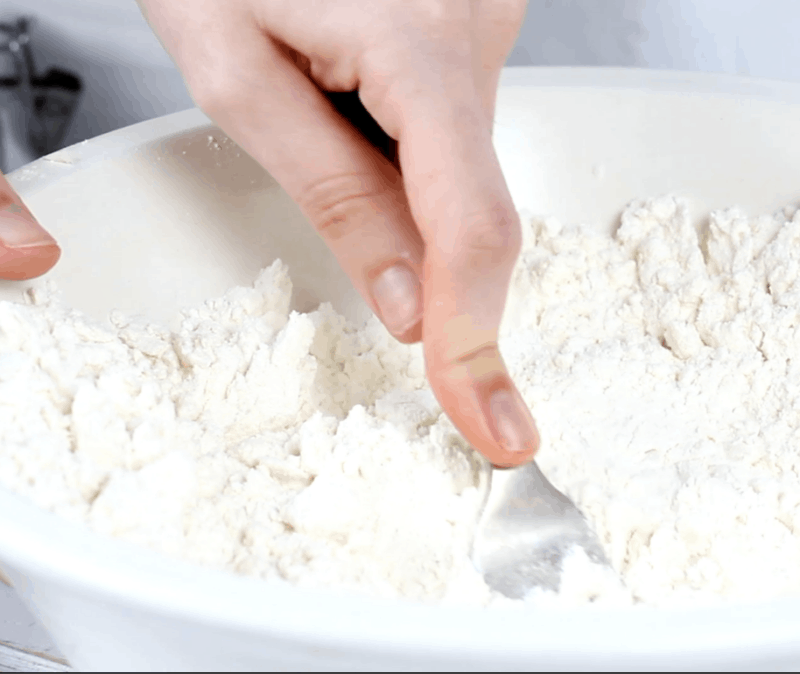
Place your flour in a bowl and add your salt.
Stir that up a bit.

Add shortening to the flour.

And cut it in.
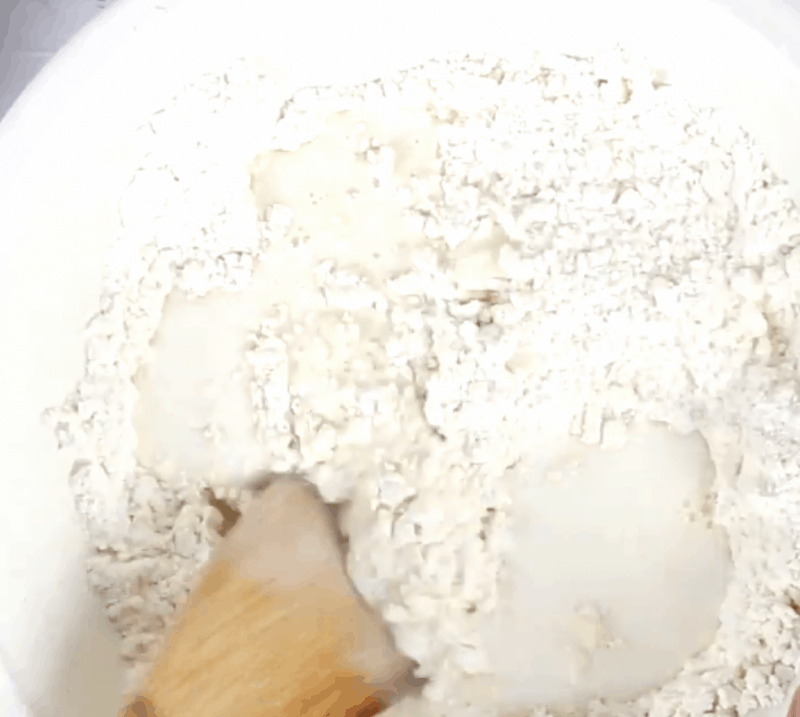
You just keep pressing down over and over with your fork and stirring it a bit and eventually it will all get incorporated together.
 It’ll look like this.
Everything I have read about how the consistency should look says it should look like peas. Does this look like peas to you? Me either. So we can let that pea thing go now, once and for all, ok? 😉
Now add in a little milk.

Stir that up a bit until it forms a dough like this.
If you need to, you can add a bit more milk but I would only add a teaspoon at a time, stirring it up after to see if that is enough. Dump that out onto a greased or floured surface and press it together to form a ball of dough.

Divide that into ten balls of dough.

Roll or pat that out into a five to six inch circle.
Recipe Tip:
If you want to be precise, you can lay a saucer upside down on it and cut around the edges to make a perfect circle.
Fortunately for me, I’ve never really had the urge to be precise…

Place about two tablespoons of filling in the center of each crust.

You can use your fingers or a pastry brush to put a little water around the edges so they’ll stick together when you fold it over.

Fold your pie over and press lightly around the edges to seal.

Use a fork to get those groovy grooves around the edges and complete the seal 🙂

Here’s a better shot.

Pour about an inch of oil into a medium to large sized skillet and allow to get hot.
Recipe TIP:
I put my oil on medium high heat while I am rolling out my dough and then reduce the heat to medium when I actually cook the pies.
I’m using a cast iron skillet, but you can use a regular one if you prefer. There is a great tutorial on how to season a cast iron skillet on Southern Plate, you can read it by clicking here.
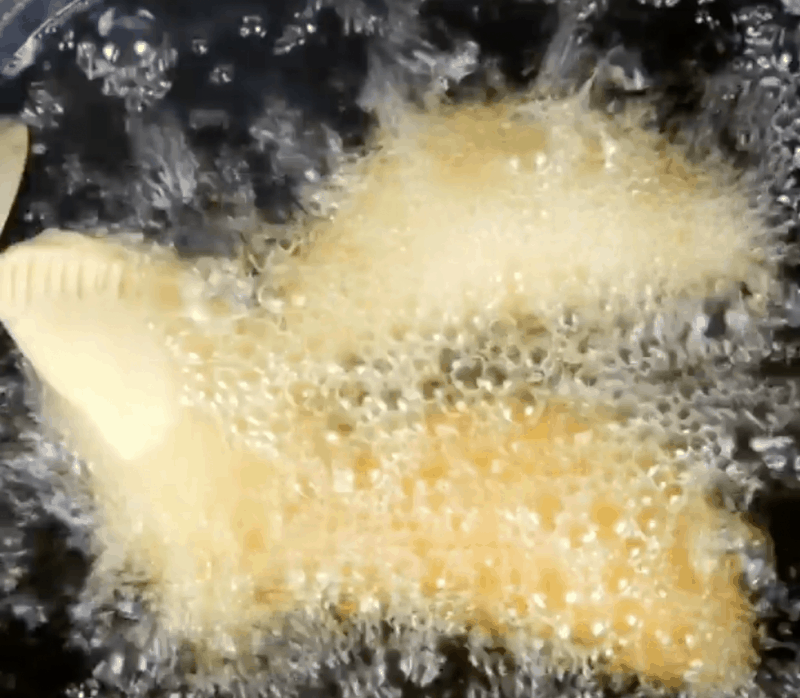
Place the peach pies in hot oil and cook until brown on both sides, turning once or twice to cook them evenly.
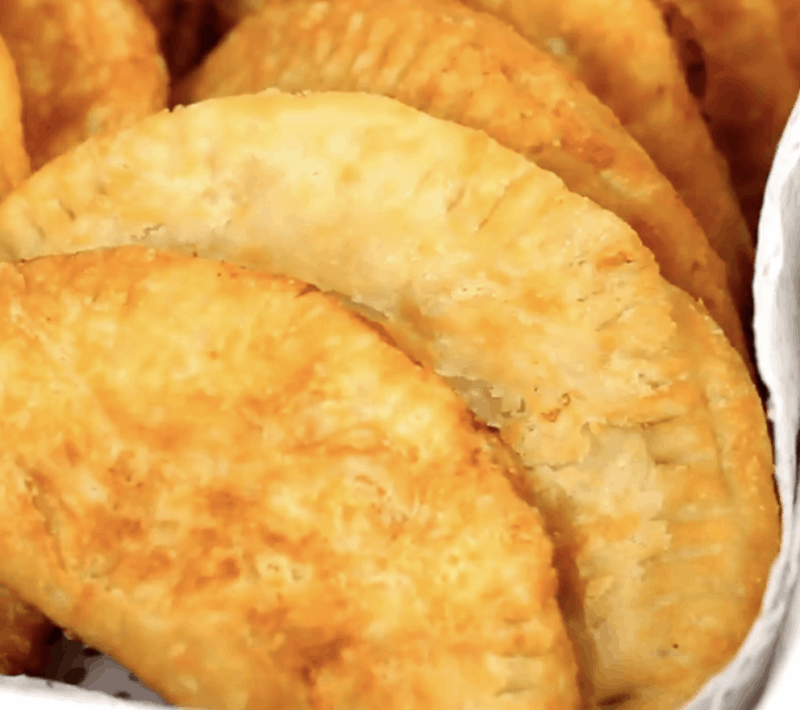
Place the fried peach pies on paper towel lined plate…

Smile, Lela is watching!

A Quick Look At The Recipe
- Recipe Name: Lela’s Fried Peach Pies
- Ready In: 35 minutes
- Serves: 4
- Main Ingredients: Filling, dried fruit, sugar, water, butter or margarine, lemon juice, cinnamon, Dough
- Why You'll Love It: My great grandmother, Lela, made the most amazing Fried Peach Pies. From scratch, using dried peaches. I even made these on the Today Show with Al Roker!
I just called my grandmother (Lela’s daughter) and said “Grandmama, I just made fried peach pies and they tasted just like Lela’s!” She said “Well now you’re getting good at cooking, aren’t you?”
~snickers~ Well I should hope so…
Ingredients
Filling
- 6-7 ounces dried fruit I used peaches, can use apples, apricots, or other dried fruit
- 1 cup sugar
- 2 cups water
- 1/4 cup butter or margarine
- 1 Tablespoon lemon juice optional, but I use it
- 1/2 teaspoon cinnamon optional, but I use it
Dough
- 2 Cups Flour
- 1 Tsp salt
- 1/2 Cup shortening
- 1/2 Cup of milk can add a little more if needed
Instructions
- Place dried fruit in a pot and add water. Bring to a boil and reduce heat to simmer until fruit is tender. Add other ingredients and mash together with a potato masher or fork. Set aside while dough is prepared.
- In medium bowl, place flour and salt. Stir together. Cut in shortening with a long tined fork. Add in milk and stir until dough sticks together. Divide into ten portions. Roll each portion out on a floured surface into a five or six inch circle. Place two tablespoons of filling in each. Wet the edges and fold over, crimping with a fork.
- Cook in oil which has been heated on medium heat, until browned on both sides, turning as needed. Remove to paper towel lined plate.
Nutrition
You may also enjoy these fried pie recipes:
Your attitude can make your life bitter, or better
Submitted by Southern Plate reader, Barb. Submit your quote here!
These fried pies look incredibly crispy and delicious! The golden crust is just perfect