
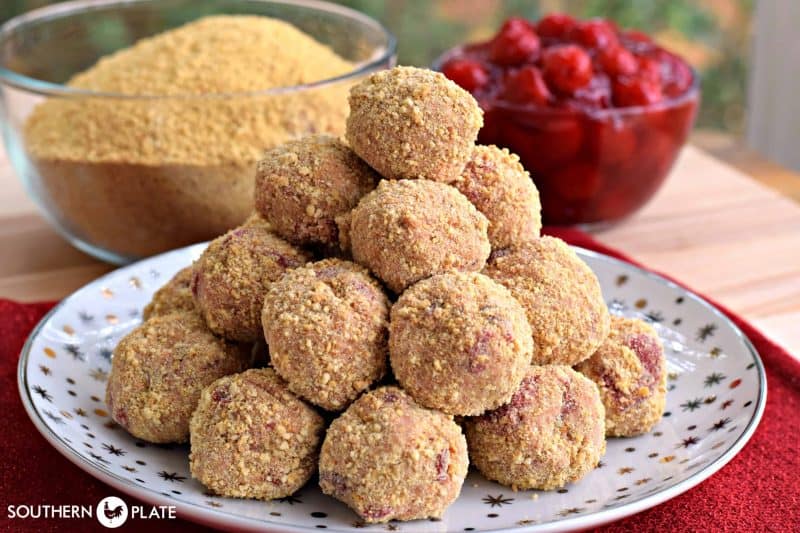
No-Bake Cherry Cheesecake Balls
Let me introduce you to my bite-sized version of cherry cheesecake. My no-bake cherry cheesecake balls are made with creamy condensed milk and cream cheese with sweet cherry pie filling and a crunchy graham cracker crumb coating.
A Quick Look At The Recipe
- Recipe Name: Cherry Cheesecake Balls
- Serves: 50 bites
- Main Ingredients: 8-ounce packages cream cheese at room temp, 14-ounce can sweetened condensed milk, graham cracker crumbs, 21-ounce can cherry pie filling, vanilla extract, bottled lemon juice
- Why You'll Love It: My no-bake cherry cheesecake balls are made with condensed milk and cream cheese with cherry pie filling and a graham cracker crumb coating.
I love cherry cheesecake around the holidays because my Grandmama used to always make a cherry cream cheese pie for me this time of year. She was actually allergic to the red cherries but still made it because she knew it was my favorite. Now that’s a good grandmama!
The problem I encountered then is still much the same as now. I can hardly be left alone with that pie because it is just too stinking good. So this year, I set out to create a bite-size version of my cherry cheesecake recipe that’s perfect for parties and get-togethers and gives you just the right amount of cherry cheesecake goodness in every bite. I could not be more thrilled with these no-bake cherry cheesecake balls! They are everything I hoped for and more, like .
All you need is cream cheese, sweetened condensed milk, vanilla, cherry pie filling, and those graham cracker crumbs. We simply mix the ingredients together, chill the batter, and then roll it into mini cheesecake balls. They truly are all that is good and wonderful about a cherry cheesecake rolled up into a bite-size ball of goodness. The taste of graham crust sprinkled throughout makes them even better than the original in many ways.
Ready to give them a go?

Recipe Ingredients
- Sweetened condensed milk
- Vanilla extract
- Graham cracker crumbs
- Cherry pie filling
- Cream cheese (here’s how to easily make homemade cream cheese)
How to Make No-Bake Cherry Cheesecake Balls
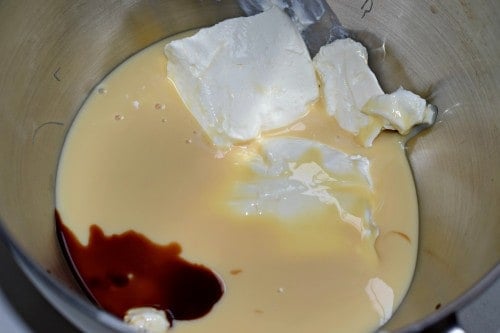
Place condensed milk, cream cheese, and vanilla in a mixing bowl and beat with an electric mixer until smooth and well blended.
If your cream cheese was not room temp, this is going to take a little more time so you really really need to let that get to room temp.
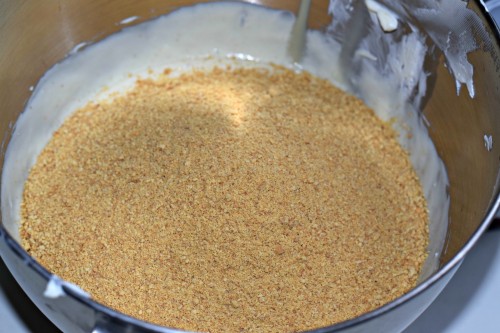
Dump the entire box of graham crumbs on top of the .
Mix again until it is the consistency of cookie dough, scraping down sides if needed.
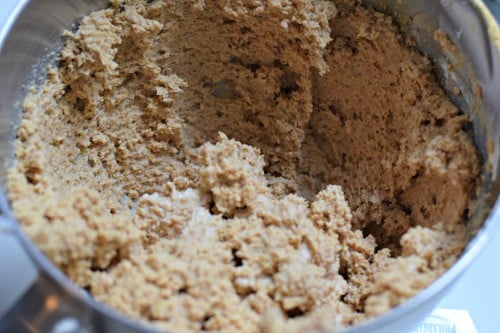
Like this.
Now, I’m not here to judge or anything but I will tell you that you’re crazy if you don’t get a pinch of this right now to taste!

Dump the entire contents of the cherry pie filling into the dough.
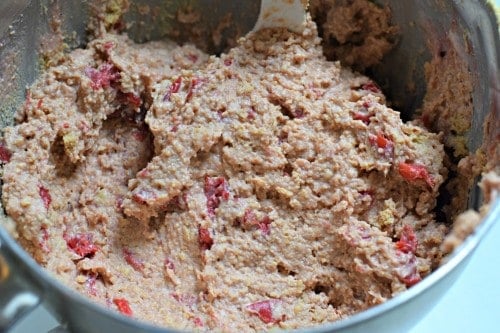
Mix that gently with an electric mixer until just blended and then stop.
We don’t want to overmix because we’ll make all of those little bits of cherries disappear into the dough.
Cover the with and place in the refrigerator for at least an hour or until well chilled.
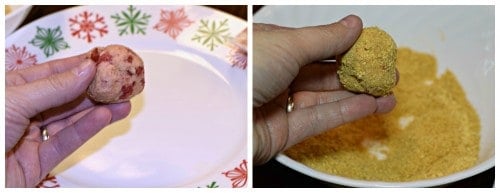
Roll refrigerated into one-inch balls and roll those in the additional graham crumbs.
Once all the mini cheesecake bites are made, store them covered in an airtight container in the fridge until ready to serve.
These little bites are wonderful to take to a party or family get-together. They remain firm and are so easy to just pick up and pop in your mouth! When you make a batch, keep a few in a container in your fridge to grab a cheesecake bite when the holiday sweet tooth hits!
Storage
Store leftovers in an airtight container in the fridge for up to 3 weeks or in the freezer for up to 3 months. Let them thaw overnight in the fridge before serving.
Recipe Notes
- If you want, you can also add a tablespoon of bottled lemon juice. I added it to one batch and forgot to add it to the other and both were very good. So if you have it on hand, go for it. If you don’t have it on hand, don’t go buy it just for this.
- On the cherry pie filling: I’m usually all about generic ingredients and saving money but when it comes to pie filling, the less you pay the fewer cherries you get these days. With that in mind, I recommend paying the extra fifty cents or so to get a “premium” cherry pie filling and avoiding the generics.
- In the directions, I suggest two boxes of graham crumbs. That is because you will have to skimp to have enough to coat them with. You’ll end up with a lot of extra crumbs but there are so many uses for them during the holidays… like making cherry no-bake cheesecake bites again after these have been inhaled!
- For added flavor and texture, fold in 1/2 cup of coconut flakes when you add the cherry pie filling.
- For something different, substitute the graham cracker crumb coating for melted chocolate instead to make chocolate cheesecake balls. YUM.
- For best results, let them chill for at least 4 hours before serving.
You may also like these recipes:
Cheesecake Toppings & An Easy Cheesecake Recipe
Christmas Tie Dyed Cheesecake Brownies

Ingredients
- 2 8-ounce packages cream cheese at room temp
- 1 14-ounce can sweetened condensed milk
- 2 boxes graham cracker crumbs
- 1 21-ounce can cherry pie filling
- 1 teaspoon vanilla extract
- 1 tablespoon bottled lemon juice optional
Instructions
- Place condensed milk, cream cheese, lemon juice (if using), and vanilla in a mixing bowl and beat with an electric mixer until smooth and well blended.2 8-ounce packages cream cheese at room temp, 1 14-ounce can sweetened condensed milk, 1 teaspoon vanilla extract, 1 tablespoon bottled lemon juice
- Dump the entire box of graham crumbs on top of the cream cheese mixture. Mix again until it is the consistency of cookie dough, scraping down sides if needed.2 boxes graham cracker crumbs
- Dump the entire contents of cherry pie filling into the dough and mix gently with an electric mixer until just blended. Don’t overmix because it will break up all of the cherries to the point that they disappear into the dough.1 21-ounce can cherry pie filling
- Cover with plastic wrap and place it in the refrigerator for at least an hour or until well chilled.
- Roll into one-inch balls and roll those in the additional graham cracker crumbs. Once all the cheesecake balls are made, store them covered in an airtight container in the fridge until ready to serve.
Nutrition
If you can’t have the best of everything, make the best of everything you have.
~Submitted by Sarah Wilson. Click here to submit your favorites to our collection!
Made these tonight , couldn’t find graham cracker crumbs at Walmart or any premium cherry pie filling, so went with strawberry, by the time I got mine mixed well so all graham cracker mixture was incorporated with pie filling, my mixture was dark pink and even after refrigerating for about 2 1/2 hours was very gooey , couldn’t roll a nice neat ball out of it like in your picture, so mine aren’t pretty and look sorta smushed , but taste good, think it would be easier though to just make a no bake cheesecake
Hi, I made these yesterday using two boxes of graham crackers that I crushed myself – one in the mix and one to roll them in. I put everything in the refrigerator but it never did get really firm. After two hours I took the bowl out, scooped out and gently rolled and put back in refrig. They never got firm, stayed really squishy. I finally put them on plates in the freezer and they got firm enough to “bite” after several hours. What is the final texture supposed to be like?
Hey Vickie! Thanks for this comment, you were so detailed and helpful! The final texture isn’t necessarily firm, but enough to pick up and pop in your mouth. They are still a soft bite but not so much that they lose texture when you put them on a plate or retrieve them to eat 🙂
Sounds wonderful! A little tip: any time I need cherry pie filling, I always use one can of inexpensive cherry pie filling and add in about 1 cup of drained, plain (sour) cherries from a jar, which I buy pretty cheap at Job Lots (off-brand-type-store). It makes it more cherry – y, and also not quite so sweet and … glommy, so to speak … you know, all the gooey stuff that you just know is sugar, sugar, sugar and no fruit? Got the idea from my thrifty mom, who used to can her own cherries from our tree, but we used up the last of those years ago. Sure wish I could go back! Thanks for the great recipe – I suspect it will become a classic around here!!
Can I use graham crackers instead of the boxed crumbs (ground up, of course). If so, how many cups?
You will use 26-28 ounces of the crushed crackers.
I discovered this website this morning and have been browsing through it for hours. I was looking for biscuit recipes and saw the 3-ingredients recipe and whipped up a batch. I made it easy on myself and used my food processor to mix the ingredients. Loved them… So tender and beautifully browned! Now I’m about to go shopping for ingredients to make these Cherry Cheesecake Bites because they sound delicious.
I hope you enjoy them Gloria!!
These look awesome. I was just wondering though if the texture is a bit gritty from the grahm cracker crumbs ?
Not at all! They have a very creamy texture but with an added graham flavor.
Thanks, I am going to make these as a Chanukah treat for my family. I have a feeling they will be a huge hit.
I hope so!! Can’t wait to hear!!
Okay, so I made these….and I could only find “dark” sweet cherries in the Lucky Premium Pie filling. So… they are purple….not thinking this would matter of course… but when rolled in yellow crumbs it appears very green!!!! The color was a big turn off for my fam. lol. And for some reason they were very very squishy (not my fam..the balls, ha). I even added more crumbs to firm them up but still squishy….Idk what I did wrong there. My batch made over 80 large balls, too. However, the bright side was they still tasted yummy. I told my family to just close their eyes and use a fork. LOL. Worked great! Ha ha!
I refrigerate mine for several hours to get them firm. They never get hard just kinda firmed up a bit. That is odd that the cherries turned them green with the crumbs! They must be in the Christmas spirit 🙂